How to Create Instructional Videos A Practical Guide
Learn how to create instructional videos that engage and educate. This guide covers planning, scripting, production with AI, editing, and distribution.
Veo3 AI · 22 min read · Nov 30, 2025
Before you ever think about hitting record, the real work begins. Creating a truly effective instructional video is less about fancy equipment and more about solid planning. This initial groundwork is what separates a video that gets a few views from one that actually teaches, engages, and gets results.
Quick Answer: To create instructional videos, choose an AI-powered video platform suited to your workflow, provide a descriptive prompt or upload your media, configure generation settings, and export the result. Leading tools like Google Veo 3 and Runway make the process possible in minutes—no technical skills required.
Building Your Foundation for a Great Instructional video
A great instructional video is a planned learning experience, not just a recording. Think of it as building a house—you need a solid blueprint before you start putting up walls. This strategic foundation guides every single decision, from what you say in the script to the final cut. Skipping this step often leads to content that’s confusing, unfocused, or just doesn't connect with the people you’re trying to help.
The proof is in the numbers. Instructional content is a huge driver of the video marketing boom. In fact, projections show that by 2025, 73% of video marketers will have created explainer videos, making it the most popular format out there. And it works: 98% of people say they’ve watched an explainer video to learn more about a product or service. Even better, 87% of them have been convinced to make a purchase after watching one. If you're curious, you can dig deeper into the latest video marketing trends to see the full picture.
Know Your Learner Inside and Out
First things first: forget your topic for a second. Who are you really teaching? A video for a complete novice will—and should—look totally different from one aimed at a seasoned pro who just needs to fine-tune one specific skill.
To really nail this down, you’ve got to ask the right questions:
- What’s their starting point? Are they true beginners, or do they already have some background knowledge you can build on?
- What’s their biggest headache? What specific problem are they hoping your video will solve for them?
- What does success look like for them? After they finish watching, what should they be able to do that they couldn't before?
For example, a tutorial on "advanced pivot tables for marketing analysts" will have a completely different tone, pace, and depth than one on "pivot table basics for small business owners." The analysts need technical detail; the business owners need a simple, practical walkthrough.
Set Crystal-Clear Learning Objectives
Once you have a sharp picture of your audience, you can define your learning objectives. These are just simple, measurable statements that spell out exactly what someone will be able to do after watching your video. Think of them as a promise you're making to your viewer.
A strong learning objective is your North Star. It keeps your content laser-focused and stops you from cramming in extra details that only distract or overwhelm the learner.
So, instead of a fuzzy goal like "Teach people about SEO," a much stronger objective would be: "By the end of this video, you'll be able to perform basic keyword research using two free tools." It's specific, it’s actionable, and you can easily tell if you’ve delivered on it.
This flow—from audience to objectives to format—is the core of your pre-production planning.
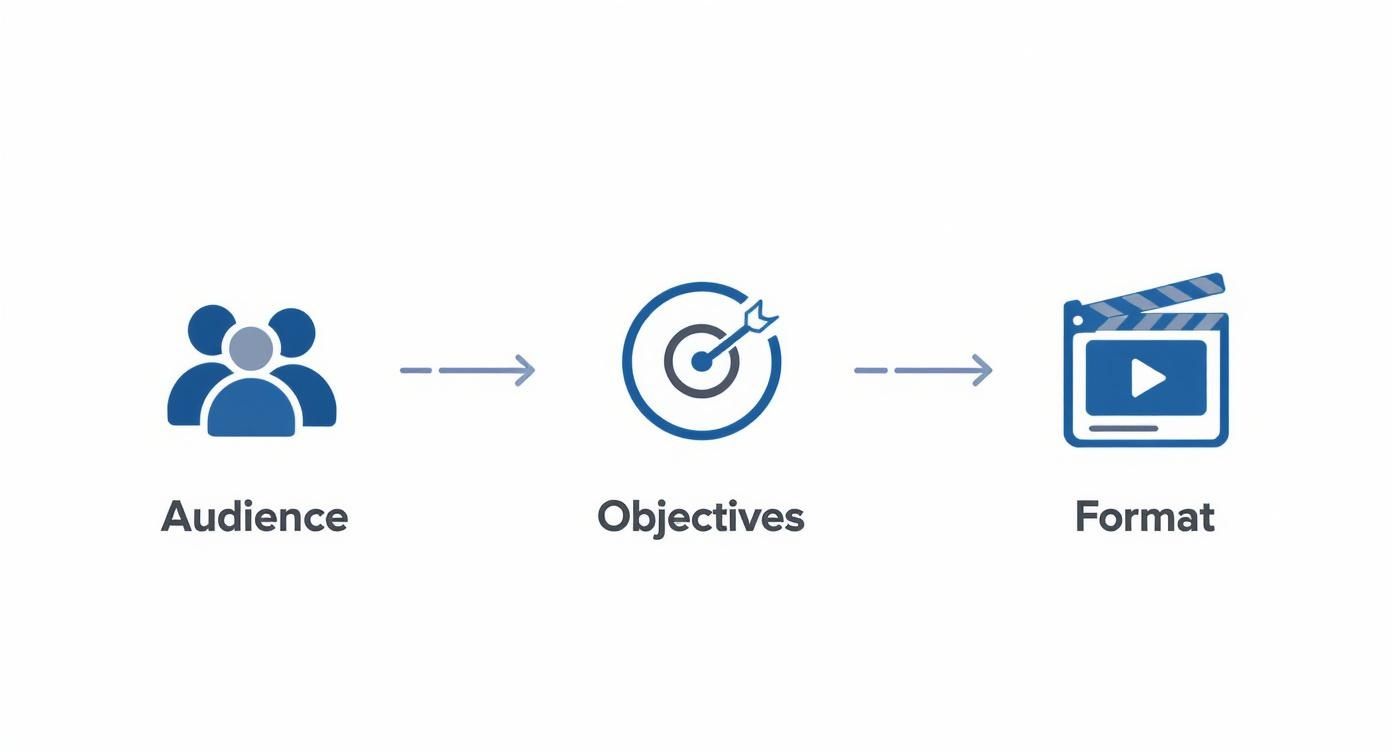
As you can see, each step naturally builds on the one before it, which is the key to creating a cohesive and genuinely helpful video.
Choose the Right Instructional Video Format
Not all instructional videos are created equal. The format you pick has to fit the lesson you're teaching. Trying to squeeze a complex, multi-step process into a 60-second clip is a recipe for frustration—for both you and your audience.
To help you decide, here’s a quick comparison of some of the most common formats I’ve used over the years.
Choosing Your Instructional Video Format
A comparison of common instructional video formats to help you select the best approach for your topic and audience.
| Format Type | Best For | Key Advantage |
|---|---|---|
| Micro-videos | Quick tips, feature announcements, or answering a single, specific question. | Extremely digestible and perfect for social media feeds. |
| Tutorials | Step-by-step guidance for a process, like software demos or hands-on tasks. | Provides clear, repeatable instructions for viewers to follow. |
| Screencasts | Walking through software workflows or navigating a website. | Shows exactly what the viewer needs to see and do on their screen. |
| Explainer Videos | Simplifying a complex idea, product, or service, often with animation. | Highly engaging and great for building foundational understanding. |
Each of these has its place. Your job is to match the format to your specific learning objective and the context where your audience will be watching.
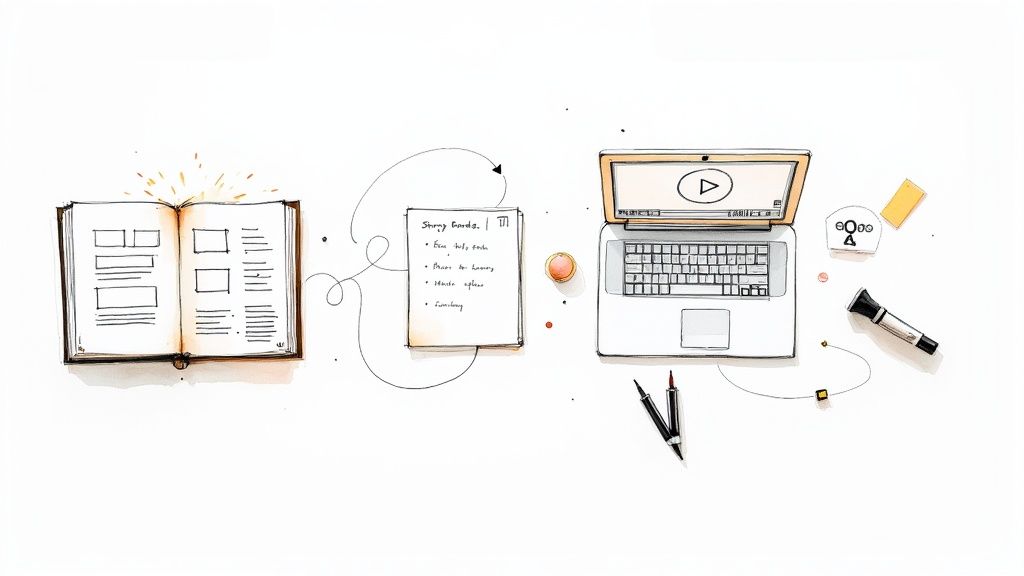
Scripting and Storyboarding for Clarity and Flow
Once you know who you’re talking to and what you want them to learn, it’s time to build the actual content. A great instructional video doesn’t just happen—it’s built on the foundation of a solid script and a clear visual plan. This is where your abstract ideas become a concrete roadmap for production.
Trust me, trying to "wing it" on camera is a classic mistake. It almost always leads to rambling, confusing explanations and a nightmare of an editing process. A little bit of planning upfront will save you a massive headache later.
How to Write a Script That Connects
Think of your script as the blueprint for the entire learning experience. The key is to write for the ear, not the eye. It needs to sound natural and conversational when you say it out loud.
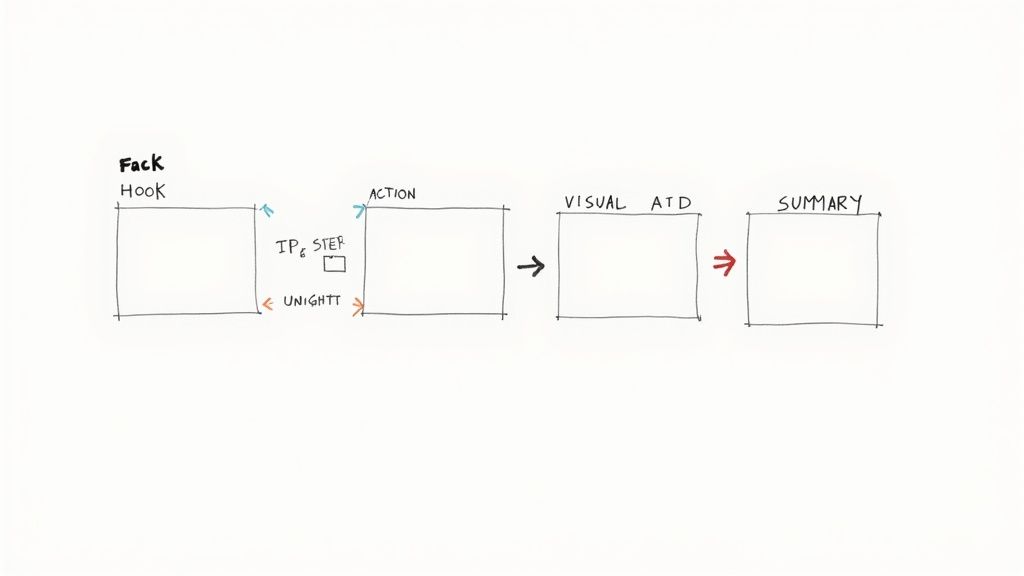
I’ve found that a simple three-part structure works wonders for almost any instructional script:
- The Hook: Jump right in by acknowledging the viewer's problem. Let them know they're in the right place and tell them exactly what you're about to teach them.
- The Core Content: This is the meat of your video. Break down your topic into logical, bite-sized chunks. Explain each step as clearly and simply as you can.
- The Summary & Call to Action: Wrap things up by quickly recapping the most important points to help the information stick. Then, tell your viewer what to do next—maybe it's downloading a worksheet, trying the skill for themselves, or moving on to the next video in your series.
For example, a hook for a video on changing a tire could be something like: "Stuck on the side of the road with a flat? Don't worry. In the next five minutes, I'll show you exactly how to change your tire safely and get you back on your way." It's direct, empathetic, and sets a clear expectation.
Turning Your Script into a Visual Plan
With a script in hand, the next step is storyboarding. This just means mapping out what visuals will appear on screen as you're speaking. And no, you don't need to be an artist to pull this off.
A storyboard is essentially a shot-by-shot guide that ensures your visuals and your narration are perfectly in sync. It prevents those awkward moments where you're talking about one thing, but the screen is showing something totally unrelated. This visual planning is a fundamental part of making effective instructional videos. For an in-depth look at this process, check out our complete guide on how to storyboard a video.
A storyboard is your production's best friend. It helps you anticipate every graphic, screen capture, and camera angle you'll need before you start recording, preventing costly reshoots and saving countless hours in post-production.
For a detailed walkthrough on translating your script into a coherent visual narrative, you can explore resources on how to storyboard a video effectively.
Simple Storyboarding Methods for Everyone
Your storyboard can be as simple or as complex as your project requires. The only thing that matters is creating a visual reference that works for you and your team.
Here are a few practical methods I've used that anyone can try:
- Stick Figures & Sketches: Sometimes the fastest way is just pen and paper. Draw simple squares for your video frames and use stick figures or basic shapes to map out the action. I just add notes for narration and sound effects below each frame.
- Slide Decks: Fire up Google Slides or PowerPoint. Each slide can represent a key scene or shot. You can drop in placeholder images, type the corresponding narration into the speaker notes, and easily drag and drop slides to rearrange the sequence.
- Spreadsheet Format: This is a super organized, text-based method that's perfect for screen recordings. Just create a simple table with columns for Scene Number, Visual Description, Narration/Dialogue, and Sound/Music.
If you're making a software tutorial, your storyboard might just be a series of ordered screenshots with the script snippet for each one written underneath. The goal is simply to visualize the flow and make sure what viewers hear and what they see are telling the same story. This upfront work is what takes a piece of content from good to great.
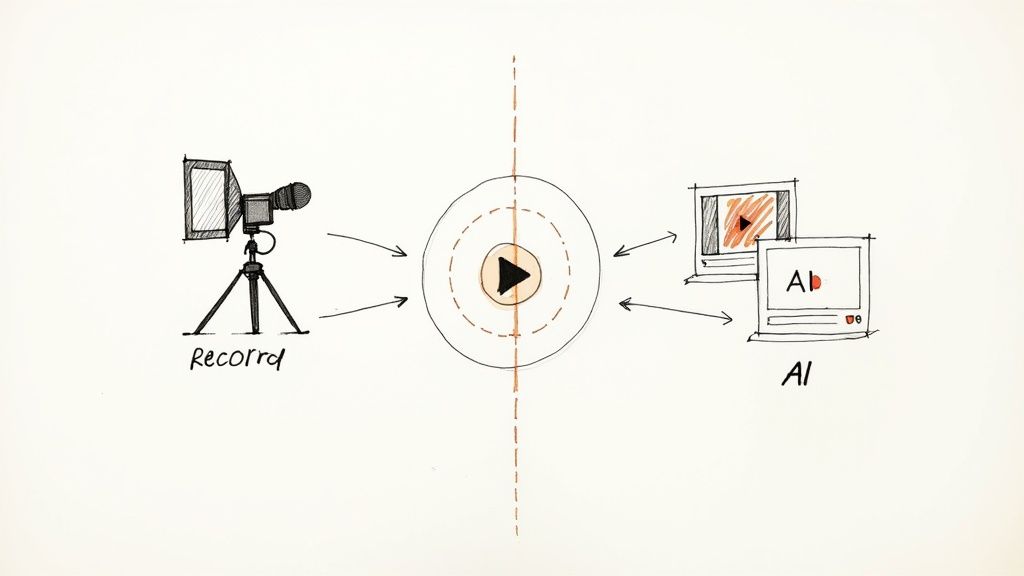
Choosing Your Production Path: Recording vs. AI
Okay, you've got your script and storyboard locked in. This is where the rubber meets the road. Now you have to decide how you're actually going to create this video. Broadly speaking, you've got two main routes: the classic, tried-and-true method of recording it yourself, or the powerful and fast-emerging world of AI video generation.
Neither one is inherently "better"—the right choice completely depends on your content, your audience, your budget, and how much time you have. Let's walk through both so you can figure out what makes the most sense for your project.
The Traditional Recording Route
This is the classic approach for a reason. It's often the best fit for tutorials that need a real human touch—think hands-on product demonstrations, software walkthroughs, or one-on-one coaching sessions. There's an authenticity that comes from seeing a real person or a direct screen capture that builds trust and makes complex steps feel more manageable.
You don't need a Hollywood budget to get this right. Seriously. Just focus on two things:
- Pristine Audio: People will forgive a slightly fuzzy video, but they will bounce the second they hear scratchy, muffled, or echoey audio. A simple lavalier mic or a decent USB microphone is a must. The built-in mic on your laptop or camera just isn't going to cut it.
- Good Lighting: Forget expensive studio lights. Sit facing a window for fantastic (and free) natural light. If you need more control, a basic ring light is a cheap investment that pays for itself immediately.
If you're recording your screen, do yourself (and your viewers) a favor and prep your digital workspace first. Close all those extra browser tabs, turn off notifications, and get all your files and windows ready to go. A clean screen keeps the focus exactly where it should be: on what you're teaching.
The AI-Powered Production Path
The other option is to use AI tools, like our own Veo3 AI, to create video from text prompts or still images. This approach is an absolute game-changer for animated explainer videos, visualizing abstract ideas, or generating custom B-roll without a camera crew or expensive stock footage subscriptions.
The impact here is huge. For many creators, AI can slash video production costs by 70-90% compared to a traditional shoot. Even better, it shrinks timelines from weeks down to a few hours. That means you can create content at a scale and speed that was unthinkable just a few years ago. If you want to go deeper, you can explore the full impact of AI on video education and see what's possible.
AI video generation isn't about replacing human creativity; it's about amplifying it. It lets you produce high-quality visuals and animations that would have previously required a team of specialists and a significant budget.
Let's say you're making a video about the water cycle. Instead of spending hours hunting for the perfect stock clips, you could just tell the AI: "Cinematic animation of water evaporating from a lake, forming into clouds, and then raining down onto a lush forest." A few minutes later, you have a completely custom scene ready to go.
Comparing Production Methods
So, which one is for you? It really boils down to your specific needs. Here's a quick cheat sheet to help you decide.
| Feature | Traditional Recording | AI Video Generation |
|---|---|---|
| Best For | Software demos, hands-on tasks, personal brand building | Animated explainers, abstract concepts, custom B-roll |
| Primary Strength | Authenticity and direct demonstration of real-world actions | Speed, scalability, and cost-effectiveness |
| Biggest Challenge | Requires time for setup, recording, and potential reshoots | Requires clear, descriptive prompts to achieve desired results |
| Initial Cost | Can be low, but equipment upgrades can be expensive | Low subscription costs, no major hardware investment |
Why Not Both? The Hybrid Approach
Here's the secret: you don't actually have to pick just one. Some of the most compelling instructional videos I've seen cleverly blend both methods.
You could start with a live-action, direct-to-camera intro to build that personal connection with your viewer. Then, transition into a slick, AI-generated animation to explain a complex theory in a way that's easy to visualize. Finally, cut to a crisp screen recording to show the practical, step-by-step application.
This hybrid model gives you the best of both worlds—the genuine feel of human instruction combined with the limitless creative muscle of AI.
Polishing Your Video: The Art and Science of Editing
This is where the real magic happens. The editing process is where you take all your raw footage—whether it’s from a camera, a screen recording, or an AI generator—and shape it into a polished, effective learning tool. It's less about flashy transitions and more about creating clarity, rhythm, and respecting your viewer's attention.
The first and most important task is to get the pacing right. Think of pacing as the heartbeat of your video. A slow, rambling pace with long, awkward pauses will have your audience reaching for the "close" button. On the other hand, a pace that's too frantic will leave them feeling overwhelmed and confused. The sweet spot is a rhythm that feels energetic but is still easy to follow.
Start by being ruthless. Trim every "um," "ah," and unnecessary silence. Did you stumble over a sentence during the recording? Cut it out and use the clean take. The goal is to create a seamless flow that makes the information feel effortless to absorb.
Use Visuals to Clarify and Focus
Once your pacing feels tight, it's time to layer in visuals that boost comprehension. You don't need a Hollywood budget; simple on-screen text and graphics are incredibly powerful for reinforcing your key concepts. Don't just say it—show it.
A few simple additions can make a huge difference:
- Key Term Callouts: When you introduce an important term, pop it up on the screen for a few seconds. This helps with both spelling and retention.
- Numbered Steps: If you're walking through a process, use numbered text overlays to visually guide the learner through each stage.
- Strategic B-roll: Cut away from your main shot to relevant footage. For example, if you're talking about a specific piece of software, show a close-up of the interface in action.
The golden rule of instructional video editing is simple: what the viewer hears and what they see must always tell the same story. Your visuals should support, clarify, and reinforce the narration, not compete with it.
This audio-visual consistency is non-negotiable. It builds trust and makes the learning process feel intuitive.
Why Crystal-Clear Audio Is Everything
If you only have the bandwidth to perfect one thing in post-production, make it the audio. I’ve seen it time and time again: audiences are far more forgiving of shaky or low-res video than they are of bad sound. If they can’t clearly hear what you’re saying, they will click away almost instantly.
Focus your audio efforts on three things:
- Clarity: Every word must be crisp and easy to understand. Go in and remove background noise, hiss, or echo.
- Consistency: The volume should stay level throughout the entire video. Nobody wants to be jolted by sudden jumps or drops in volume.
- Synchronization: The audio has to be perfectly aligned with the video. Mismatched audio is incredibly distracting. If you're struggling with this, our guide on how to sync audio to video has some practical fixes.
Most editing software has tools to help you clean this up. Features like noise reduction and audio normalization can make a massive difference with just a few clicks.
Add Your Brand for a Professional Finish
Finally, let's add that professional sheen with some simple, consistent branding. This doesn't need to be complex, but it instantly makes your content look more credible and authoritative.
Just a few small touches will do the trick:
- A branded intro/outro: A short, consistent animation at the beginning and end.
- A subtle watermark: Your logo placed neatly in a corner of the screen.
- Consistent fonts and colors: Use your brand’s color palette and typography for all on-screen text and graphics.
This final polish ties everything together, transforming your project from a simple recording into a cohesive and trustworthy instructional video.
Getting Your Video Ready for the World
You’ve done the hard work—the editing is tight, the visuals are polished, and your video is almost ready to go live. But before you smash that publish button, there are a few final touches that can make the difference between a video that gets seen and one that gets lost in the noise.
Think of this as your pre-flight checklist. It’s all about ensuring your video not only reaches the right people but also gives them the best possible experience.
Skipping these final steps is like creating an incredible product but leaving it in a locked room. Let's make sure your audience can find and enjoy what you've made.
Make Your Content Accessible for All
Accessibility is more than just a box to check—it’s about creating an inclusive experience. By adding closed captions and transcripts, you’re instantly opening up your video to a massive audience. This includes viewers who are deaf or hard of hearing, people who speak a different language, or anyone watching with the sound off (which is more common than you'd think).
And captions aren't just for hearing assistance. An eye-opening stat is that 80% of viewers who use captions don't have hearing impairments. They use them to stay focused and better understand complex or technical topics.
Adding captions is a non-negotiable step for boosting accessibility and reach. If you're new to the process, this guide on how to caption YouTube videos is a fantastic resource that walks you through everything.
Nail Your Export Settings
The way you export your final video file has a huge impact on how it looks online. The wrong settings can take your beautiful, crisp tutorial and turn it into a pixelated mess. The key is striking the right balance between quality and file size.
Here are the technical settings I always double-check:
- Resolution: Stick to the resolution you filmed and edited in. For platforms like YouTube, 1920x1080 (1080p) is still the gold standard, though 4K is great if you have it.
- Format: You can't go wrong with the MP4 format using the H.264 (or AVC) codec. It’s the universal language of online video, offering great quality without giant file sizes.
- Bitrate: This controls your video's data rate. For a clean 1080p video, I usually aim for a bitrate between 8-12 Mbps. This keeps it looking sharp on a big screen without taking forever to upload.
Your export settings are the final handshake between your editing software and the viewing platform. Getting them right ensures your video looks as good on YouTube as it did on your timeline.
Optimize for People and Platforms
Now for the final piece: making your video discoverable. This is where you craft your metadata—your title, description, and thumbnail—to grab the attention of both humans and search algorithms. This is a critical part of any good https://www.veo3ai.io/blog/video-content-marketing-strategy.
Your thumbnail is your video’s billboard; it's your first and best chance to earn a click. A winning thumbnail is high-contrast, features a clear focal point (like an expressive face), and has a tiny bit of bold text that teases the video's value.
When writing your title and description, put yourself in your viewer's shoes. What words would they type into a search bar to find your video? Use those keywords in a clear, benefit-driven title. In the description, expand on what the video covers, add any relevant links, and weave in those keywords again to help platforms understand what your content is all about.
Common Questions About Creating Instructional Videos
<iframe width="100%" style="aspect-ratio: 16 / 9;" src="https://www.youtube.com/embed/-zBTjbYLyAw" frameborder="0" allow="autoplay; encrypted-media" allowfullscreen></iframe>
Once you get your hands dirty making instructional videos, you'll find a few practical questions pop up again and again. Let's get straight to the point and tackle the most common ones I hear from creators.
What Is the Ideal Length for an Instructional Video?
This is the million-dollar question, and while there's no single magic number, viewer behavior gives us some pretty strong hints. If you’re making quick tips for social media, keep it under 3 minutes. For a detailed software tutorial or a multi-step process, the sweet spot is generally 5-10 minutes.
What if your topic is really complex? Fight the urge to make one epic, 30-minute video. A much better strategy is to break it down into a logical series of shorter, digestible videos and group them in a playlist. Think about it: research shows over 70% of YouTube viewers are there to solve a specific problem. They want a fast, focused answer.
My rule of thumb? Respect the viewer's time. Attention plummets after the 10-minute mark. A series of short videos gives them control over their learning journey, which almost always leads to better engagement.
Do I Need Expensive Equipment to Get Started?
Nope, not at all. The high-quality camera you already have on your smartphone is more than enough to start. The one piece of gear where a small investment pays huge dividends is a good microphone.
I've seen it a thousand times: viewers will forgive slightly grainy video, but they will click away in a heartbeat if the audio is scratchy, muffled, or hard to understand. A simple lavalier or USB mic can make your content sound a hundred times more professional.
For lighting, just use a window. Natural light is free and it looks fantastic. Nail your content first, then you can worry about upgrading your gear later on.
How Can I Make My Screen Recordings More Engaging?
A static, full-screen recording is a surefire way to put your audience to sleep. The trick is to add some simple dynamic elements that guide their focus and keep things moving.
Here are a few techniques that work wonders:
- Zoom and Pan: Don't just leave the camera parked on your entire desktop. When you're talking about a specific menu or button, zoom in on it. This simple move directs the viewer's eye exactly where you want it to be.
- Highlight Clicks and Cursors: Most screen recording software lets you add a visual effect to your cursor or animate your clicks. It’s a small thing that makes it so much easier for someone to follow your actions on a busy screen.
- Add a Picture-in-Picture: Every once in a while, cut to a small video of you in the corner. It puts a human face to the instruction, breaks up the monotony, and helps reconnect with your viewer.
What's the Best Way to Measure a Video's Success?
You can't measure success if you haven't defined it first. Before you even look at a single metric, you have to be crystal clear about what you wanted the video to accomplish in the first place.
Your key metrics will flow directly from that goal:
| Goal Type | Key Metrics to Watch |
|---|---|
| Audience Engagement | Average View Duration and Audience Retention charts. These tell you how long people watch and pinpoint the exact moments they drop off. |
| Employee Training | Post-video quiz scores, a reduction in support tickets on that topic, or task completion rates. |
| Marketing and Sales | Click-Through Rate (CTR) on links you've placed in the description or the number of new leads generated from your call to action. |
Start with a clear objective. Then, and only then, pick the key performance indicators (KPIs) that prove you've achieved it. This turns video creation from a guessing game into a measurable part of your strategy.
Ready to create stunning instructional videos without the hassle of traditional recording and editing? With Veo3 AI, you can transform your scripts and ideas into professional-quality videos in minutes. Try our free, all-in-one AI video generator today and see how easy it can be. Learn more at https://veo3ai.io.
Our Verdict
Learning how to create instructional videos has never been more accessible thanks to today's AI-powered tools. We recommend starting with one of the beginner-friendly platforms mentioned in this guide, following the step-by-step process outlined above, and experimenting with different settings to find your preferred style. The investment of time to master this skill will pay off in consistently high-quality content.
Related Articles
Continue with more blog posts in the same locale.

Animating for Beginners: Create with Veo3 AI
Learn animating for beginners with Veo3 AI. Create your first animated social clip from text & get workflow tips. No experience needed.
Read articleHow to Animate a Logo: A Practical Guide for 2026
Learn how to animate a logo from scratch. Our guide covers planning, AI tools like Veo3, pro tips on timing, and exporting for web and social media.
Read article
Minimax Hailuo AI: A Guide to Cinematic Video Generation
Unlock cinematic video with our guide to Minimax Hailuo AI. Learn its capabilities, how it compares to other models, and how to use it in your workflow.
Read article