How to Make Cinematic Videos A Guide for Modern Creators
Learn how to make cinematic videos that captivate your audience. Our guide covers everything from planning and AI tools to color grading and sound design.
Veo3 AI · 23 min read · Dec 9, 2025
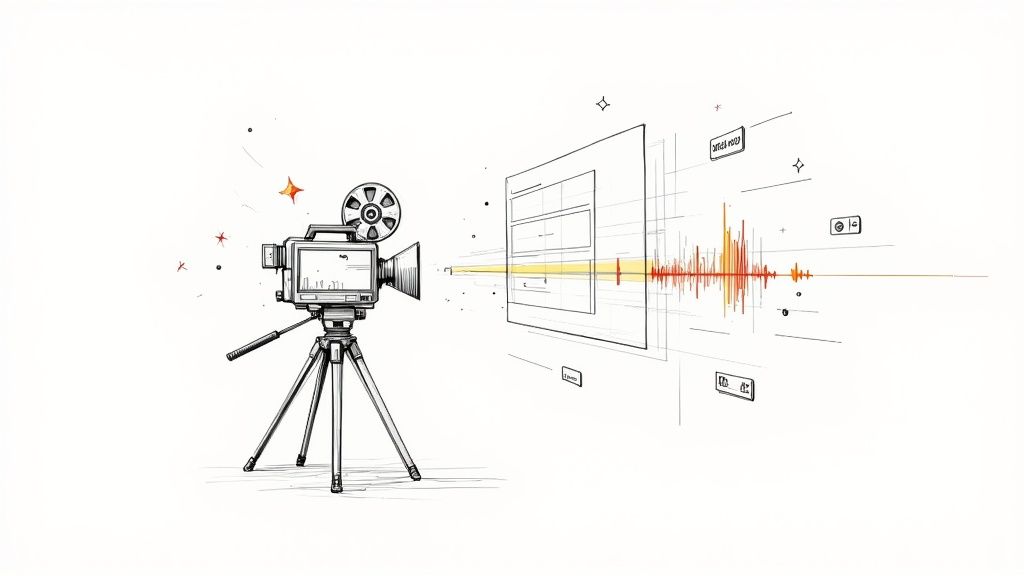
Making a cinematic video isn't about having the most expensive gear. It’s about telling a story with intention. This really boils down to four key pillars: strategic planning, deliberate camerawork (or in our case, smart AI prompting), artful editing, and immersive sound design. If you nail these, you can turn otherwise ordinary footage into a visual story that truly connects.
Quick Answer: To make cinematic videos, choose an AI-powered video platform suited to your workflow, provide a descriptive prompt or upload your media, configure generation settings, and export the result. Leading tools like Google Veo 3 and Runway make the process possible in minutes—no technical skills required.
What Makes a Video Cinematic
At its heart, a cinematic video just feels different. It doesn't just document an event; it pulls you in, makes you feel something, and guides your experience from start to finish. That intentional quality is what separates a polished, professional piece from a quick phone clip. It’s always been less about the camera and more about the choices you make before you ever hit record.
And people are noticing. The demand for high-quality video is exploding. The global film and video production market hit an estimated $279.4 billion in 2024, and it's only climbing as new tech and audience expectations push for better storytelling. You can dig into the full research on film and video production to see the trends driving this. It’s a clear signal that learning this craft is a massive advantage for any creator or marketer today.
So, what are those core components that give a video that "cinematic" feel? I've broken them down into a simple table.
Core Elements of a Cinematic Video
| Element | Description | Key Objective |
|---|---|---|
| Visual Storytelling | Using composition, lighting, and camera movement to tell a story without words. | To guide the viewer’s eye and build a visual narrative. |
| Deliberate Pacing | The rhythm of the edits, which controls the flow of information and emotion. | To create tension, excitement, or reflection. |
| Immersive Sound | Combining dialogue, sound effects, and a musical score to create a rich audio world. | To enhance the mood and deepen the viewer's immersion. |
| Cohesive Color | Using a specific color palette (color grading) to establish a consistent tone. | To evoke a specific feeling and unify the visual aesthetic. |
These elements work together, so you can't just focus on one and ignore the others. A beautifully shot scene can fall flat with poor sound, and great sound can't save a poorly paced edit.
The Core Cinematic Workflow
Getting that cinematic look isn't an accident; it comes from a structured process. You need a workflow that balances your creative vision with the technical steps needed to bring it to life. From the first spark of an idea to the final export, every stage builds on the one before it.
"Cinema isn't defined by a single element. It’s the harmony of visual storytelling, emotional pacing, and immersive sound that creates a truly captivating experience for the audience."
This visual breaks down the entire journey. Think of it as a roadmap.
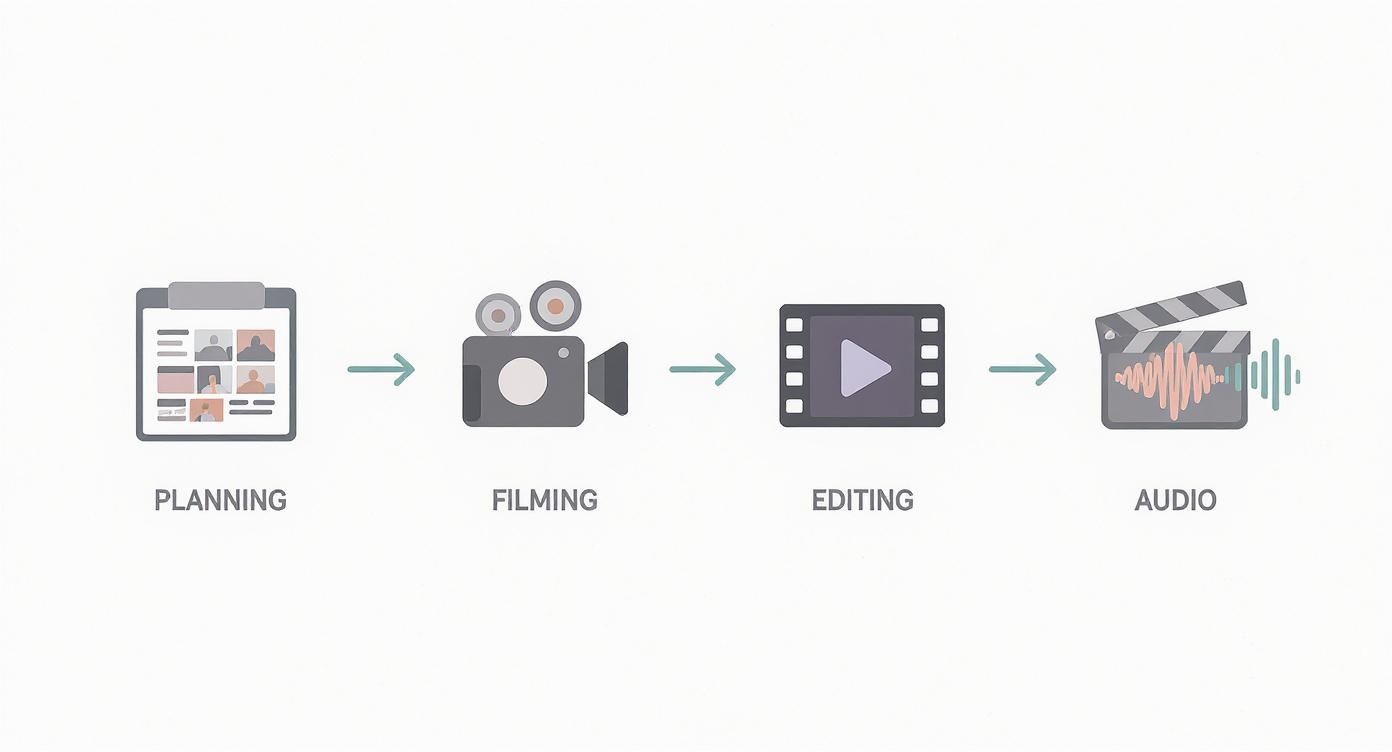
As you can see, everything starts with a solid plan. Rushing into production without one is the fastest way to get a messy, incoherent final video.
Why Intention Is Your Most Important Tool
Ultimately, what makes something cinematic is intention. Every single choice—the color palette, the speed of a cut, the angle of a shot—should serve the story you're trying to tell.
Here’s what that looks like in the real world:
- Purposeful Composition: You're not just pointing and shooting. You’re using classic techniques like the rule of thirds or leading lines to deliberately direct the viewer’s attention.
- Controlled Lighting: You’re using light to create a mood. That could mean waiting for the "golden hour" for that perfect natural glow or setting up a simple three-point lighting rig to sculpt your subject.
- Narrative Editing: You’re piecing clips together to build a rhythm. The goal isn't just to show what happened, but to build tension, control the emotional arc, and tell a compelling story.
And this is where modern tools are changing everything. Platforms like Veo3 AI now let us generate shots that used to require a huge crew and an even bigger budget. This lowers the barrier to entry, but it doesn't remove the need for a strong creative vision. If anything, it makes your intention even more critical.
Building Your Visual Blueprint
Let's be honest: every great cinematic video starts long before you ever hit record. It begins with a plan. Before you get lost in AI prompts or camera settings, you need to lay the groundwork with a solid visual blueprint. This is where you take a raw idea and shape it into a real, shootable story that resonates with people. Skipping this part is probably the single biggest mistake I see new creators make, and it almost always leads to a bunch of pretty shots without a soul.
So, first things first: get crystal clear on your concept. What's the core feeling or message you're trying to get across? Are you building hype for a product launch? Or are you aiming for that sense of peaceful wonder in a travel vlog? Nailing down this central theme will inform every single choice you make later, from your color palette to the rhythm of your edits. A clear objective is your best defense against a project that feels disjointed and confusing.
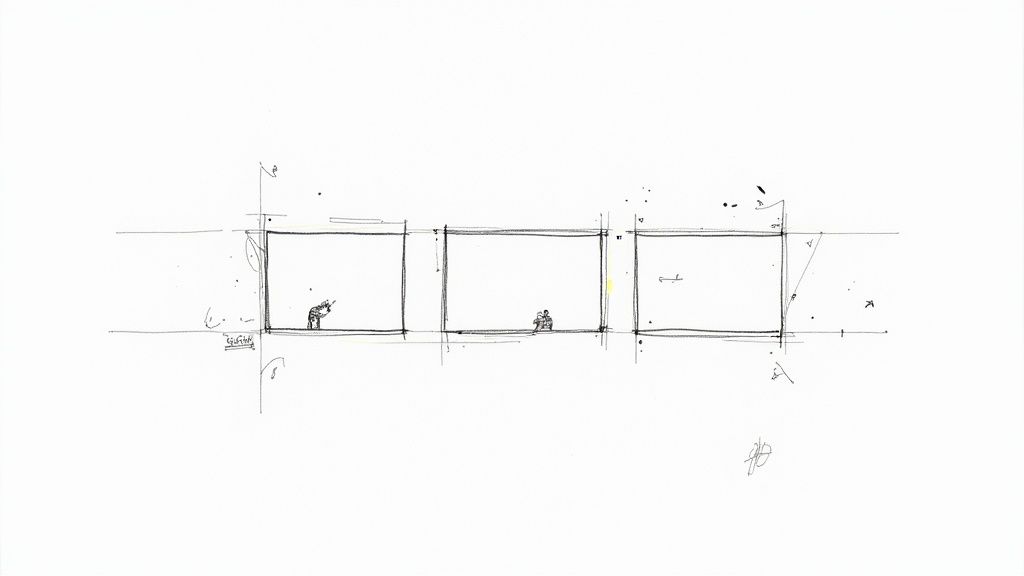
From Idea to Storyboard
With your concept locked in, it’s time to start seeing your story. That’s where storyboarding comes in. And no, you don't need to be an artist. Simple stick figures and rough sketches are all it takes to map out your sequence of shots. The whole point is to visualize the flow, spot any weird gaps in the narrative, and figure out your camera angles before the pressure is on. For a much deeper look at this, our guide on how to storyboard a video walks you through a process that can save you a ton of headaches.
Think of your storyboard as a visual script. It gets everyone on the same page—even if that "everyone" is just you. It forces you to think through your story scene by scene, helping you build a real narrative arc with a solid beginning, middle, and end.
Creating a Detailed Shot List
Working hand-in-hand with your storyboard is the shot list. This is your technical roadmap for the entire shoot. It's essentially a checklist that breaks down every single shot you need to get, and it’s where you can get really specific about the nitty-gritty details.
A good, basic shot list should track things like:
- Scene & Shot Number: Just to keep your clips organized (e.g., Scene 1, Shot 3).
- Shot Type: Is this a wide shot, a medium, a close-up? Or maybe something with movement, like a dolly or a pan?
- Subject & Action: A quick note on what's happening (e.g., "Subject walks toward the camera, smiling").
- Location/Setting: Where is this shot taking place?
- Notes: This is your catch-all for anything else—lighting ideas, props needed, or the specific mood you're after.
This level of detail is your safety net. It makes sure you don't forget to capture that one critical shot. Whether you're filming on location or generating clips with Veo3 AI, this list will become your bible, keeping you focused and efficient.
A great video is built twice: once in planning and once in production. Your visual blueprint ensures the first build is strong enough to support the second.
Applying Timeless Composition Rules
Finally, a truly professional blueprint has to include the fundamentals of good composition. Think of these rules as the grammar of visual storytelling. They help you create shots that feel balanced, dynamic, and just plain pleasing to look at. Mastering them is a game-changer.
If you're just starting out, focus on these two foundational principles:
- The Rule of Thirds: Picture your frame divided by a 3x3 grid. Instead of sticking your subject dead center, try placing key elements along those lines or at their intersections. It almost instantly makes your shot feel more natural and engaging.
- Leading Lines: Use natural lines in your scene—a road, a fence, the edge of a building—to draw the viewer's eye right to your subject. It's a classic technique for adding depth and directing attention exactly where you want it.
When you put it all together—a clear concept, a thoughtful storyboard, a detailed shot list, and a plan for composition—you're not just hoping for a good video. You're engineering one. This prep work is the invisible foundation that holds up every beautiful, compelling, and truly cinematic video you'll ever create.
Capturing Your Footage With Intention
Alright, your plan is locked in. Now comes the fun part: creating the raw material for your story. Whether you’re looking through a camera lens or typing a prompt into an AI, this is where your vision starts to become reality. Every single shot has to be deliberate.
And there's a huge appetite for this kind of content. Film production is booming—in 2023 alone, a staggering 9,571 films were made globally. That’s a massive rebound and proof that people are hungry for great visual stories. If you want to dive deeper, you can read about the film industry's impressive recovery here.
Your job is to make sure what you create stands out. It all starts with how you capture your footage.
Filming With a Traditional Camera
If you're shooting with a real camera—even your smartphone—a few small tweaks to the settings will make a world of difference. Think of these less as technical chores and more as creative choices that directly shape how your audience feels.
For that classic, film-like aesthetic, these are the settings I never compromise on:
- Shoot at 24fps: This is the magic number. The film industry has standardized on 24 frames per second for a reason. It creates a subtle, natural motion blur that just feels cinematic to our eyes. It’s a simple change with a huge payoff.
- Use a Wide Aperture: Setting a low f-stop (like f/1.8 or f/2.8) gives you a shallow depth of field. This is how you get that gorgeous, blurry background (known as bokeh) that makes your subject pop. It’s one of the fastest ways to make your shots look professional.
- Nail Your Shutter Speed: The rule of thumb here is the 180-degree shutter rule. You want your shutter speed to be double your frame rate. So, if you're shooting at 24fps, aim for a shutter speed of 1/50th of a second. This keeps the motion blur looking smooth and natural, not choppy or smeared.
These three settings are the technical foundation of a cinematic look. They work together to create an image that feels intentional, not like a random home video.
Generating Footage With AI
When you're working with an AI tool like Veo3 AI, you trade camera dials for keywords. Your prompt is your camera, your lens, your lighting rig—everything. A lazy prompt gets you a lazy, generic video. But a detailed, descriptive prompt gives you incredible control.
You have to think like a director talking to their cinematographer. You need to be specific to get the shot you've imagined in your head and sketched out in your storyboard. Forget simple descriptions like "a person walking on a beach."
A well-crafted AI prompt is the digital equivalent of setting up the perfect camera shot. It’s where you define the mood, movement, and style before a single pixel is ever rendered.
To get truly cinematic results, your prompts need to be layered. A solid formula I use is combining the core elements—Subject + Action + Environment—with specific cinematic modifiers that tell the AI how to film it.
The Anatomy of a Cinematic AI Prompt
Let's break down what makes a prompt go from basic to brilliant. You're not just telling the AI what to show, but how it should be shot.
Let's use an example: You need a powerful opening shot for a travel video about a solo hiker.
- Basic Prompt:
A hiker at the top of a mountain at sunrise.(This is okay, but it leaves way too much to chance.) - Cinematic Prompt:
**Epic wide shot** of a solo hiker standing on a misty mountain peak at **golden hour**. The camera **slowly pushes in** from a distance. Filmed with a **35mm anamorphic lens**, dramatic lighting, deep shadows, cinematic color grade.
The difference is night and day. The second prompt directs the scene. It gives the AI explicit instructions on the camera movement, the type of lens, the lighting, and even the color. You're not just asking for a picture; you're directing a shot.
To help you get started, I've put together a table of keywords and phrases that I pull from all the time. Think of this as your cheat sheet for telling the AI exactly what you want.
Cinematic Prompt Modifiers for AI Video
| Modifier Category | Example Prompts & Keywords |
|---|---|
| Camera Shot & Angle | Wide shot, extreme close-up, low-angle shot, over-the-shoulder view, Dutch angle, point-of-view (POV) |
| Camera Movement | Slow dolly in, smooth tracking shot, handheld shaky cam, crane shot rising up, fast whip pan, static tripod shot |
| Lighting Style | Golden hour lighting, dramatic chiaroscuro, soft diffused window light, neon noir, hard shadows, backlit silhouette |
| Lens & Film Style | 35mm anamorphic lens, shot on 70mm film, vintage 8mm film grain, telephoto lens with compressed background, fisheye lens |
These modifiers are your new best friends. Mixing and matching them allows you to create incredibly specific and evocative scenes.
By getting comfortable with both traditional camera craft and the art of the AI prompt, you ensure that every piece of footage you create is a powerful building block for the final story you're about to piece together.
Crafting Your Narrative in the Edit

All that incredible footage—whether captured through a real lens or generated by an AI prompt—is pure potential. The edit is where the magic really happens. This is where you transform a folder of disconnected clips into an emotional, cohesive story that pulls your audience in from the very first frame.
Don't just think of yourself as an editor; you're a storyteller. Your timeline is the canvas. Every single cut you make is a brushstroke that either strengthens your narrative or muddies the water.
Finding Your Rhythm and Pacing
Pacing is the heartbeat of your video. It’s the invisible hand guiding your audience’s emotional journey. Are you trying to build nail-biting suspense? A blast of high-octane energy? Or maybe you want a quiet, poignant moment to truly land. How long you hold a shot and how quickly you cut are your main tools here.
- Fast Cuts: Short, snappy cuts create a sense of urgency and excitement. Think of a training montage or a frantic chase scene. They get the blood pumping.
- Longer Takes: Letting a shot breathe gives the viewer time to soak in the atmosphere, connect with a character’s feelings, or just admire a gorgeous landscape. This slows everything down, creating a more dramatic or thoughtful mood.
The best edits are never one-note. The real art is in the contrast—building tempo to create a rush, then pulling back to let a key moment have its full impact. This push and pull is what keeps people glued to the screen.
The edit is where you find the music in your story. It’s not just about what you show, but when you show it and for how long. The timing of each cut shapes the entire emotional experience for your viewer.
Building a Cohesive Narrative Sequence
Once you have a feel for the rhythm, it’s time to arrange your shots into a story that makes sense. This is about more than just putting clips in chronological order. You're building an arc with a clear beginning, a compelling middle, and a conclusion that feels earned.
A powerful sequence doesn't just show what happened; it reveals information strategically. Use your opening shots to establish the world and introduce your subject. From there, weave together wide shots for context, medium shots to follow the action, and tight close-ups to punch up an emotion or highlight a critical detail. This deliberate flow guides the viewer’s eye and their understanding.
Using Advanced Cuts for a Seamless Flow
To take your editing from good to great, you need to go beyond simple cuts. Two of the most powerful techniques that separate the amateurs from the pros are J-cuts and L-cuts. These are all about letting the audio lead the way.
- J-Cut: Here, the audio from the next clip starts a moment before the visuals switch. It’s a fantastic way to introduce a new scene or a line of dialogue, as it smoothly pulls the audience from one shot to the next without a jarring jump.
- L-Cut: This is the reverse. The audio from your current clip continues to play over the start of the next shot. This is incredibly effective for showing someone’s reaction to what was just said or for letting the sound of one scene bleed into the next.
Mastering these audio overlaps will make your edits feel incredibly natural and polished. For a breakdown of editing platforms that handle these techniques well, our https://www.veo3ai.io/blog/video-production-software-comparison can help you find the right tool.
Of course, these techniques are just one part of a larger editing strategy. For a solid workflow from start to finish, check out this excellent guide on how to edit YouTube videos. A strong foundation in the basics makes pulling off these advanced cinematic tricks a whole lot easier.
Adding the Final Polish with Color and Sound
<iframe width="100%" style="aspect-ratio: 16 / 9;" src="https://www.youtube.com/embed/pdLEHfkwgV8" frameborder="0" allow="autoplay; encrypted-media" allowfullscreen></iframe>
Here's where the magic really happens. A solid edit is the foundation, but the final polish is what separates a good video from a truly cinematic one. This is where we’ll dig into color and sound to create a specific mood, transforming your timeline into an experience that feels immersive and professional.
Think of these final steps as the essential layers that breathe life and emotion into your story.
Setting the Mood with Color
Let’s start with color. This process really breaks down into two key jobs: color correction and color grading.
Color correction is the technical, foundational step. The goal here is to fix any problems with the footage itself—maybe one shot is a little too dark, or the white balance is slightly off between different clips. You’re just trying to create a clean, consistent, and natural-looking baseline across your entire video.
Color grading is where the artistry comes in. This is all about infusing your video with a specific feeling or style by applying a deliberate color palette. You can make a scene feel warm and nostalgic with golden hues or create tension and isolation with cool, desaturated blues. It's about shaping the visual mood to support your narrative.
How to Create a Look with Color Grading
Color grading gives your video its unique personality. One of the fastest ways to get a professional, stylized look is by using a Look-Up Table (LUT). Think of a LUT as a color preset; it's a file that applies a complex set of color adjustments to your footage with a single click, instantly giving you a cinematic style.
You can find LUTs that mimic the look of famous Hollywood films or popular aesthetics, like that classic "teal and orange" look you see everywhere. Just remember one crucial tip: always apply your LUT after you’ve done your basic color correction. You need a clean canvas for the paint to look right.
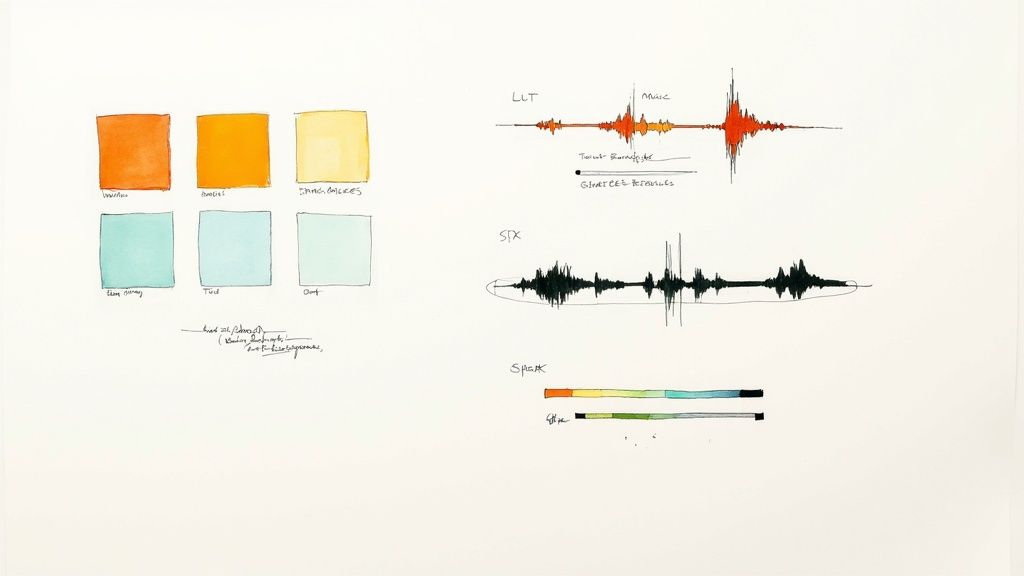
Here are a few common color schemes and the emotions they usually stir up:
- Warm Tones (Yellows, Oranges, Reds): These colors often bring out feelings of happiness, nostalgia, romance, or energy. They're perfect for a travel montage or a heartfelt brand story.
- Cool Tones (Blues, Greens, Purples): This palette can create a sense of calm, mystery, sadness, or a futuristic, techy vibe. It’s a go-to for sci-fi, thrillers, or more somber scenes.
- Desaturated Colors: Pulling back the color saturation can make your video feel more gritty, realistic, or serious. It's a common technique in dramas to create a grounded, authentic atmosphere.
Color is a silent narrator. It tells the audience how to feel about a scene before a single word is ever spoken.
The Unseen Power of Sound Design
They say audio is "half the picture," and they're not wrong. You can have the most beautiful-looking video in the world, but if the sound is bad, the whole thing falls apart. On the flip side, great sound design makes your world feel real and pulls the viewer right into the story.
A truly cinematic soundscape is built by mixing three core layers:
- Dialogue/Voiceover: This is the anchor of your story. It needs to be crisp, clear, and mixed at the right level so it’s always easy to understand.
- Sound Effects (SFX): These are the sounds that make your world believable—footsteps on gravel, the rustle of leaves, a distant siren. They add texture and realism.
- Music/Score: Your soundtrack is arguably the most powerful tool for setting the emotional tone. It can build tension, create excitement, or add a layer of heartfelt emotion.
Balancing these three elements is the real art form. The dialogue should always be front and center, while the sound effects and music should swell and fade to support the action on screen without ever becoming distracting. Making sure everything is perfectly aligned is critical; you can get into the nitty-gritty of that with our guide on how to sync audio to video.
Beyond just adding sounds, learning how to improve audio quality is essential for a professional result. Even subtle background ambiances, like the hum of a city or the chirp of crickets, can make a scene feel truly alive.
Investing time in high-quality audio and color isn’t just an artistic choice—it’s what separates amateur content from professional productions. The U.S. film and TV industry, which sets the standard for quality, is projected to spend nearly $40 billion in 2025 as it recovers from recent disruptions. That number shows just how critical polish and production value are to creating content that truly connects with an audience.
Got Questions? Let's Get Them Answered.
Even with the best guide, you're bound to run into specific questions once you're deep in a project. That's what this section is for. I've pulled together some of the most common hurdles and practical questions that pop up when creators are learning the ropes of cinematic video.
Think of this as your quick-reference sheet to solve problems on the fly and refine your technique. Let's fill in those gaps.
What's the Best Frame Rate for That "Cinematic Look"?
The hands-down industry standard is 24 frames per second (fps). This is the frame rate of traditional movies, and it's what gives footage that subtle, natural motion blur our eyes instantly recognize as "filmic."
Shooting and exporting your video in 24fps is one of the quickest ways to get that authentic feel. It’s a deliberate choice that stands apart from the smoother, more "real-life" look of 30fps or 60fps you see on TV broadcasts or your phone’s default settings.
But what about that buttery smooth slow-motion? The trick is to shoot at a much higher frame rate—say, 60fps or even 120fps—and then conform it to a 24fps timeline in your editing software. This gives you a dramatic, high-quality slow-motion clip without any weird stuttering or choppiness.
How Can I Make My Smartphone Videos Look More Cinematic?
Let’s be clear: you absolutely do not need a multi-thousand-dollar camera to make something beautiful. Your smartphone is a powerhouse, as long as you use it with intention.
Here are a few things you can do right now to elevate your phone footage:
- Lock it Down: Before you hit record, tap and hold on the screen to lock your focus and exposure. This stops the camera from "breathing"—auto-adjusting brightness and focus mid-shot, which is a dead giveaway of amateur video.
- Go Wide: Always, always shoot horizontally (landscape mode). Cinematic video is meant for a wide canvas, and filming vertically immediately kills that immersive, expansive feeling.
- Use the Grid: Turn on your phone’s grid lines. This simple overlay is your best friend for applying the rule of thirds and creating compositions that are balanced and visually engaging.
- Control Your Movement: A gimbal is great, but you can get smoother shots without one. Try the "ninja walk"—bend your knees, walk heel-to-toe, and keep your arms tucked in. It makes a huge difference.
The most cinematic tool you have is your own creativity. A well-composed, intentionally lit shot from a smartphone will always look better than a poorly planned shot from an expensive camera.
For even more control, look into third-party apps like FiLMiC Pro. They unlock manual controls for things like ISO and shutter speed, giving you the kind of power you'd normally find on a proper DSLR.
What Exactly Are LUTs and How Do I Use Them?
LUT stands for Look-Up Table. In simple terms, a LUT is a preset for color grading. It's a file that tells your editing software how to remap the colors in your footage to create a specific mood or style.
For instance, you might apply a "teal and orange" LUT to get that popular Hollywood blockbuster look instantly. Using them is pretty straightforward.
- Import Your Footage: Get your clips into an editing program like DaVinci Resolve, Adobe Premiere Pro, or Final Cut Pro.
- Apply the LUT: Find the color grading panel in your software and apply the LUT file (it usually ends in
.cube). - Correct First, Grade Second: This is key. For the best results, always do basic color correction first. That means adjusting your white balance, exposure, and contrast to get a clean, neutral starting point before applying the creative LUT.
Can I Actually Mix AI-Generated Video with Real Footage?
Absolutely. In fact, blending AI footage with real-world camera footage is an incredibly powerful technique that's becoming more common every day. The trick to making it work is consistency. You want the transition to feel seamless, not jarring.
First, try to match the tech specs. If your camera footage is 4K at 24fps, generate your AI clips with those same settings. When you're writing prompts for a tool like Veo3 AI, get really specific about matching the real-world conditions.
Focus your prompts on elements like:
- Lighting:
shot during golden hour,soft overcast lighting,harsh midday sun - Color Palette:
warm and nostalgic color grade,cool, desaturated tones,vibrant neon colors - Lens Style:
filmed with a 35mm lens,shallow depth of field,anamorphic lens flare
Then, in your edit, apply the exact same color grade and any effects like film grain across both the AI clips and the real ones. This final touch helps glue everything together. It's a fantastic way to create epic establishing shots, add complex VFX, or fill gaps in your story that would be too expensive or impossible to shoot for real.
Ready to bring your cinematic vision to life without the complex gear? Veo3 AI transforms your ideas into stunning videos in minutes. Generate impossible shots, animate images, and streamline your entire creative workflow with our powerful, all-in-one platform. Start creating for free at Veo3 AI.
Our Verdict
Learning how to make cinematic videos has never been more accessible thanks to today's AI-powered tools. We recommend starting with one of the beginner-friendly platforms mentioned in this guide, following the step-by-step process outlined above, and experimenting with different settings to find your preferred style. The investment of time to master this skill will pay off in consistently high-quality content.
Related Articles
Continue with more blog posts in the same locale.

Animating for Beginners: Create with Veo3 AI
Learn animating for beginners with Veo3 AI. Create your first animated social clip from text & get workflow tips. No experience needed.
Read articleHow to Animate a Logo: A Practical Guide for 2026
Learn how to animate a logo from scratch. Our guide covers planning, AI tools like Veo3, pro tips on timing, and exporting for web and social media.
Read article
Minimax Hailuo AI: A Guide to Cinematic Video Generation
Unlock cinematic video with our guide to Minimax Hailuo AI. Learn its capabilities, how it compares to other models, and how to use it in your workflow.
Read article