How to Make Product Demo Videos That Convert
Discover how to make product demo videos that convert, with actionable steps, scripts, and examples to boost engagement and sales.
Veo3 AI · 24 min read · Nov 6, 2025
Creating a solid product demo video breaks down into four main stages: figuring out your message and who you're talking to (planning), capturing your product doing its thing (recording), polishing that raw footage into a story (editing), and finally, getting it in front of the right eyeballs (distribution).
Quick Answer: To make product demo videos, choose an AI-powered video platform suited to your workflow, provide a descriptive prompt or upload your media, configure generation settings, and export the result. Leading tools like Google Veo 3 and Runway make the process possible in minutes—no technical skills required.
The best demos I've ever seen don't just rattle off a list of features. They zero in on a specific customer problem and tell a compelling story about how the product solves it, pushing the viewer to take the next step.
Why Demo Videos Are Your Secret Sales Weapon
Before we get into the "how-to," let's talk about why demo videos are such a game-changer. They aren't just another asset to drop on your website; they're a strategic tool that can directly boost your bottom line by building trust, making your value crystal clear, and speeding up the sales process.
Think of it this way: a demo video is the bridge between a potential customer's headache and your product's solution. Instead of just telling them what your software does, you actually show them. This "show, don't tell" method is incredibly powerful. It cuts through the jargon and helps prospects see themselves using your product successfully—a crucial lightbulb moment in their buying journey.
Turning Viewers Into Qualified Leads
A well-made demo video confronts customer pain points directly. It’s your chance to back up all your marketing claims with tangible proof, showing that your product truly delivers on its promises.
This visual evidence is vital for building credibility, especially if you have a newer product or a complex B2B solution where prospects are naturally a bit skeptical. A strong demo can turn a casual website visitor into an engaged, qualified lead who already gets what you do before they even hop on a call with sales.
A great product demo does more than just show features; it builds trust by demonstrating tangible value. It’s the closest you can get to putting your product directly into a prospect's hands before they commit.
The Undeniable Impact on Sales
The numbers don't lie—video is a powerhouse. It's become so standard that 89% of businesses now use video as a core part of their marketing.
Digging deeper, 48% of marketers are creating product demo videos specifically to show how their products work. This focus pays off, with a massive 87% of consumers saying they've purchased a product after watching a demo. These stats show a clear shift toward using video to educate and persuade, making product demos an essential part of any modern video content marketing strategy.
For a really thorough breakdown of the entire process, check out a comprehensive guide on how to make product demo videos. It’s a great resource for mastering the fundamentals before we jump into the practical steps ahead.
Crafting Your Demo Video Blueprint
The best product demo videos aren't born in the editing suite; they're built on a solid foundation long before you even think about hitting the record button. This pre-production phase is where you turn a vague idea into a sharp, actionable plan. It's truly the difference between a video that just wanders and one that actually converts.
Success really boils down to deeply understanding two things: your audience and the problem you solve for them. Forget trying to make a video for everyone. Instead, get specific and picture your ideal customer. What are their biggest daily frustrations? What’s that one pain point that keeps them searching for a better way? Your entire video needs to be a direct answer to that single, pressing problem.
Defining Your Audience and Core Message
Before you write a single word of your script, you need to get crystal clear on a few things.
- Who is this for? Is it for a tech-savvy project manager who speaks in acronyms, or a small business owner who feels completely overwhelmed by new tools?
- What's their #1 problem? Don't give me a laundry list of ten issues. Focus on the most significant one your product absolutely nails.
- What's the 'aha!' moment? Pinpoint that key feature or workflow that makes a user’s life noticeably, undeniably easier. This is the star of your show.
Answering these questions helps you lock in your core message. For instance, if you sell a project management tool, your message isn't, "We have Gantt charts and task dependencies." It's something like, "Stop letting project deadlines sneak up on you and keep your team aligned without drowning in meetings."
The goal isn't to show off every single thing your product can do. It's to show how it solves a specific, painful problem for a specific person. A focused message will always hit harder than a cluttered feature tour.
This process transforms a simple product showcase into a real conversion tool, guiding viewers from their initial frustration to a clear, compelling solution.
This visual shows exactly how a well-crafted demo intercepts a customer's problem and turns them into a qualified lead, ready to take the next step.
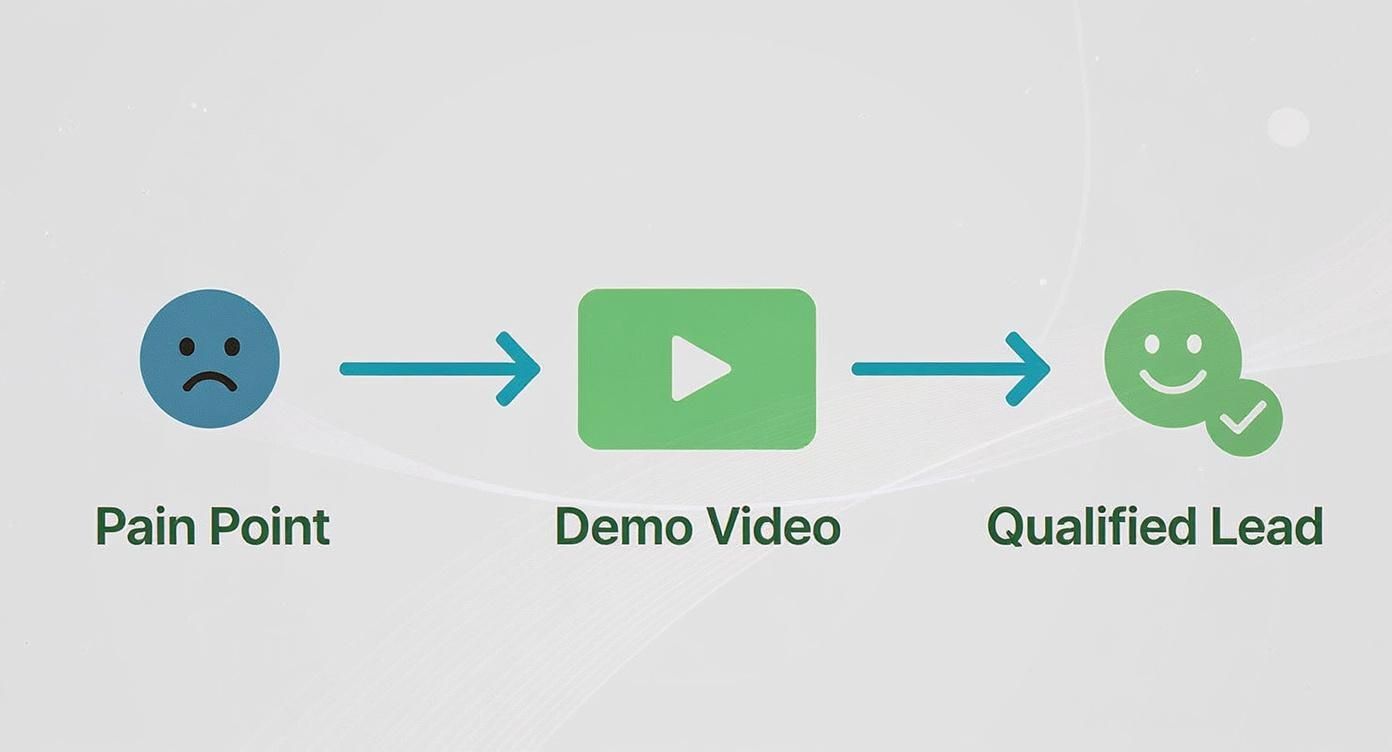
The real takeaway here is that your video acts as that critical bridge. It visually proves your product's value and builds the confidence someone needs to actually click that "buy" or "sign up" button.
Choosing the Right Demo Format
With your audience and message locked in, you can pick the best format to bring your story to life. Each style has its own strengths, so choose wisely based on your product and goals.
- Screencast with Voiceover: This is the go-to for most software demos. It’s a direct, no-fuss way to walk people through your user interface and is perfect for showing off specific workflows.
- Animated Demo: Animation is fantastic for explaining complex or abstract ideas. You can simplify concepts and create a visually engaging story that isn't stuck inside the four corners of a user interface.
- Live-Action Demo: If you sell a physical product, nothing beats showing it in action. This format builds a ton of trust and helps viewers imagine themselves actually using the item.
Honestly, the most effective demos often blend these formats. Think about starting with a live-action shot of someone struggling with a problem, then transitioning to a slick screencast to show them the solution. To dig deeper into what makes a video drive sales, check out this excellent guide on making product videos that sell.
Scripting for Engagement and Action
A tight script is the backbone of your video. It's what keeps your message clear, concise, and compelling from the first second to the last. In fact, a strong script is a huge reason why 87% of people say a video has convinced them to buy a product.
Your script has to balance giving enough detail with respecting the viewer's short attention span. That's why the sweet spot for most demos is between 2 and 5 minutes.
Here's a simple, proven structure to follow for your script. It's not a rigid formula, but a framework that just works.
Product Demo Script Template Breakdown
This table breaks down the essential parts of a high-converting demo script, from grabbing attention to driving action.
| Script Section | Purpose | Example Snippet |
|---|---|---|
| The Hook (0-15 sec) | Grab attention immediately by calling out a specific pain point. | "Tired of wasting your Monday morning digging through emails and Slack messages just to figure out what to work on?" |
| Introduce the Problem (15-45 sec) | Show you understand their struggle and the limits of their current way of doing things. | "You're juggling spreadsheets, sticky notes, and three different apps. Important deadlines are falling through the cracks." |
| Present Your Solution (45-60 sec) | Introduce your product as the clear, confident hero of the story. | "Meet ClarityHub. It’s the single source of truth that brings all your team’s tasks, files, and conversations into one place." |
| Showcase the "How" (1-3 min) | Walk through the 2-3 key features that directly solve the problem. Focus on benefits. | "First, let's create a project. See how you can assign a task to Maria and set a deadline—she’ll get notified instantly. No more follow-up emails needed." |
| The Call to Action (Final 15 sec) | Tell the viewer exactly what you want them to do next. Be direct. | "Stop the chaos and get your team on the same page. Click the link below to start your free 14-day trial of ClarityHub today." |
This structure ensures your video has a logical flow that guides the viewer from problem to solution, making the final call-to-action a natural next step.
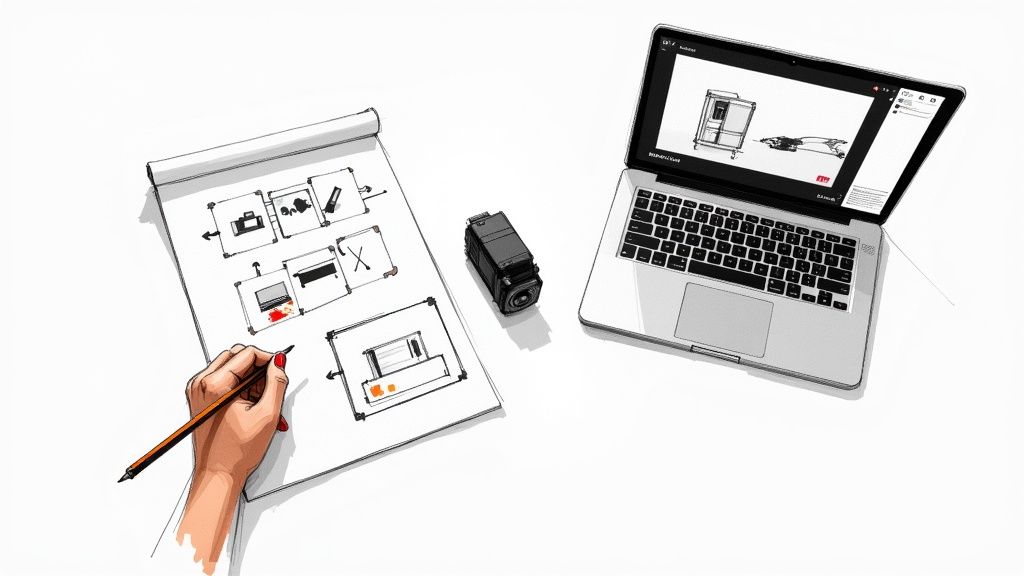
Visualizing the Flow with a Storyboard
Once your script feels solid, it's time to create a storyboard. A storyboard is just a sequence of simple drawings or descriptions that map out each scene in your video. And no, you don't need to be an artist—stick figures and basic shapes work perfectly fine.
The whole point is to plan your visuals alongside your script, making sure what people see reinforces what they hear. This simple step helps you spot awkward transitions, fix pacing issues, and ensure every single second of your video serves a purpose. It's a vital planning tool that connects your script to the final video. For a more detailed walkthrough, check out our guide on how to storyboard a video.
Recording Your Demo With Confidence
Alright, you've got your script and storyboard locked in. Now for the fun part: bringing it all to life. This is where all that prep work really starts to pay off. Don't worry, you don't need a Hollywood budget or a full film crew to get a professional result.
Honestly, a common hang-up I see is people thinking they need thousands of dollars in gear. You don't. Your smartphone is an incredibly powerful tool, and with a few smart choices, you can capture footage that looks fantastic. The goal here is clarity and stability, letting your product shine.

Setting Up Your Gear for Success
Your setup can be as simple or as kitted-out as you want, but there are a few essentials that make a world of difference.
- Camera: A modern smartphone will do the trick just fine. If you’re using a DSLR or mirrorless camera, take a few minutes to learn the basic manual settings. Locking your focus and exposure prevents the camera from "breathing" or auto-adjusting while you’re mid-sentence.
- Tripod: This is a non-negotiable. Shaky footage is an instant credibility killer. A simple tripod for your phone or camera is probably the single best, most affordable investment you can make to immediately upgrade your video quality.
- Microphone: This is critical. People will forgive a slightly grainy video, but they will click away in a heartbeat if the audio is terrible. An external USB mic or a simple lavalier (lapel) mic will capture far cleaner sound than the one built into your laptop or camera.
- Lighting: Good light is what separates amateur-looking video from something that feels polished and professional. You don't need a fancy lighting kit—just sit facing a large window. Natural light is soft and flattering. If that's not an option, a basic ring light can work wonders.
Your audience's perception of quality is tied more closely to audio clarity than video resolution. Clear, crisp sound builds credibility, while muffled or echoing audio immediately undermines it. Always prioritize your microphone setup.
Nailing the Screen Recording
For software demos, your screen is the main stage. Getting a clean, crisp screen recording is everything. Before you even think about hitting that record button, prep your digital workspace.
First, tidy up your desktop. Get rid of distracting icons, close every application you don't need, and shut down all those extra browser tabs. A random email notification popping up mid-demo just screams unprofessional.
Next, get your resolution right. Recording in a standard 1920x1080 resolution ensures your video will look sharp on pretty much any device. One pro tip: slightly increase your cursor size in your system settings. You might also want to use a screen recording tool that highlights clicks, making it dead simple for viewers to follow your every move.
Capturing Live Action and Audio
If your demo has segments with you on camera or showing off a physical product, a little attention to framing and audio goes a long way.
When framing yourself, think about the rule of thirds. Picture your screen with a tic-tac-toe grid over it. Instead of dead-centering yourself, position your eyes or the main subject along one of those lines or at an intersection. It’s a simple trick that makes any shot look more balanced and composed.
As for audio, find a quiet spot. Bare walls and hardwood floors are your enemy—they create echo. A room with a rug, curtains, or even a bookshelf will do a much better job of absorbing sound. Always do a quick test recording. Listen for the hum of a fan or refrigerator and do what you can to shut them off.
When it's time to speak, project your voice with confidence and keep a steady pace. It's so much easier for an audience to trust and follow someone who sounds prepared. By getting these recording basics right, you’ll have high-quality raw footage that makes the editing process a breeze.
Editing Your Footage Into a Polished Story
Getting all your footage captured is a huge step, but let's be honest—the real magic happens in the edit. This is where you take a collection of raw clips and screen recordings and weave them into a tight, compelling story that keeps your viewer hooked and drives home your product's value.
Your raw footage will never be perfect. You'll find awkward pauses, meandering mouse movements, and maybe a few verbal stumbles. The very first thing to do is trim all that fat. Cut anything that doesn't push the narrative forward. You're aiming for a clean, efficient story that respects your audience's time.
Guiding the Viewer’s Eye
With your timeline cleaned up, it's time to layer in some simple visual cues. In a software demo, these little additions can make a massive difference in how well your message lands.
For instance, using on-screen text or simple callouts to label key features as you introduce them is a great way to reinforce what the narrator is saying. It helps lodge those important takeaways in the viewer's memory. Just don't go overboard; a few well-placed labels are way more effective than a screen drowning in text.
Another one of my favorite tricks is the zoom-in. When you're about to click a critical button or highlight a specific detail in your UI, a subtle zoom pulls the viewer's focus right where you need it. Think of it as a visual highlighter, making sure nobody misses the most important part of the workflow.
Polishing the Vibe with Audio and Graphics
Audio is so much more than just the voiceover—it sets the entire emotional tone. The right background music can completely transform your demo, making it feel more energetic, professional, or trustworthy.
- Choose the Right Track: Find some royalty-free music that actually fits your brand's personality. A high-energy, optimistic track is perfect for a productivity app, while a calm, reassuring tune might be better for a cybersecurity product.
- Get the Levels Right: The music should support the narration, not compete with it. A good rule of thumb is to set the volume low enough that it’s felt more than it's heard.
You'll also want some simple intro and outro graphics. A clean opening with your company logo instantly makes the video feel more professional. The outro is your last chance to make an impression, so make sure it clearly displays your call-to-action, giving viewers a final visual reminder of what to do next.
A great edit isn’t about flashy, over-the-top effects. It’s all about clarity and pacing. Every single cut, zoom, and graphic should have one purpose: to make your product's value crystal clear.
Finding the Right Editing Software
The tool you choose can make this whole process a breeze or a total nightmare. The good news is you don't need the most expensive, complicated program out there to create a fantastic product demo.
Here’s a quick look at your options:
- Free and Powerful: Tools like the free version of DaVinci Resolve or CapCut offer an incredible range of features without costing a dime. They're excellent starting points.
- User-Friendly Paid Tools: Software like Camtasia is built from the ground up for screen recordings and tutorials, which makes it an incredibly intuitive choice for software demos.
- The Professional Suites: Powerhouses like Adobe Premiere Pro give you limitless creative control, but they come with a steeper learning curve and a subscription fee.
If you’re still weighing your options, especially for creating content that will live on social media, our guide on the best video editing software for social media is a great resource. At the end of the day, the best tool is the one that lets you work efficiently without getting lost in the technical weeds.
Getting Your Demo in Front of the Right People
<iframe width="100%" style="aspect-ratio: 16 / 9;" src="https://www.youtube.com/embed/ZfrkJQ5up7I" frameborder="0" allow="autoplay; encrypted-media" allowfullscreen></iframe>
You've planned, scripted, and polished your product demo video. Great! But the real work starts now. A masterpiece of a video has zero impact if it’s just sitting on your hard drive. Your final—and arguably most important—step is getting it in front of the right eyeballs.
This isn’t about just blasting a link everywhere and hoping for the best. It’s about being strategic. You need to meet potential customers where they already are, whether they're searching on YouTube, browsing your website, or scrolling through their social feeds. Each channel has its own rules of engagement, and tailoring your approach is key to turning views into real business.
Turn YouTube Into Your Lead Generation Machine
Think of YouTube as a massive search engine, not just a video-sharing site. People go there looking for answers, and if you play your cards right, your product demo can be the solution they find. This is all about playing the long game for organic discovery.
First up, your title needs to be packed with relevant keywords. Forget vague titles like "Our Latest Update." Get specific. Something like, "How to Automate Invoicing with ProjectFlow in Under 5 Minutes" is far more effective because it targets a real search query.
Your video description is your next best friend. Write a solid paragraph or two summarizing what the demo covers, and be sure to weave in your main keywords naturally. Most importantly, drop a clear call-to-action link right at the top, so it’s visible before anyone has to click "show more."
Finally, don't skimp on tags. Brainstorm every possible term someone might use to find you:
- Your product name (the obvious one)
- The problem you solve (e.g., "invoice automation," "project tracking software")
- Who you solve it for (e.g., "tools for freelancers," "small business accounting")
- Even competitor names, if you're positioning yourself as an alternative.
Make Your Website a Conversion Hotspot
Your own website is the most valuable real estate you have for your demo. It's where warm leads go to make a final decision, and a well-placed video can be the nudge they need.
The homepage is a no-brainer. A short, punchy overview demo right at the top can instantly show new visitors what you're all about and why they should care. Keep this one high-level and focused on the core value.
But don't stop there. Get granular by embedding more specific demos on relevant product or feature pages. Have a killer feature for managing team tasks? A quick video showing that exact workflow on that feature’s landing page is incredibly persuasive.
A demo video on a landing page can increase conversions by as much as 80%. It’s the visual proof that gives people the confidence to click that "Sign Up" or "Buy Now" button.
Go Native on Social Media
Social media is a different beast entirely. You’re fighting for slivers of attention in a fast-scrolling feed, so your full-length demo just won’t cut it. The key here is to create short, snappy clips tailored for each platform.
On platforms like LinkedIn or Twitter, your sweet spot is a 30-60 second teaser. Pull out the most exciting "aha!" moment from your full demo, add a hook, and drive them to the full version on your website or YouTube.
And a crucial pro-tip: always upload the video file directly to the platform. Native videos get way more love from social algorithms than a shared YouTube link, which means more eyeballs and better engagement.
Arm Your Sales and Marketing Teams
Your demo isn't just for public-facing channels. It's a powerhouse tool for your internal teams, too.
For email marketing, just adding the word "video" to a subject line can give your open rates a serious boost. Think about where you can slot it in:
- Onboarding emails to get new users up to speed quickly.
- Nurture campaigns to re-engage leads who’ve gone quiet.
- Feature announcements to show people what's new instead of just telling them.
Your sales team will love you for it, too. Encourage them to include the demo in their outreach to give prospects a crystal-clear picture of the product before the first call. It saves everyone time and helps qualify leads more effectively.
A Quick Guide to Platform-Specific Optimization
Optimizing your demo isn't a one-size-fits-all task. Different platforms reward different behaviors. Here’s a quick-reference table to help you tailor your video for the channels that matter most.
| Platform | Key Optimization Actions | Pro Tip |
|---|---|---|
| YouTube | Keyword-rich title & description, comprehensive tags, custom thumbnail. | Add timestamped "chapters" in your description to help viewers navigate to the most relevant parts of your demo. |
| Website | Embed above the fold on key pages (homepage, features), use a fast-loading player. | Gate longer, in-depth demos behind an email form on a dedicated landing page to generate leads. |
| Native upload, subtitles (most watch muted), 30-90 second clips, tag relevant companies/people. | Post it from a personal founder/employee account for more authentic engagement than a company page post. | |
| Use a static image with a play button that links to the video, mention "video" in the subject line. | Personalize the email by mentioning how a specific feature in the demo can solve a known pain point for the recipient. |
Ultimately, a multi-channel approach is non-negotiable. With video content on track to make up 82% of all internet traffic by 2025 and demos proven to improve conversion rates by nearly 90%, the evidence is overwhelming. To dive deeper, you can explore more insights on how video is shaping digital marketing.
Common Questions About Product Demo Videos
Even with the best game plan, a few questions always come up when you're getting into the nitty-gritty of creating a product demo. Let's tackle some of the most common ones I hear so you can sidestep the usual hurdles and polish your approach.
What’s the Ideal Length for a Product Demo Video?
There's no single magic number, but experience shows the sweet spot is usually between 2 to 5 minutes. That’s typically enough time to get to the heart of your product's value and show off the key features without seeing your viewer engagement drop off a cliff.
Of course, context is everything. If you’re demonstrating a complex B2B tool to leads who are already deep in the buying cycle, you can probably get away with a longer, more detailed video in the 5-10 minute range. But for general marketing on your website or social media? Shorter is almost always better.
A great rule of thumb is to focus on solving just one core problem. Only show the features that directly contribute to that solution.
My Go-To Tip: Instead of making one epic video that tries to do it all, think about creating a library of shorter, feature-specific demos. This lets people find exactly what they're looking for and gives you a ton of versatile content for different marketing channels.
This strategy really respects the viewer's time and makes your content far easier to digest and share.
Should I Use a Professional Voiceover or My Own Voice?
This one really boils down to your brand’s personality and, let's be honest, your budget. A professional voiceover artist can give your video a serious dose of polish and authority. It’s a great move for established brands going for that slick, corporate feel.
On the other hand, using someone from your team—maybe the product manager or even the CEO—can feel much more authentic and personal. For startups or brands trying to forge a real connection with their audience, this can be incredibly powerful.
But here’s the most important thing: audio quality is non-negotiable. Bad audio will torpedo your video's credibility faster than anything else, way more than a voice that isn't perfectly smooth. If you decide to DIY, please invest in a decent USB microphone and find a quiet room without echo to record. It makes all the difference.
How Do I Show My Product’s Value, Not Just List Features?
This is it. This is the single most important question to get right. You have to shift your mindset from giving a feature tour to telling a problem-solving story. Never, ever just say, "Click here to access the reporting dashboard."
Instead, build your demo around a real user’s workflow, starting with a pain point they know all too well.
- Set the Scene with a Problem: Start by describing a common, frustrating situation your ideal customer deals with every day.
- Introduce Your Product as the Hero: Position your tool as the elegant solution to that specific frustration.
- Walk Through the "Aha!" Moment: Show the exact steps to solve the problem, framing every feature you touch on as a direct benefit.
For example, don't say, "We have an automated reporting feature." Say, "Tired of wasting hours pulling reports together by hand? Watch how you can generate a complete analysis with one click and instantly share it with your team." Always connect the what (the feature) to the so what (the value it delivers).
What Are the Most Common Mistakes to Avoid?
When you’re making a product demo, a few common pitfalls can sink an otherwise great video. Knowing what they are from the start will save you a world of pain.
Here are the three biggest mistakes I see all the time:
- Horrible Audio Quality: A video that sounds bad is unwatchable. It doesn't matter how beautiful your visuals are; if the audio is muffled, echoing, or too quiet, people will click away immediately.
- Showing Way Too Much: Trying to cram every single feature into one video is a classic mistake. It just overwhelms your audience and dilutes your core message. Stick to the essential "aha!" moments that really make your product shine.
- Forgetting a Clear Call-to-Action (CTA): You've held their attention, now what? If you don't explicitly tell viewers what to do next, you're throwing away a massive opportunity. A strong CTA is crucial for turning that interest into a free trial, a scheduled call, or whatever your goal is.
Ready to create stunning visuals for your next product demo without the headache of filming or complex software? With Veo3 AI, you can generate professional-quality video footage from a simple text prompt or image. Bring your concepts to life in minutes and build your next demo video faster than ever.
Start Creating for Free with Veo3 AI
Our Verdict
Learning how to make product demo videos has never been more accessible thanks to today's AI-powered tools. We recommend starting with one of the beginner-friendly platforms mentioned in this guide, following the step-by-step process outlined above, and experimenting with different settings to find your preferred style. The investment of time to master this skill will pay off in consistently high-quality content.
Related Articles
Continue with more blog posts in the same locale.

Seedance 2.0 API: The Complete Integration Guide for 2026
Integrate stunning AI video generation with the Seedance 2.0 API. Our complete guide covers authentication, endpoints, code samples, and Veo3 AI workflows.
Read article
Can Veo 3 Edit Existing Videos? How to Change & Transform Footage (2026)
Can Veo 3 edit a video you already have? The honest answer, the 4 real ways to change existing footage, what Veo 3 can't do, the Google Flow workflow, prompts, and alternatives.
Read article
How to Make AI Dance Videos with Veo 3: A 2026 Generator Workflow
A practical Veo 3 workflow for making AI dance videos: text-to-video and image-to-video paths, copy-ready prompts, platform specs, and quality checks.
Read article