Image to Cartoon Your Photos with Powerful AI
Discover how to use AI for your next image to cartoon project. Learn proven techniques to transform photos into stunning cartoons and engaging animations.
Veo3 AI · 18 min read · Dec 12, 2025
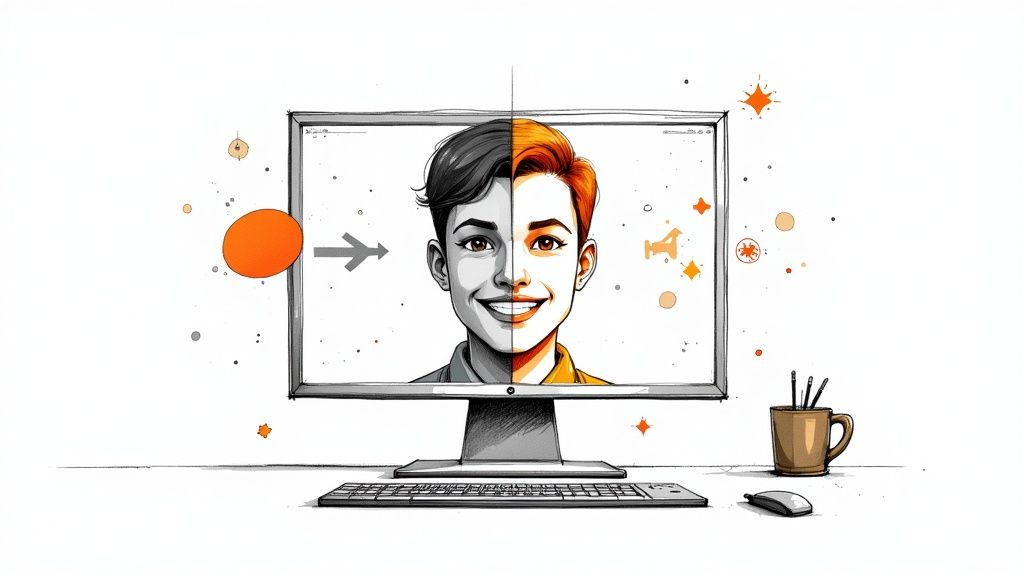
Turning a photo into a cartoon used to mean slapping on a generic, cookie-cutter filter. Not anymore. With AI tools like Veo3 AI, you're not just applying an effect—you're using a smart algorithm to completely reimagine your image in a new artistic style. The whole process is less about filters and more about creative direction, giving you a polished, unique cartoon asset in just a few minutes.
Quick Answer: Image To Cartoon is a rapidly growing area of AI-powered content creation in 2025. The best tools combine high output quality, intuitive workflows, and flexible pricing—making professional-grade results accessible to creators at every skill level.
The New Way to Cartoon Your Images
The leap from basic app filters to modern AI is huge. Old-school apps would just lay a simple graphic style over your picture. Today's AI, powered by sophisticated neural networks, actually understands the image. It sees the shapes, the lighting, the subject, and the background.
From there, it generates a brand-new, stylized version from scratch based on your instructions. Think of it as having a digital artist on call. This shift has unlocked professional-grade cartooning for everyone, whether you’re a social media manager trying to create scroll-stopping content or a digital artist looking for a new tool.
Why AI Beats the Old Methods
The demand for fresh, animated visuals has exploded, especially in marketing and content creation where grabbing attention is everything. AI tools have stepped in to meet that need head-on, offering a much more practical solution than traditional methods.
When you think about the advantages, it's easy to see why so many creators have made the switch.
Why AI Beats Traditional Cartooning Methods
| Benefit | Description | Best For |
|---|---|---|
| Speed & Efficiency | Generates a high-quality cartoon in seconds, not hours. | Marketers, social media managers, and anyone needing quick turnarounds. |
| Creative Control | Use text prompts to dictate the exact style, from a 3D Pixar vibe to 2D anime. | Artists, designers, and brands wanting to maintain a consistent aesthetic. |
| Accessibility | No need for advanced illustration skills or expensive software. | Small business owners, hobbyists, and content creators of all skill levels. |
At the end of the day, AI makes creating high-quality cartoons faster, more flexible, and accessible to anyone with an idea. What used to be a specialized skill is now a simple, creative process.
The global animation market was valued at an incredible USD 436.24 billion in 2024 and is expected to nearly double by 2034, largely because of how accessible these technologies have become. For a hands-on look, you can try out tools like Face To Cartoon and see the results for yourself.
If you want to get into the nitty-gritty of how it all works, our detailed guide on AI-driven image-to-image conversion over at https://www.veo3ai.io/image-to-image is the perfect place to start.
Picking the Perfect Photo to Cartoonize
The final cartoon you get is only as good as the photo you start with. Think of the AI as an incredibly talented artist who follows your instructions to the letter—give it a great reference, and it'll hand you back a masterpiece. A solid starting photo gives the AI all the visual information it needs to work its magic.
This doesn't mean you need a professional camera rig or a studio setup. It's really just about choosing a picture where the main subject is clear and easy to see. You want to take the guesswork out of it for the AI so it can focus on the creative stuff, not on trying to figure out what it's even looking at.
Clarity and Focus Come First
The most critical thing? Your subject needs to be sharp and in focus. The AI works by analyzing the edges, shapes, and tiny details to map out the structure of your photo. If the image is blurry, all that crucial information gets smudged, and the AI has to guess what's there. That's when you get weird, distorted, or muddy-looking results.
For instance, a portrait where the person's eyes are crystal clear and their facial features are well-defined will always generate a better cartoon than a blurry selfie snapped in a dark room. The AI can take those sharp features and translate them beautifully into expressive, stylized lines.
Pro Tip: Always start with the highest-resolution photo you have. A crisp, high-quality image feeds the AI more data to work with, which directly translates to a cleaner, more detailed, and professional-looking cartoon.
Why Lighting and Contrast Matter So Much
Good lighting is what gives your subject shape and dimension. Photos with strong, clear light and a nice balance between the bright and dark areas help the AI "see" in 3D. If the lighting is flat and washed out, your subject can look two-dimensional, which usually results in a less dynamic cartoon.
On the flip side, a photo that's too dark or full of deep shadows can hide important details, forcing the AI to invent features that aren't really there.
- Go for good light: Look for photos taken in natural light, where the subject is lit nicely from the front or the side.
- Check the contrast: Try to avoid pictures that are blown out (too bright) or underexposed (too dark). A balanced photo is always the best starting point.
A Few Simple Edits Go a Long Way
You don't need to be a Photoshop wizard to prep your image. Just a couple of quick tweaks can make a huge difference in your final image to cartoon conversion.
Before you upload your photo to a tool like Veo3 AI, I'd recommend spending 30 seconds on these fixes:
- Crop in Tight: Frame your subject so they fill most of the picture. Get rid of any busy backgrounds or dead space. This tells the AI exactly what to focus on, and it's especially important for portraits.
- Bump Up the Contrast: A slight boost in contrast can make the details in your photo pop. This gives the AI a much clearer roadmap to follow.
- Add a Touch of Sharpening: If your photo is just a little soft, a gentle sharpening filter can help define the edges. Just don't go overboard, or it can look unnatural.
Mastering AI Prompts and Styles
Okay, with your photo prepped and polished, we get to the fun part: telling the AI what to do with it. This is where you graduate from applying a simple filter to becoming a true art director. The trick is understanding how pre-set styles and your own custom text prompts work together to get the final look you're after.
Think of it this way: a style gives the AI a broad artistic foundation—like "Anime" or "Modern 3D"—while your prompt provides the specific, nuanced details that make the piece uniquely yours. You're the director, and the AI is the artist waiting for your instructions.
Before we even get to the AI, remember that the quality of your original photo lays the groundwork for everything that follows.
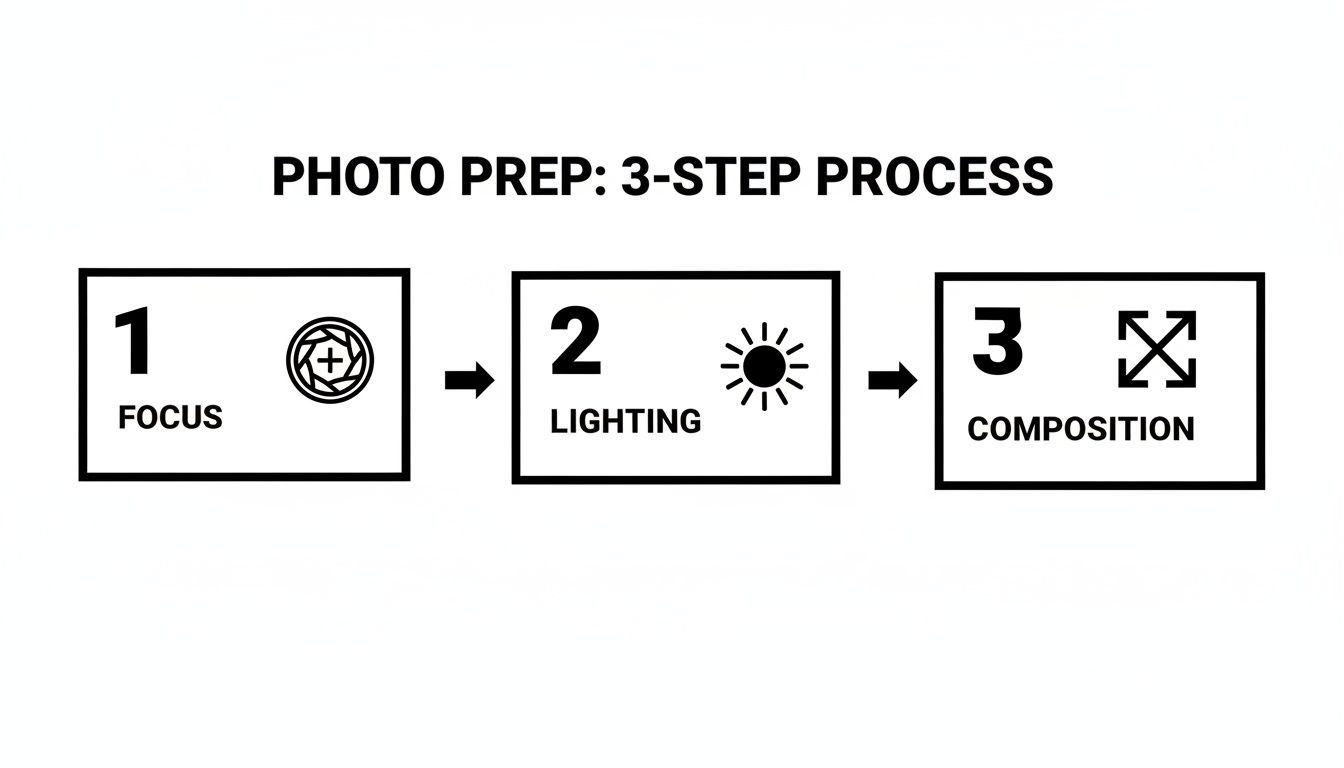
This quick flowchart drives home the point: a sharp focus, good lighting, and a strong composition are the building blocks of a great cartoon conversion. Garbage in, garbage out, as they say.
Navigating the Style Library
Most AI image tools, including Veo3 AI, come with a library of built-in styles. I always treat these as my starting point. It’s a whole lot easier to get close to your vision by picking a base style instead of trying to describe an entire art movement from scratch in a text prompt.
You'll typically find options like:
- 2D Illustration: Perfect for that classic, flat-shaded cartoon look.
- Anime: Your go-to for capturing that distinct Japanese animation aesthetic.
- Modern 3D: This is what you want for visuals with a Pixar-like, computer-generated feel.
- Watercolor: Creates a softer, more artistic result with beautiful, blended colors.
My advice? Always start by selecting a pre-set style that generally matches what's in your head. It’s far more effective to tweak an existing style with a prompt than it is to build a complex look from the ground up.
Writing Prompts That Actually Work
This is where the real magic happens. Your text prompt is your direct line to the AI, letting you fine-tune everything from the overall mood to the tiniest details. The difference between a bland result and a stunning one often comes down to the prompt's specificity.
Let's walk through a real-world example. Say you've got a great photo of your dog playing in the park.
- A weak prompt would be: "Turn my dog into a cartoon."
- A strong prompt, however, looks like this: "A playful golden retriever in a Ghibli-inspired anime style, soft watercolor background, vibrant green grass, warm afternoon sunlight."
See the difference? The second prompt gives the AI so much more to work with. It specifies a famous sub-style (Ghibli), a texture (watercolor), and even details about the lighting and environment. This is what separates a basic conversion from a piece of genuine art.
This demand for higher-quality, more controllable AI creations is driving huge growth in the industry. The generative AI animation market is projected to explode from USD 2.1 billion in 2024 to USD 15.9 billion by 2030, all because creators like us are demanding more powerful and intuitive tools.
The best prompts are a mix of artistic style, subject description, and environmental mood. Don't just describe what's in the picture; describe how you want it to feel.
If you're interested in the nitty-gritty of how these algorithms interpret styles, our guide on AI style transfer is a fantastic read. It pulls back the curtain on the technology that makes all this creative work possible.
Bringing Your Cartoon to Life with Animation
Creating a static cartoon from your photo is cool, but that’s really just the starting point. The magic happens when you introduce motion, turning that still image into a dynamic asset that can actually stop someone from scrolling right past it. With a tool like Veo3 AI, this part of the process is surprisingly simple, letting you add subtle yet powerful movements without getting tangled up in complex animation software.
This isn't about trying to become a Pixar animator overnight. It’s about using small, deliberate movements to elevate your image. Imagine a slow camera pan across a cartoon landscape you’ve just created, or a gentle zoom-in on a character’s expression. These little touches are what give your content a professional polish and make it far more engaging.
Adding Simple Motion with AI Settings
Most AI video tools give you a straightforward set of animation controls. These are your go-to options for breathing some life into your cartoon. Instead of a confusing dashboard with a million sliders, you’ll find presets for high-impact movements that you can apply with a single click.
You can usually experiment with a few common effects:
- Camera Pan: This gives you that smooth side-to-side or up-and-down sweep across the image. It’s perfect for revealing a wider scene or just adding a bit of cinematic flair.
- Zoom In/Out: A slow zoom is one of the best ways to direct the viewer’s focus. You can use it to build a little drama or highlight a specific detail in your cartoon.
- Character Blink: If you're working with a portrait, a simple blink command can add an uncanny amount of life and personality. It's a small detail that makes a huge difference.
These built-in features are fantastic for banging out quick, eye-catching clips for things like Instagram Stories or website banners, where that tiny bit of motion is all you need.
The goal here isn't to create an epic film. It's to make your image feel alive. Even a three-second clip with a subtle pan is infinitely more interesting than a static picture.
Guiding the Action with Animation Prompts
When you want to get more specific, you can start using text prompts to direct the action. This is where you go beyond basic camera moves and start telling the AI exactly what you want your character to do. It's as simple as combining your original style prompt with a new command for movement.
For instance, you could take your cartoon character and add a prompt like, "character smiling and waving gently at the camera." The AI will then generate a short clip that interprets that action, all while keeping the art style consistent. To get a better feel for how this works, take a look at our guide on how to make animation from photos.
Fine-Tuning Your Animation Clip
Once you’ve got the motion down, the last step is to dial in the technical settings. This makes sure your clip looks great and performs well on whatever platform you're sharing it on.
- Animation Length: Keep it short. On social media, clips between 3 to 8 seconds almost always perform best.
- Frame Rate (FPS): I always recommend sticking to 24 or 30 FPS. This gives you that smooth, natural-looking motion. Anything lower can start to look a bit choppy.
- Looping: For things like GIFs or short video backgrounds, turn this on. A seamless loop can keep viewers engaged for much longer.
The ability to quickly turn an image into a cartoon and then animate it is a huge deal. The animation market is projected to hit nearly USD 400 billion by 2025, and AI-driven content is a massive part of that growth. If you're serious about creating dynamic visuals, diving into AI powered video creation is a great next step.
Bringing Your Cartoon to Life: Exporting and Sharing
<iframe width="100%" style="aspect-ratio: 16 / 9;" src="https://www.youtube.com/embed/MrPoCGHM80E" frameborder="0" allow="autoplay; encrypted-media" allowfullscreen></iframe>
Once you’ve put the finishing touches on your new cartoon, the final step is to get it out into the world. Exporting might sound like a simple "save as" command, but it's really about choosing the right settings to ensure your creation looks just as crisp and professional on Instagram as it did in the editor.
The goal here is to preserve every ounce of quality Veo3 AI produced. A small misstep during export can lead to that blurry, compressed look that just ruins great artwork.
Think of your export settings as the final, crucial polish. For any static image, PNG is almost always your best friend. Unlike JPEGs, which can introduce those ugly, blocky artifacts, PNGs use lossless compression. This keeps your clean lines and vibrant colors perfectly intact—an absolute must for that sharp cartoon aesthetic.
Fine-Tuning for Different Platforms
Where your audience sees your work dictates your export strategy. A one-size-fits-all approach just doesn't cut it when you're dealing with the unique technical quirks of platforms like TikTok, Instagram, or even your own professional website. Each one processes media a little differently.
When it comes to animated clips, your two main contenders are MP4 and GIF.
- MP4: This is the industry standard for video for a reason. It gives you fantastic quality without a massive file size, making it perfect for Instagram Reels, TikToks, and professional posts on LinkedIn. It also supports audio and delivers fluid motion, which is essential for anything more than a quick loop. For the best results, always stick to 24 or 30 frames per second (FPS).
- GIF: These are your go-to for short, looping animations you might embed in an email newsletter or on a website. They're supported everywhere but have a limited color palette, so they shine with simpler, bolder cartoons. Try to keep them under 5-7 seconds to keep file sizes from ballooning.
Pro Tip: Always match your export settings to the platform's native format. If you’re making an Instagram Story, export a 9:16 vertical video. This ensures it fills the screen perfectly and creates a much more immersive experience for your viewers.
Optimal Export Settings for Popular Platforms
To make things even easier, I've put together a quick-reference guide. Following these guidelines will help you sidestep weird cropping, fuzzy compression, or other quality killers.
| Platform | Recommended Format | Ideal Resolution | Pro Tip |
|---|---|---|---|
| Instagram/TikTok | MP4 (Video), PNG (Image) | 1080x1920 (Vertical) | Keep video clips short and punchy, ideally under 15 seconds, to maximize engagement. |
| LinkedIn/Website | MP4 (Video), PNG (Image) | 1920x1080 (Horizontal) | Prioritize high quality. These platforms are less forgiving of pixelated or blurry content. |
| Email Newsletters | GIF | 600px wide (max) | Optimize for a small file size to ensure fast loading times in different email clients. |
Taking a moment to get these settings right ensures your hard work pays off, capturing your audience's attention with a clean, professional-looking asset every time.
Got Questions? We’ve Got Answers.
Diving into AI art for the first time? It's completely normal to have a few questions pop up. Whether you're stuck on a specific step or just curious about how it all works, getting clear answers is the best way to keep your creative momentum going. I've put together some of the most common questions I hear about the image-to-cartoon process to help you out.
Can I Really Use Any Photo?
You can, but the quality of your starting image makes a huge difference. Think of it as "good in, good out." Photos with clear subjects, decent lighting, and a reasonably high resolution almost always give the best results. Portraits, landscapes, and pictures of your pets are fantastic candidates.
Where things get tricky is with images that are blurry, washed out, or incredibly busy. The AI does its best work when it can clearly pick out the main subjects of a photo. If it has to guess what it's looking at, the final cartoon can end up looking a bit muddled.
How Can I Get a Specific Look, Like Pixar or Anime?
Getting a very specific style, like something you'd see from Pixar or in a classic anime, is more art than science. It's all about blending the built-in styles with your own descriptive prompts. You won't find a single "Pixar" button, but you can guide the AI to get incredibly close.
- For that Pixar Vibe: Start by selecting the "3D Model" style. Then, in the prompt box, try adding phrases like, "soft lighting, expressive eyes, rendered in 3D, cinematic quality."
- For an Anime Look: Go for the "Anime" or "2D Illustration" setting. Your prompts are key here. Use things like, "90s anime aesthetic, cel-shaded, vibrant colors, Studio Ghibli inspired background."
The real secret is to just play around with different combinations of words. You'll be surprised how a small change in your prompt can totally transform the final image.
Copyright for AI-generated art is a tricky, fast-moving legal space. Always make sure you have the rights to use your source image, and take a minute to read the terms of service for any AI tool you use. Some platforms might claim rights to the art you create with their service.
What About the Legal and Copyright Stuff?
This is a big one, and it's smart to ask. First things first: you absolutely must have the legal right to use the original photo. Grabbing a copyrighted image off the internet and running it through the AI can land you in hot water.
As for the cartoon you create, ownership can be a bit of a gray area and often depends on where you live. Generally, if the AI's output is heavily based on your own photo and your unique creative prompts, you have a strong claim to ownership. Still, it's always a good idea to check the AI tool's terms of service so you know exactly where you stand.
Why Does My Animation Look Choppy?
If your final animation looks more like a slideshow than a smooth video, the culprit is usually the frame rate (FPS). For motion that looks natural to the human eye, you'll want to aim for at least 24 FPS. The standard for most online video is 30 FPS, which is even better. Anything lower than that is going to look jerky.
Poor quality can also come from the export settings. When you save your animation, look for a quality or bitrate setting and choose a higher option. And remember, always start with a high-resolution cartoon image before you even begin the animation process. A fuzzy source image will only lead to a fuzzy video.
Ready to turn your own photos into amazing cartoons and animations? Veo3 AI has everything you need, all in one free and straightforward platform. Start creating for free today!
Our Verdict
After reviewing the available options and capabilities for image to cartoon, we recommend taking a hands-on approach: start with a free trial of the leading platforms, test with your actual use cases, and upgrade to the plan that best matches your volume and quality requirements. The AI tools in this space are advancing rapidly, making now an excellent time to integrate them into your content creation workflow.
Related Articles
Continue with more blog posts in the same locale.

Animating for Beginners: Create with Veo3 AI
Learn animating for beginners with Veo3 AI. Create your first animated social clip from text & get workflow tips. No experience needed.
Read articleHow to Animate a Logo: A Practical Guide for 2026
Learn how to animate a logo from scratch. Our guide covers planning, AI tools like Veo3, pro tips on timing, and exporting for web and social media.
Read article
Minimax Hailuo AI: A Guide to Cinematic Video Generation
Unlock cinematic video with our guide to Minimax Hailuo AI. Learn its capabilities, how it compares to other models, and how to use it in your workflow.
Read article