Creare Animazioni da Foto con l'IA: Guida Completa
Scopri come creare animazioni da foto con potenti strumenti IA. Questa guida copre preparazione immagini, prompting IA ed esportazione per i social media.
Veo3 AI · 23 min read · Dec 6, 2025
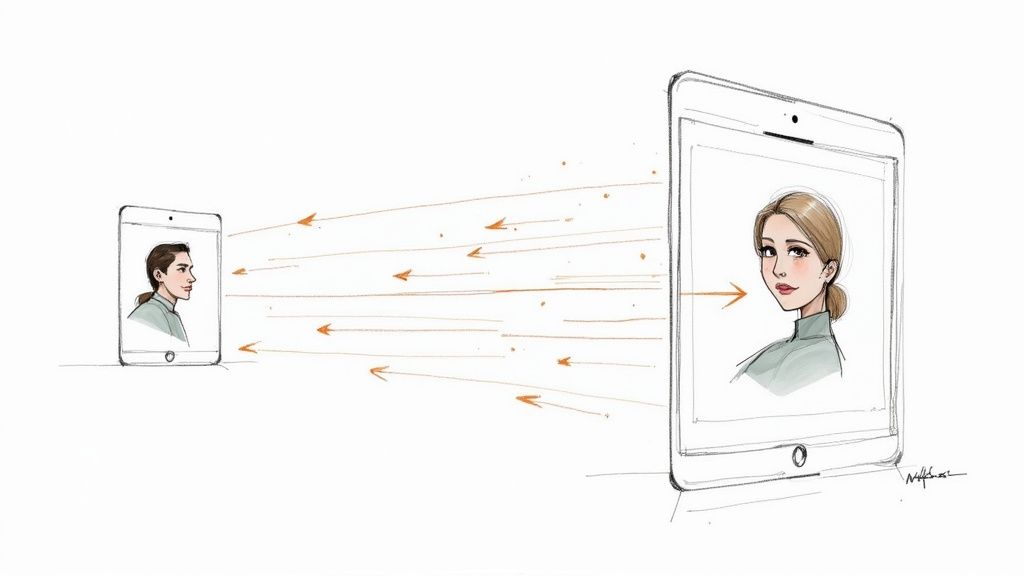
Hai mai desiderato che una bella foto potesse fare di più che restare lì ferma? Che un singolo momento congelato potesse mostrare l'intera storia: una brezza sottile che fa frusciare le foglie, un sorriso gentile che si allarga su un volto o il vapore che sale da una tazza di caffè fresco.
Questa guida serve proprio a sbloccare quel potenziale nascosto. Ti spiegherò come i moderni strumenti AI possono dare vita alle tue immagini statiche, trasformandole in piccoli video accattivanti. Saltiamo la ripida curva di apprendimento dei software di animazione tradizionali e passiamo direttamente a un flusso di lavoro pratico che puoi utilizzare oggi stesso.
Dare Vita alle Tue Foto Statiche con l'AI
L'idea è semplice ma potente: prendi un'immagine statica, dai a un'AI come Veo3 un semplice comando testuale che descriva il movimento che desideri e guarda mentre genera un breve video clip dinamico. Questo processo evita completamente la necessità di complicati software di animazione "vecchia scuola".
Perché Animare le Foto?
Ammettiamolo, i contenuti visivi dinamici regnano sovrani in questo momento. Che sia sul tuo feed dei social media, su un banner di un sito web o in una pubblicità, le immagini in movimento catturano e trattengono l'attenzione meglio di quelle statiche. È un modo comprovato per distinguersi.
Animando una fotografia, aggiungi un livello di narrazione e profondità emotiva che un tempo era fuori portata a meno che tu non fossi un professionista con competenze specializzate. Ora, chiunque—marketer, artisti, creatori di social media—può far risaltare i propri contenuti visivi. Ciò che una volta richiedeva ore di lavoro noioso ora può essere fatto in pochi minuti.
Punto Chiave: Trasformare le foto in animazioni non è più un'abilità di nicchia per professionisti. È un modo incredibilmente accessibile e potente per chiunque di elevare i propri contenuti e raccontare storie visive più avvincenti.
Non è solo un'intuizione; i numeri lo confermano. Si prevede che il mercato del software di animazione esploderà da 576,7 milioni di USD nel 2025 a ben 1,53 miliardi di USD entro il 2035. Questa crescita è alimentata dall'enorme domanda di strumenti facili da usare nel marketing e nell'intrattenimento.
Cosa Tratta Questa Guida
Sebbene il nostro obiettivo principale qui sia l'animazione di foto, questo fa parte di un quadro molto più ampio di creazione di contenuti basata sull'AI che sta prendendo il sopravvento su tutti i tipi di media.
Nelle prossime sezioni, analizzerò tutto ciò che devi sapere per iniziare con sicurezza. Ecco cosa approfondiremo:
- Come scegliere e preparare le immagini migliori per l'animazione AI.
- Il segreto per scrivere prompt AI efficaci che ottengano esattamente l'azione giusta.
- Un flusso di lavoro passo dopo passo per portarti da una foto statica a un video finale.
- Suggerimenti per ottimizzare e condividere le tue creazioni per il massimo impatto.
Se sei specificamente interessato a dare nuova vita a vecchie immagini, dovresti anche consultare la nostra guida dedicata su come animare vecchie foto per tecniche più su misura. Quando avrai finito qui, sarai pronto per iniziare a creare le tue animazioni fotografiche.
Scegliere e Preparare le Tue Foto per l'Animazione AI
La qualità dell'animazione finita dipende quasi interamente dalla foto di partenza. È un classico caso di "garbage in, garbage out" (spazzatura dentro, spazzatura fuori). Se fornisci all'IA un'immagine di bassa qualità, sfocata o disordinata, otterrai in cambio un video confuso e incoerente.
Pensala in questo modo: l'IA ha bisogno di una tela pulita e ben definita per compiere la sua magia. Dedicando solo pochi minuti iniziali alla selezione e alla preparazione dell'immagine, aumenti drasticamente le probabilità di ottenere un risultato sbalorditivo. Onestamente, questo lavoro di preparazione è probabilmente la parte più critica del processo quando vuoi creare animazioni da foto.
Cosa rende una foto “AI-Friendly”?
Non tutte le foto sono uguali agli occhi di un'IA. Alcune immagini sono naturalmente più facili da interpretare e animare in modo fluido per l'algoritmo. La giusta foto di partenza fornisce all'IA una solida base, offrendo istruzioni chiare su cosa mantenere immobile e cosa portare in vita.
Ecco cosa ho scoperto funzionare meglio:
- Un punto focale chiaro: L'IA deve sapere chi è il protagonista della scena. Le foto con una persona, un oggetto o un punto di riferimento distinti funzionano quasi sempre meglio delle scene eccessivamente affollate in cui il soggetto si perde nel rumore.
- Buona illuminazione e contrasto: Le immagini ad alto contrasto con ombre e luci ben definite sono di grande aiuto. Forniscono all'IA chiari segnali visivi per distinguere tra i diversi elementi. Un'illuminazione piatta e sbiadita, d'altra parte, può confondere molto il modello.
- Alta risoluzione: Inizia sempre con la foto alla risoluzione più alta che riesci a trovare. Più pixel significano più dati per l'IA, il che si traduce direttamente in un'animazione più nitida e dettagliata. Un input sfocato produrrà sempre un output sfocato.
La mia regola generale è scegliere foto in cui il soggetto è nitido e lo sfondo è relativamente semplice. Un ritratto con uno sfondo leggermente fuori fuoco è perfetto perché l'IA capisce immediatamente su cosa concentrarsi e cosa trattare come ambiente.
Azzeccare questa selezione iniziale prepara il terreno per tutto ciò che segue. Prima ancora di iniziare a pensare ai prompt, trova una foto che soddisfi questi requisiti. Ti risparmierà un sacco di frustrazione in seguito.
Modifiche semplici che fanno una grande differenza
Una volta trovato un candidato valido, pochi rapidi ritocchi possono portarlo da buono a perfetto. Non è necessario essere dei maghi del fotoritocco. Semplici regolazioni con strumenti gratuiti come Canva o software più avanzati come Adobe Lightroom possono avere un impatto enorme chiarendo le tue intenzioni all'IA.
Di solito mi concentro su queste tre cose:
- Ritaglia per la composizione: Questo è fondamentale. Ritaglia la tua foto per inquadrare il soggetto esattamente come desideri. Se punti a un TikTok o a un Reel di Instagram, ritagliala subito in un rapporto d'aspetto 9:16. Questo assicura che gli elementi chiave siano centrati e non vengano tagliati in seguito.
- Aumenta il contrasto: Un leggero aumento del contrasto può far risaltare il soggetto rispetto allo sfondo. Questa semplice mossa aiuta l'IA a separare meglio il primo piano, portando ad animazioni molto più precise in cui si muovono solo le parti giuste.
- Rimuovi le distrazioni: Vedi un oggetto estraneo o un elemento di disturbo sullo sfondo? Eliminalo. Usa un semplice strumento di rimozione macchie o timbro clone per ripulire la scena. Una tela più pulita permette all'IA di generare movimento senza farsi distrarre da dettagli irrilevanti.
Ad esempio, se hai un ottimo scatto di una persona in spiaggia ma c'è un asciugamano colorato a caso in un angolo, rimuoverlo impedirà all'IA di provare ad animarlo in modo insensato. Queste correzioni rapide sono essenziali quando vuoi creare animazioni da foto per un aspetto professionale o rifinito. Affinano la concentrazione dell'IA, aiutandoti a ottenere una clip finale che sembri pulita, intenzionale e visivamente accattivante.
Scrivere prompt che dirigono l'animazione
Pensa al tuo prompt di testo come alle note di regia per la tua animazione. È il tuo copione, il tuo storyboard e le tue istruzioni di ripresa, tutto in un unico potente comando. Quando vuoi trasformare una foto statica in un video avvincente, le parole che scegli sono tutto. Dire semplicemente all'IA di "farlo muovere" probabilmente ti darà un'animazione traballante e generica. La vera magia accade quando diventi descrittivo.
È molto simile a dare istruzioni a un direttore della fotografia su un set cinematografico. Non diresti semplicemente "riprendi l'attore". Saresti specifico: "Inizia con un primo piano stretto sui suoi occhi, poi allarga lentamente l'inquadratura per rivelare che si trova sulla cima di una montagna all'alba". Questo è il livello di dettaglio che sblocca ciò che l'IA può realmente fare.
E sempre più persone si stanno avvicinando a questo mondo come mai prima d'ora. L'industria globale dell'animazione è stata valutata circa USD 372 miliardi nel 2024 e si prevede che supererà i USD 462 miliardi entro il 2025. Questo boom è dovuto in gran parte a strumenti accessibili che mettono il potere creativo nelle mani di tutti. Se sei curioso riguardo ai numeri, puoi scoprire ulteriori approfondimenti sulla crescita dell'industria dell'animazione su MotionPlayStudio.com.
L'anatomia di un prompt potente
Un ottimo prompt non deve essere un romanzo, ma ha bisogno di struttura. Attraverso molti tentativi ed errori, ho scoperto che un approccio semplice e a strati funziona meglio. Assicura di coprire tutti gli aspetti senza confondere l'IA.
Inizio sempre dalle basi e costruisco da lì:
- Soggetto: Per prima cosa, individua il protagonista della scena. È la persona in primo piano, l'auto d'epoca o le nuvole drammatiche nel cielo? Sii chiaro su cosa dovrebbe muoversi.
- Azione: Ora, descrivi il come. Invece di un generico "muovi", prova qualcosa di più evocativo come "fluttuare lentamente", "sfrecciare via" o "ondeggiare dolcemente nella brezza".
- Stile: Questo definisce l'intera atmosfera. Parole come "cinematografico", "onirico", "ad alta energia" o "sereno" forniscono all'AI un contesto vitale per l'estetica visiva.
- Direzione della telecamera: È qui che puoi davvero elevare il tuo lavoro. Dì all'AI cosa vuoi che faccia la telecamera virtuale. Pensa in termini di "lento dolly zoom", "panoramica da sinistra a destra" o "inquadratura drammatica dal basso".
Stratificando questi elementi, stai essenzialmente costruendo un set completo di istruzioni che lascia ben poco al caso. Il tuo prompt passa da un vago desiderio a un comando preciso.
Aggiungere atmosfera ed effetti ambientali
Oltre alla meccanica di base, la vera arte deriva dall'aggiunta di dettagli che creano un'atmosfera tangibile. Questo è ciò che trasforma un'animazione piatta in un piccolo mondo immersivo. Questi segnali sottili danno l'impressione che la scena esista oltre i bordi dell'inquadratura.
Prova a intrecciare elementi come questi:
- Illuminazione: È la "luce solare dell'ora d'oro che filtra tra gli alberi" o la "luce dura e sterile di una lampadina fluorescente"? La scelta dell'illuminazione cambia tutto.
- Meteo: Una semplice frase come "pioggia leggera che cade sull'asfalto" o "fitta nebbia che rotola sulle colline" può trasformare istantaneamente la storia della tua immagine.
- Dettagli sottili: Non dimenticare le piccole cose. Quei minuscoli movimenti secondari aggiungono una grande dose di realismo. Pensa a "sottile vapore che sale da una tazza di caffè" o "braci ardenti che fluttuano da un falò".
Questi piccoli tocchi sono spesso ciò che separa una buona animazione da una veramente grandiosa. Rendono la scena viva.
Consiglio dell'esperto: Non aver paura di concatenare più comandi in un unico prompt. Qualcosa come: "I capelli di una donna soffiano dolcemente al vento mentre la telecamera fa una lenta panoramica a destra per rivelare un mare in tempesta", è molto più potente di un semplice "fai muovere i suoi capelli".
Prompt d'impatto: Istruzioni AI vaghe vs. specifiche
Per vedere davvero quanto contano i prompt, diamo un'occhiata ad alcuni esempi affiancati. La differenza tra un comando vago e uno specifico è spesso come il giorno e la notte. Creare un prompt solido ti dà risultati prevedibili e di alta qualità, che è esattamente ciò di cui hai bisogno quando crei animazioni da foto per un progetto specifico.
| Goal | Vague Prompt | Specific Prompt | Expected Outcome Difference |
|---|---|---|---|
| Animare un paesaggio urbano | "Fai muovere la città." | "Un time-lapse del traffico cittadino notturno, con scie luminose delle auto che sfrecciano per le strade. Zoom indietro lento." | Il prompt specifico produce un time-lapse dall'aspetto professionale. Quello vago probabilmente restituirà un movimento tremolante, casuale e inutilizzabile. |
| Animare un ritratto | "Fai sorridere la persona." | "Un sorriso sottile e lento si diffonde sul volto della persona, con un battito di ciglia delicato. Lo sfondo rimane statico." | La specificità qui garantisce un'espressione naturale e realistica, evitando l'effetto "uncanny valley" che un comando vago potrebbe creare. |
| Animare una scena naturale | "Anima la foresta." | "La luce del sole filtra attraverso la fitta chioma, con raggi di luce visibili che si spostano lentamente. Le foglie sugli alberi in primo piano frusciano in una brezza leggera." | Il prompt vago potrebbe deformare l'intera immagine in modo innaturale. Quello specifico crea una scena credibile e serena isolando movimenti sottili. |
Come mostrano questi esempi, un linguaggio preciso ti dà un controllo creativo diretto. Più ti eserciti, più svilupperai un'intuizione su quali parole e frasi ti permettono di ottenere i migliori risultati dall'AI. E per chi vuole vedere come questo si inserisce nel quadro generale, la nostra guida su come creare video AI copre l'intero flusso di lavoro dall'inizio alla fine.
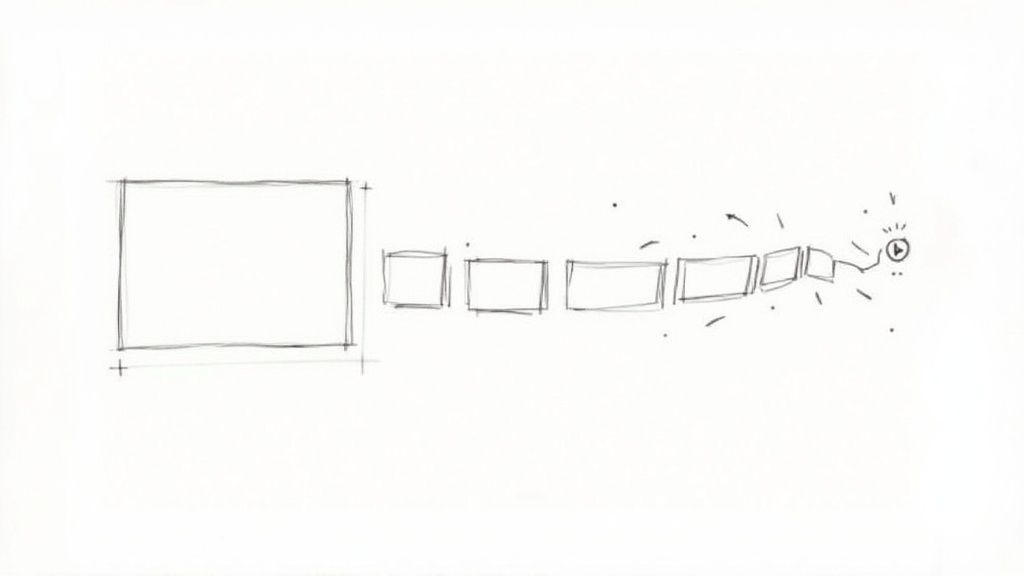
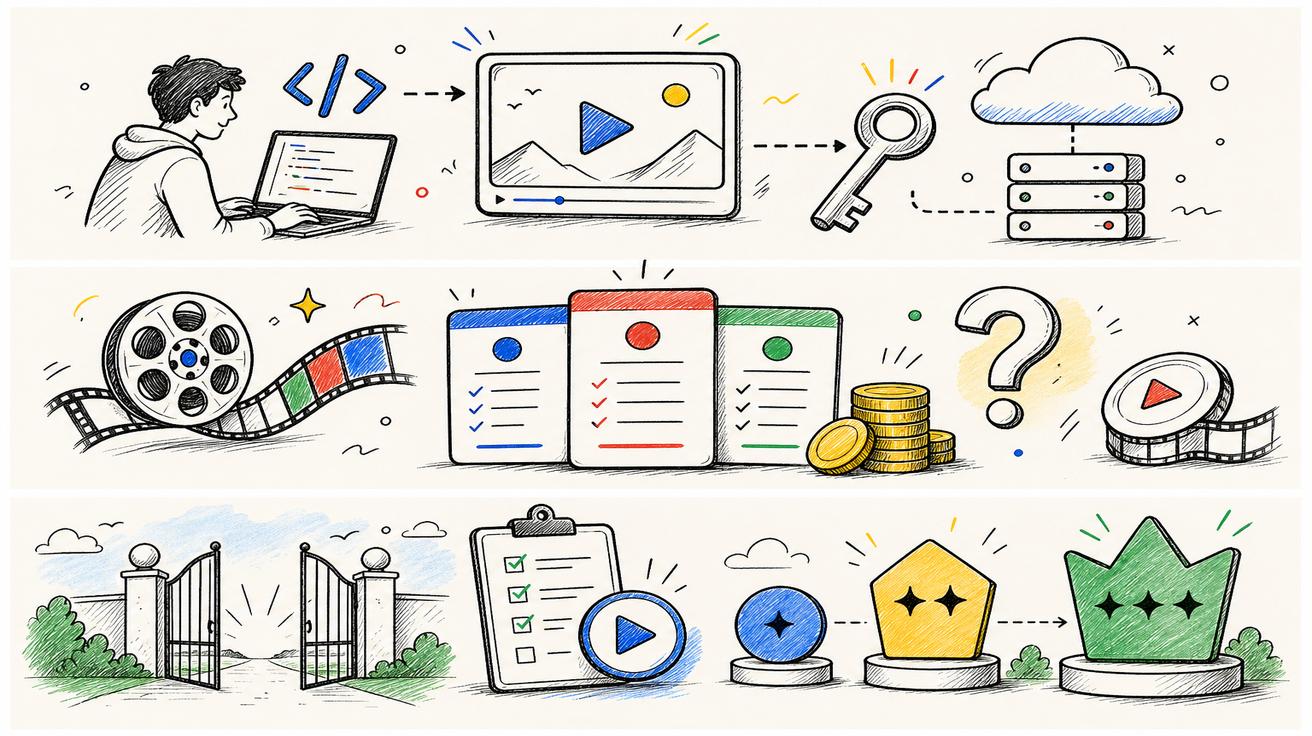
Da un'immagine statica a una clip in movimento: il flusso di lavoro AI
Bene, è qui che avviene la magia. Hai la tua immagine rifinita e un prompt accuratamente elaborato pronto all'uso. Ora è il momento di passare a uno strumento AI come Veo3 e dare vita alla tua idea. Ti guiderò attraverso un processo semplice e ripetibile che ti porterà dal caricamento a una clip video finita e condivisibile.
I giorni in cui servivano più programmi complessi per creare animazioni da foto sono finiti. Le moderne piattaforme AI racchiudono l'intero flusso di lavoro in un unico posto. Carichi un'immagine, descrivi ciò che vuoi, regoli alcuni cursori e premi "genera". È un ciclo creativo coinvolgente che ti incoraggia davvero a sperimentare.
Prendere confidenza con il generatore AI
Quando apri per la prima volta un generatore video AI, di solito trovi un layout piuttosto semplice. Vedrai un'area per caricare la tua immagine, una casella per il tuo prompt di testo e un pannello con varie impostazioni. Non lasciarti sopraffare da tutte le opzioni; ci concentreremo solo su quelle che contano davvero per animare una foto.
Per prima cosa, carica quell'immagine ad alta risoluzione che hai preparato in precedenza. Poi, incolla il tuo prompt dettagliato nella casella di testo. Ma prima di cliccare freneticamente sul pulsante "Genera", parliamo delle impostazioni chiave che ti mettono sulla sedia del regista.
Ecco un semplice modello mentale che uso per strutturare i miei prompt. Si tratta di dare all'AI istruzioni chiare e separate per il soggetto, l'azione e lo stile generale.
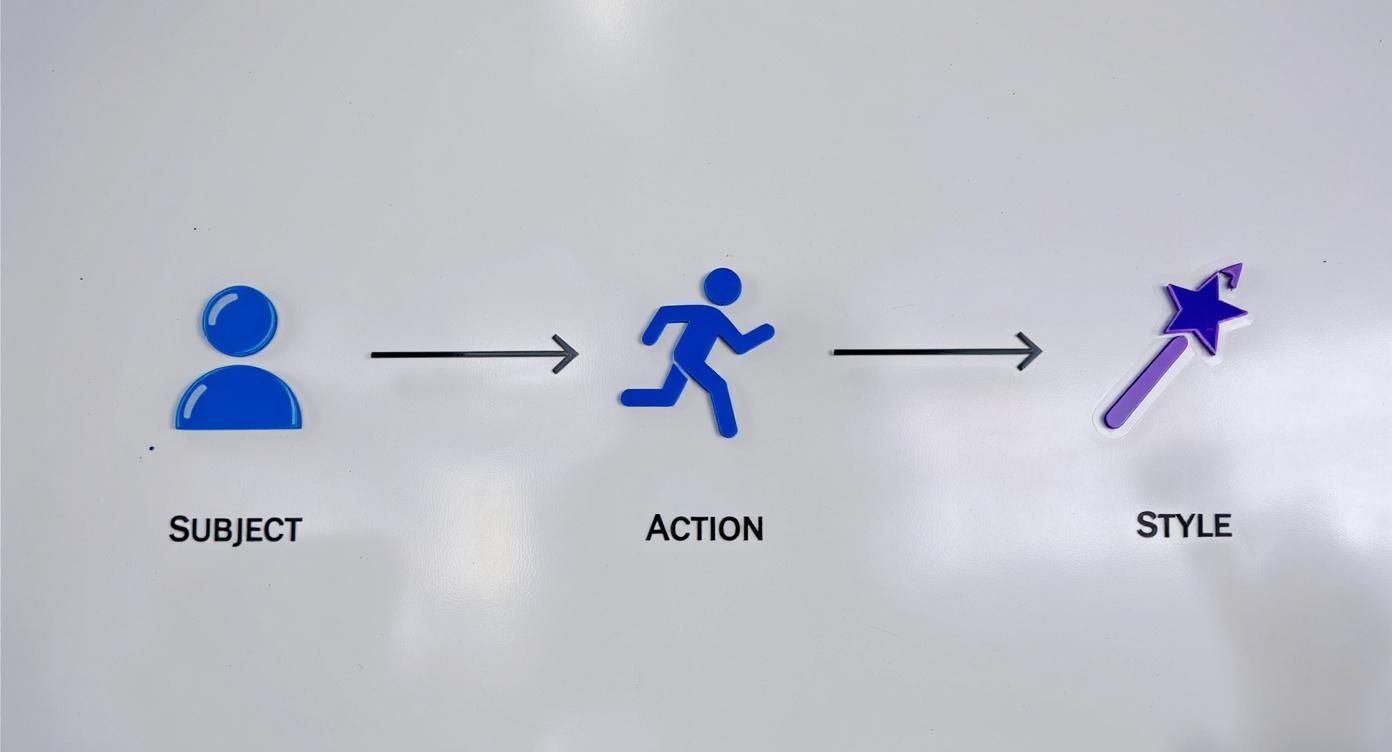
Pensare in questo modo aiuta a mantenere le tue istruzioni pulite e dirette, il che è onestamente il segreto per far fare all'AI ciò che vuoi.
Padroneggiare le impostazioni chiave dell'animazione
Sebbene l'interfaccia possa apparire leggermente diversa da uno strumento all'altro, quasi tutti condividono alcuni parametri fondamentali. Padroneggiare questi cursori e menu è ciò che eleva il tuo lavoro da una generica clip generata dall'IA a qualcosa che sembri intenzionale e curato.
Ecco i controlli principali con cui lavorerai:
- Motion Intensity (Intensità del movimento): Questo è il tuo comando più importante. Un'impostazione bassa crea un effetto sottile, simile a un cinemagraph: pensa a una brezza leggera che muove le foglie. Aumentandola si produce un movimento drammatico ed energico, ottimo per riprese d'azione o panoramiche dinamiche.
- Duration (Durata): La maggior parte di questi strumenti genera brevi clip, solitamente tra tre e otto secondi. Scegli una lunghezza che abbia senso per dove la pubblicherai. Un rapido loop di 3 secondi può essere perfetto per lo sfondo di un sito web, mentre una clip più lunga ti offre più materiale per un montaggio sui social media.
- Style Consistency (Coerenza dello stile): Questa impostazione dice all'IA quanto fedelmente attenersi all'aspetto della tua foto originale. Un valore alto assicura che preservi l'estetica della tua immagine. Abbassarlo dà all'IA più libertà creativa, il che può essere divertente ma spesso porta a risultati imprevedibili.
Il mio consiglio personale: Inizio quasi sempre con l'intensità del movimento impostata bassa, magari intorno al 20-30%, per il primo tentativo. È molto più facile aggiungere energia nella generazione successiva che cercare di calmare un'animazione che è già troppo caotica. Questa piccola abitudine mi fa risparmiare un sacco di tempo e crediti di generazione.
Anteprima, Ritocca e Ripeti
Il tuo primo tentativo è raramente quello definitivo. Lavorare con l'IA è un po' come una danza: tu guidi con le tue istruzioni e il modello segue con la sua interpretazione. La finestra di anteprima è la tua migliore amica qui. È dove vedrai rapidamente cosa ha funzionato e cosa deve cambiare.
Non scoraggiarti se la prima animazione è un po' fuori fase. Forse la telecamera si è mossa troppo velocemente o la parte sbagliata dell'immagine ha preso vita. Non è un fallimento; è solo un feedback per il tuo prossimo tentativo.
Ecco il semplice ciclo di perfezionamento che seguo:
- Genera V1: Usa il tuo prompt migliore e mantieni le impostazioni prudenti.
- Analizza l'anteprima: Guardala un paio di volte. Il movimento sembra giusto? Cattura l'atmosfera che cercavi?
- Modifica una cosa: Questo è cruciale: regola solo un'impostazione alla volta. Se il movimento è troppo debole, aumenta un po' l'intensità. Se la panoramica della telecamera è sbagliata, affina quella parte specifica del tuo prompt.
- Rigenera e Confronta: Crea la nuova versione e guardala accanto alla vecchia. Questo approccio metodico ti aiuta a imparare esattamente come ogni cambiamento influisce sul risultato finale.
Questo ciclo iterativo è il cuore del processo creativo. La crescente domanda di questi strumenti sta alimentando una massiccia crescita del settore. Infatti, il mercato strettamente correlato dei software di animazione 3D è stato valutato a USD 27.23 billion nel 2025 e si prevede che schizzerà a USD 59.12 billion entro il 2032. Questo dimostra quanto le persone vogliano strumenti accessibili in grado di creare animazioni da foto per tutto, dal marketing ai progetti personali. Puoi leggere la ricerca completa sul mercato dei software di animazione 3D per vedere le tendenze che spingono questa tecnologia in avanti.
Una volta soddisfatto dell'anteprima, è il momento di esportare. Di solito vedrai opzioni come MP4 o GIF. Per la maggior parte degli usi, MP4 è la scelta migliore per video di alta qualità sui social media o sul tuo sito web. Le GIF sono ottime per animazioni semplici e in loop nelle e-mail o in luoghi in cui i video non sono supportati. Con quel file scaricato, sei pronto a condividere la tua foto animata con il mondo.
Condividere le tue foto animate per il massimo impatto
<iframe width="100%" style="aspect-ratio: 16 / 9;" src="https://www.youtube.com/embed/n6HC__qvV9Q" frameborder="0" allow="autoplay; encrypted-media" allowfullscreen></iframe>
Hai svolto il lavoro creativo e dato vita a una foto statica: è una grande vittoria. Ma il tuo lavoro non è ancora finito. Portare quell'animazione davanti alle persone, con lo stesso aspetto che aveva sul tuo schermo, è il passaggio finale e più critico. Il modo in cui esporti e ottimizzi il tuo nuovo videoclip può fare la differenza tra qualcosa che cattura l'attenzione e qualcosa che si perde nel rumore.
Quando sei pronto per esportare, vedrai principalmente due opzioni: MP4 e GIF. Le GIF sono semplici e vanno in loop automaticamente, il che è carino, ma hanno alcuni seri svantaggi. Sono vincolate a una tavolozza di colori limitata e spesso risultano in file di dimensioni enormi per immagini di qualità piuttosto bassa.
Onestamente, per quasi ogni uso moderno, MP4 è la strada da percorrere. Ottieni una qualità video di gran lunga migliore con dimensioni del file molto più ridotte, che è esattamente ciò di cui hai bisogno per siti web a caricamento rapido e feed dei social media.
Scegliere le giuste impostazioni di esportazione
Prima di cliccare sul pulsante di esportazione, prenditi un momento per pensare a dove vivrà questo video. Le esigenze tecniche per un video di TikTok sono completamente diverse da quelle per un post di LinkedIn o un banner di un sito web. Se adatti le tue impostazioni alla destinazione, eviterai ritagli strani, pixelizzazione e altri difetti che possono far sembrare il tuo duro lavoro poco professionale.
Uno degli errori più comuni che vedo è esportare un singolo file enorme e cercare di usarlo ovunque. Questo approccio di solito porta a pagine a caricamento lento e a un'esperienza macchinosa per chiunque utilizzi un telefono. La mossa più intelligente è creare alcune versioni diverse per le tue piattaforme più importanti.
- Per i feed dei social media come Instagram o TikTok: Scegli sempre un rapporto d'aspetto verticale 9:16. Riempie l'intero schermo del telefono ed è molto più coinvolgente.
- Per i banner dei siti web: Un classico rapporto d'aspetto widescreen 16:9 di solito funziona meglio qui. La priorità principale dovrebbe essere mantenere le dimensioni del file ridotte per garantire che il tuo sito rimanga veloce.
- Per le campagne e-mail: Questo è uno dei rari casi in cui una GIF piccola e leggera può essere una buona scelta. Alcuni client di posta elettronica hanno ancora difficoltà con i video incorporati e una GIF è una scommessa più sicura.
Intuizione chiave: L'ottimizzazione delle dimensioni del file non è solo una casella tecnica da spuntare: riguarda l'esperienza dell'utente. È molto più probabile che le persone guardino un video che si carica istantaneamente rispetto a uno che va in buffering, specialmente se si trovano su una rete mobile.
Una guida rapida alle specifiche video per i social media
Per eliminare ogni dubbio, ecco una piccola scheda riassuntiva che uso con le migliori impostazioni per le principali piattaforme social. Azzeccare queste specifiche fin dall'inizio aiuta i tuoi contenuti ad apparire curati e a performare meglio, il che è una parte fondamentale di qualsiasi solida strategia di video marketing di formato breve.
Specifiche di esportazione video per i social media
Questa tabella è un pratico riferimento per impostare correttamente i dettagli tecnici per le piattaforme più popolari.
| Piattaforma | Formato Consigliato | Risoluzione Ottimale | Durata Massima |
|---|---|---|---|
| Instagram Reels | MP4 | 1080 x 1920 (9:16) | 90 secondi |
| TikTok | MP4 | 1080 x 1920 (9:16) | 10 minuti |
| Feed di LinkedIn | MP4 | 1920 x 1080 (16:9) | 10 minuti |
| Header del Sito Web | MP4 | 1920 x 1080 (16:9) | 15-30 secondi |
Attieniti a queste linee guida e darai ai tuoi contenuti le migliori possibilità di brillare.
Strategie creative per i tuoi contenuti animati
Ok, il tuo video è stato esportato ed è perfetto. Ora viene la parte divertente: cosa farne? Le foto animate sono incredibilmente versatili e possono essere utilizzate in modi davvero creativi che vanno ben oltre un classico post sui social.
Ecco alcune idee per iniziare:
- Header dinamici per siti web: Sostituisci quell'immagine hero statica sulla tua homepage con una foto sottilmente animata. Aggiunge un fattore "wow" istantaneo che cattura subito l'attenzione del visitatore.
- Annunci social accattivanti: In un feed affollato, il movimento è tutto. Usa una clip animata per attirare l'attenzione su un dettaglio del prodotto o creare un'atmosfera specifica che un'immagine fissa non riesce a catturare.
- Newsletter via email coinvolgenti: Un'animazione ben posizionata in un'email può renderla più viva e moderna, il che può fare miracoli per i tuoi tassi di clic.
- Arte digitale unica: Per artisti e creator, queste animazioni sono perfette per essere vendute come NFT o per far risaltare davvero il tuo portfolio online rispetto alla massa.
Per un'intelligente tattica di promozione incrociata, potresti utilizzare alcuni strumenti gratuiti per creare avatar anime per trasformare un fotogramma chiave della tua animazione in una nuova fantastica immagine del profilo. Questo aiuta a creare un aspetto più coeso e riconoscibile sui tuoi diversi canali. Alla fine della fiera, sapere come creare animazioni da foto aggiunge un nuovo strumento potente e flessibile al tuo kit creativo.
Hai domande sull'animazione di foto con l'IA?
Se hai appena iniziato con l'animazione fotografica IA, probabilmente hai qualche domanda. È uno spazio piuttosto nuovo per la maggior parte di noi, ed è utile sapere a cosa si va incontro prima di tuffarsi a capofitto in un progetto. Chieriamo alcuni dei dubbi più comuni che sento spesso.
La maggior parte delle persone chiede subito informazioni sul controllo. Quanta influenza hai effettivamente sull'animazione finale? La risposta breve è: parecchia, ma non è un telecomando. La tua leva più grande è il prompt testuale. Un prompt super specifico che descriva i movimenti della telecamera, cosa dovrebbe fare il soggetto e persino l'atmosfera può darti un enorme potere di regia. Ma ricorda, l'IA porta sempre il suo tocco creativo, che è metà del divertimento.
Quanto controllo ho davvero sull'animazione?
Mi piace pensare che sia come collaborare con un animatore brillante ma un po' eccentrico. Gli consegni la sceneggiatura (il tuo prompt) e la star dello spettacolo (la tua foto), e l'IA le dà vita. Puoi guidare la performance con incredibile dettaglio, ma non puoi manovrare ogni singolo pixel come un burattino.
È proprio per questo che prendere confidenza con la modifica e la riesecuzione del prompt è fondamentale. Se la prima animazione non è proprio come l'avevi immaginata, non devi scartarla. Modifica semplicemente il prompt, magari aumenta o diminuisci l'intensità del movimento e guida l'IA più vicino alla tua visione. È un dialogo creativo, non un comando.
Il mio punto chiave: Hai un enorme controllo creativo grazie a buoni prompt e impostazioni. I risultati migliori, però, arrivano quando tratti l'IA come un partner creativo. Il tuo compito è guidare, non dettare.
L'intero processo per creare animazioni da foto non consiste tanto nell'ottenere il risultato perfetto al primo tentativo, quanto nello scoprire il prodotto finale attraverso alcuni cicli di collaborazione con l'IA.
Cosa allunga i tempi di generazione di un'animazione?
Il tempo è un altro fattore importante. Quanto dovrai stare lì ad aspettare il rendering della tua clip? Dipende davvero, ma alcune cose fondamentali influenzeranno sempre la velocità. Conoscerle ti aiuta a gestire il tuo tempo, specialmente se hai una scadenza ravvicinata.
Le cose principali che rallentano il processo sono:
- Risoluzione di output: Un video nitido a 1080p richiederà più tempo per essere elaborato rispetto a una clip a 720p. Più pixel significano più lavoro.
- Durata dell'animazione: È matematica semplice. Un video più lungo necessita di più fotogrammi, il che si traduce direttamente in un maggiore tempo di elaborazione.
- Quanto sono occupati i server: Se tutti cercano di generare contemporaneamente, le cose possono diventare un po' lente. A volte, eseguire un lavoro durante le ore non di punta può velocizzare le cose.
La buona notizia è che la maggior parte delle piattaforme oggi è sorprendentemente veloce. Spesso puoi ottenere una breve clip in appena un minuto o due, il che rende facile e divertente sperimentare senza aspettare in eterno.
Quali sono gli errori più grandi che le persone commettono?
Bene, parliamo delle trappole comuni. Se riesci a evitare queste poche cose, ti risparmierai un mondo di frustrazione e otterrai un ottimo risultato molto più velocemente. Secondo la mia esperienza, la maggior parte dei problemi si verifica proprio all'inizio, non con l'IA in sé.
Ecco gli errori più grandi che vedo ripetere continuamente:
- Iniziare con una brutta foto: Questo è, senza dubbio, il problema numero uno. Se la tua immagine di partenza è sfocata, scura o semplicemente troppo caotica, stai predisponendo l'IA al fallimento. Se metti spazzatura, ottieni spazzatura.
- Scrivere prompt pigri: Scrivere semplicemente "muovi" o "anima" è la ricetta per un disastro. L'IA non ha idea di cosa tu voglia, quindi otterrai qualcosa di generico e probabilmente strano.
- Arrendersi dopo un tentativo: Premere "genera", non essere soddisfatti e chiudere la scheda è una grande occasione persa. La magia accade quando affini la tua idea in due o tre tentativi.
Onestamente, se inizi con una foto di alta qualità e un prompt descrittivo, eviterai il 90% dei soliti grattacapi.
Pronto a smettere di pensarci e iniziare a creare? Con Veo3 AI, puoi trasformare le tue immagini statiche in video accattivanti in pochissimo tempo. Provalo gratuitamente e scopri cosa puoi portare in vita.
Related Articles
Continue with more blog posts in the same locale.
Gemini Omni è gratis? Piani, limiti e accesso
Gemini Omni è gratis? Scopri cosa dice ufficialmente Google su accesso a Gemini Omni, piani Google AI, crediti Flow, rollout YouTube, limiti e incognite API.
Read article
Prezzo di Gemini Omni: è gratuito o a pagamento?
Prezzi di Gemini Omni spiegati: accesso gratuito, piani Google AI Plus, Pro e Ultra, crediti Flow, limiti e ciò che non è ancora confermato ufficialmente.
Read article
Gemini Omni API: disponibilità, prezzi e accesso per sviluppatori
Disponibilità della Gemini Omni API spiegata: che cosa Google ha confermato ufficialmente, che cosa resta sconosciuto, segnali sui prezzi, accesso sviluppatori e migrazione sicura.
Read article