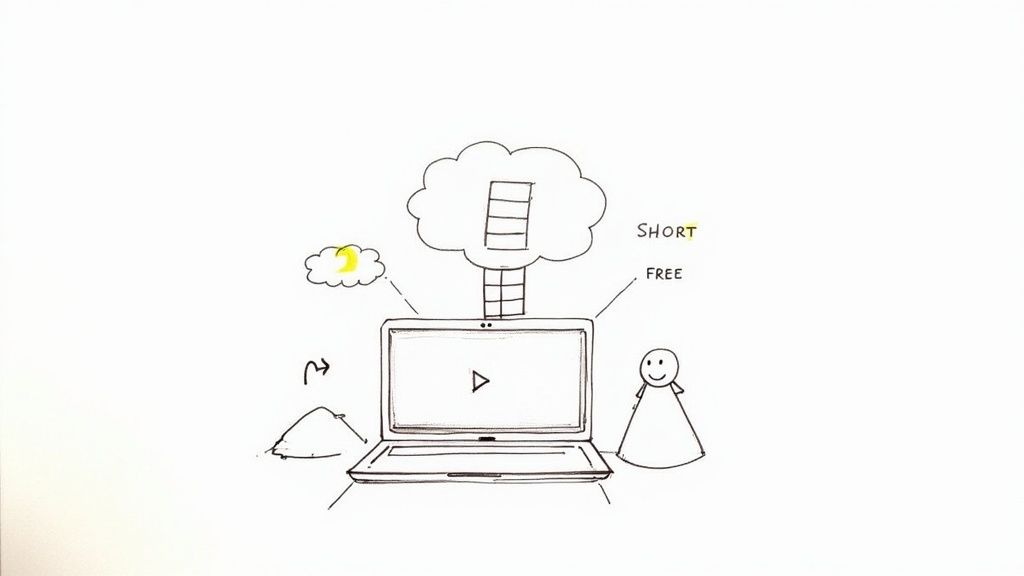
text to video ai free: Create Stunning Clips Today
Discover text to video ai free tools and workflows to create eye-catching clips quickly. Learn prompts, setup tips, and common mistakes to avoid.
Veo3 AI · 25 min read · Nov 19, 2025

The idea of turning simple text into a full-blown video clip for free sounds like science fiction, but it's now a reality. These tools have completely opened up video creation, making it possible for anyone to produce compelling social media posts, quick ads, or educational tutorials without spending a dime.
Quick Answer: Text-to-video AI tools convert written descriptions into fully rendered video clips using generative AI models. Top platforms in 2025 include Google Veo 3, Runway Gen-4, Kling AI, and Pika—offering cinematic quality, controllable camera motion, and outputs up to 4K resolution.
The Reality of Free Text-to-Video AI Tools
The biggest draw of these free platforms is how they eliminate the usual technical headaches and steep learning curves. You can jump right in and start creating. Of course, the output quality can vary quite a bit between them, so it's all about finding the one that clicks with your project's needs.
So, what’s the real appeal?
- No Budget Required: You can experiment and create sample videos on the fly without ever pulling out a credit card.
- Rapid Prototyping: Got an idea? You can generate a quick version, get feedback, and iterate almost instantly.
- Wide Accessibility: Most of these tools are browser-based, meaning they work on just about any device without a beefy setup.
These are the core reasons we've seen such a massive surge in their popularity.
Why Free AI Video Generation Is Exploding
It's not just a niche trend; the demand for free text-to-video AI tools is growing across almost every industry. Analysts currently value this market at around $0.31 billion, but they're projecting it will skyrocket to over $1.17 billion by 2029.
That's a staggering compound annual growth rate (CAGR) of 29.5% – 30.9%. People are clearly seeing the value.
A Quick Look at Top Free Text to Video AI Tools
With so many options popping up, it can be tough to know where to start. Here's a breakdown of the leading free AI video generators, focusing on their unique strengths, limitations, and who they're best suited for.
| Platform | Standout Feature | Free Tier Limit | Ideal For |
|---|---|---|---|
| Runway | Custom models and real-time previews | 1 minute export | Beginners & Marketers |
| Pika Labs | ML-driven animations | 30 seconds per month | Social media clips |
| Veo3 AI | Multi-model cinematic rendering | 3 exports | Professionals & Educators |
This table gives you a snapshot of what each platform brings to the table, helping you make a more informed choice right from the get-go.
Choosing the Best Free AI Video Generator
The "best" tool really depends on what you're trying to create. Your project's length, the specific visual style you're after, and your export needs should guide your decision.
For instance, if you're making a quick, high-energy event recap for social media, the freestyle motion offered by Pika Labs might be perfect. But if you're working on something more polished, like a mini-documentary or a detailed educational video, you'll probably need the higher quality and greater creative control that a tool like Veo3 AI provides.
No matter which one you pick, here are a couple of best practices I always follow:
- Be Consistent with Style Prompts: To keep your video visually coherent, make sure you include specific style keywords (e.g., "cinematic, hyperrealistic, 8k") in every prompt.
- Optimize Your Aspect Ratio: Always adjust the resolution and aspect ratio before you hit render. This saves you a ton of headaches later.
Expert Insight on Free AI Videos
Free tools are leveling the playing field, allowing small creators and solopreneurs to produce content that can genuinely compete with what big studios put out.
This shift is sparking a wave of experimentation and creative storytelling in countless niches. For a deeper dive into this trend, check out a comprehensive guide to AI-powered content creation that explores how these technologies are reshaping workflows.
To get started with Veo3 AI, we’ve put together a step-by-step walkthrough packed with tips and real-world examples. You can find it right here: https://www.veo3ai.io/blog/how-to-make-ai-videos-for-free.
The process is pretty straightforward. You begin by drafting a clear, descriptive prompt and picking a style preset that aligns with your vision. From there, you'll want to define the video's length and format based on where you plan to post it, like TikTok or YouTube Shorts. Always preview your drafts, make small tweaks, and then export in the highest quality possible—usually HD or 4K.
In just a few minutes, you can go from a simple idea to a shareable video clip. While these free tools aren't flawless, they're improving at an incredible pace. With a bit of practice and some smart prompting, you can create truly stunning visuals without touching your wallet.
Common Mistakes to Avoid
As you get started, you’ll likely run into a few common pitfalls. One of the biggest is trying to cram too many details into a single prompt. This can easily confuse the AI and lead to some bizarre, messy results. Another frequent mistake is forgetting to check resolution settings, which often results in blurry, pixelated videos.
Keep an eye out for these traps:
- Ignoring Negative Prompts: Don't forget to tell the AI what you don't want. Failing to exclude unwanted elements can leave you with strange artifacts or misplaced objects.
- Skipping Test Renders: Always generate a short, low-res preview first. It's a huge time-saver compared to waiting for a full render only to find out it's not what you wanted.
- Relying on a Single Tool: Every platform has its strengths and weaknesses. Sometimes, the best approach is to combine clips from different tools to get a better final product.
The key is to keep iterating, refining your prompts, and learning the quirks of each tool. Do that, and you'll be able to deliver compelling videos for social media, marketing, or education—all without a budget.
How to Write Prompts That Actually Create Great Videos
The real secret to getting stunning clips from a text to video AI free tool isn't buried in some complex menu. It's all in the prompt. A lazy prompt gets you a lazy, lifeless video. But a great prompt? That’s your director's script, telling the AI exactly what cinematic magic you want it to create.
Think about it. If you tell an artist to "draw a car," you're leaving everything up to them. But if you ask for a "charcoal sketch of a classic 1960s muscle car, parked under a single streetlamp on a rainy, reflective city street at night," you've given them a vision. The exact same idea applies here.
Honestly, vague prompts are the #1 reason people get frustrated and give up. The difference is night and day.
- Vague Prompt: "a car driving"
- Powerful Prompt: "cinematic side-shot of a vintage red sports car cruising along a coastal highway at sunset, lens flare, high-speed motion blur, 4K"
See the difference? The second one isn't just describing something; it's setting a mood, dictating the camera work, and calling out specific visual effects. It gives the AI a rich blueprint to build from.
The Core Elements of a Killer Prompt
To get consistently good results, you have to start thinking like a film director. I’ve found that breaking down my ideas into four key areas is what takes my clips from "meh" to magnetic.
Your prompt should always nail these four things:
-
Subject & Action: Who or what is the main focus, and what are they doing? Be specific. Don't say "a woman walking." Say "a young woman with long blonde hair, wearing a blue trench coat, walking briskly through a crowded train station."
-
Environment & Setting: Where is this all happening? Paint a picture with details. "A neon-lit Tokyo street at night, rain slicking the pavement, steam rising from food stalls" is worlds better than just "a city street."
-
Cinematography & Style: How should this feel? This is where you grab the camera and define the whole vibe. Use terms like "close-up shot," "drone footage," "slow-motion," or go for a specific look like "hyperrealistic," "anime style," "vintage film look," or "vaporwave aesthetic."
-
Lighting & Mood: What's the emotional tone? Lighting does the heavy lifting here. Try descriptions like "golden hour sunlight," "dramatic, high-contrast lighting," "soft, ambient morning light," or "moody, cinematic blue tones."
When you weave these elements together, you're leaving very little to chance.
Describing Motion and Camera Angles
Static descriptions make for static, boring videos. You have to inject movement into your prompts—not just for the subjects in the scene, but for the camera itself.
Start using real filmmaking language to tell the AI how you want the shot to be filmed.
- Pan Left/Right: "A slow pan right revealing a vast mountain landscape."
- Tilt Up/Down: "Camera tilts up from the character's shoes to their face."
- Zoom In/Out: "Slow zoom in on the mysterious object on the table."
- Tracking Shot: "Tracking shot following a wolf running through the snow."
This is the vocabulary of filmmaking, and most of the better text to video AI free models have been trained on it. Using these terms is what will give your clips that professional, dynamic quality that a simple description just can't touch.
Pro Tip: String your keywords and descriptive phrases together with commas. The AI tends to process these as separate instructions, which helps it layer in all the details you're asking for. Think of each comma-separated phrase as another layer of paint on your canvas.
Nailing Character Consistency
Okay, this is one of the trickiest parts: keeping a character looking the same from one clip to the next. If you're not careful, the AI will just spit out a slightly different person every single time you generate a new scene.
The solution is to create a super-detailed "character description" and then copy-paste it into every single prompt for that character.
Let's walk through an example:
- Clip 1 Prompt: "A rugged male adventurer named 'Alex,' with short brown hair, a light beard, wearing a green canvas jacket, looking at a map. Wide shot, dense jungle background, dappled sunlight."
- Clip 2 Prompt: "A rugged male adventurer named 'Alex,' with short brown hair, a light beard, wearing a green canvas jacket, crossing a rope bridge. Side profile shot, misty gorge below, cinematic."
By repeating that core description—"rugged male adventurer named 'Alex,' with short brown hair, a light beard, wearing a green canvas jacket"—you dramatically improve your odds of the AI rendering the same person. Some newer tools are starting to add features to "lock" a character's face, but for now, this prompt-based strategy is your best bet. Getting this right is what separates a bunch of random clips from a video that actually tells a story.
A Practical Workflow for Creating Your First AI Video
<iframe width="100%" style="aspect-ratio: 16 / 9;" src="https://www.youtube.com/embed/IjF5Uun2jrM" frameborder="0" allow="autoplay; encrypted-media" allowfullscreen></iframe>
Theory is great, but getting your hands dirty is where the real learning kicks in. Let's walk through a repeatable workflow for making your first video with a text to video AI free tool. This process is pretty universal and will give you a solid foundation for most platforms, including powerful options like Veo3 AI.
We'll start by crafting a killer prompt to generate our first clip. Then, I'll show you how to refine the output with reference images, dial in the right settings for different platforms, and fix common problems. By the end, you'll have a clear roadmap to turn any idea into a polished video.
Laying the Groundwork with a Solid Prompt
Everything hinges on the quality of your prompt. A vague instruction will get you a generic, uninspired video. To get something great, you need to give the AI a rich, detailed script that covers the subject, the action, and the environment.
Let's say we're creating a short clip for a travel brand’s social media. Instead of just writing "a person hiking," we need to be way more specific to really guide the AI's creative eye.
A much better prompt:
- "Cinematic aerial drone shot of a solo female hiker with a red backpack standing on a rocky mountain summit at sunrise, golden light illuminating the misty valleys below, epic and inspiring mood, 4K, photorealistic."
See the difference? This prompt gives the AI specific directions on the subject (hiker), camera work (aerial drone shot), lighting (sunrise, golden light), mood (epic, inspiring), and quality (4K, photorealistic). That level of detail is what gets you a high-quality result on the first try.
Refining the Visual Style with Presets and Images
Once your prompt is locked in, the next move is to define the visual aesthetic. Most free AI video tools offer style presets, which are basically creative shortcuts. They're your best friend when you're just starting out.
You'll usually see options like:
- Photorealistic: Aims for that true-to-life, camera-shot look.
- Cinematic: Adds dramatic lighting, professional color grading, and a widescreen feel.
- Anime: Recreates the classic Japanese animation style.
- 3D Animation: Gives you a CGI look, kind of like a Pixar movie.
For our hiker example, the 'Cinematic' or 'Photorealistic' preset is the obvious choice to match the prompt. This one click immediately tells the AI the overall vibe we’re going for. If you want to get into the nitty-gritty of how different tools process prompts, our complete guide on how an AI video generator from text works is a great resource.
For even more control, you can use a reference image. If you've found a photo with the exact color palette or mood you're after, upload it along with your prompt. The AI will analyze the image and try to apply its style to your video, which is an incredibly powerful way to direct the final output.
Optimizing Technical Settings for Your Platform
Before you hit "generate," don't forget the technical specs. So many beginners skip this part, but it's crucial for making sure your video looks great wherever you post it. The two most important settings are the aspect ratio and the motion level.
- Aspect Ratio: This is just the shape of your video. For a standard YouTube video, you want 16:9 (widescreen). For a TikTok or Instagram Reel, you need to use 9:16 (vertical).
- Motion Level: This slider controls how much movement is in the clip. A low setting creates a subtle, almost still image (like a cinemagraph), while a high setting produces a ton of action. I usually start in the middle and tweak it from there.
Getting these settings right from the beginning saves you the headache of awkwardly cropping or re-editing your video later.
Using Negative Prompts for Fine-Tuning
Sometimes, the AI will throw in stuff you didn't ask for. Maybe it adds extra people in the background or generates hands with six fingers (a classic AI quirk). This is where negative prompts become your secret weapon.
A negative prompt is just a simple instruction telling the AI what not to include. You’ll usually find a separate field for it, and you might have to add a prefix like --no.
For our hiker video, if the first version looked a bit too much like a cartoon or had distorted features, we could add a negative prompt like:
--no animation, deformed hands, blurry face. This helps steer the AI away from common generative flaws and gets it closer to what you actually want.
This back-and-forth process—generating, reviewing, and refining with negative prompts—is how you really master any text to video AI free platform.
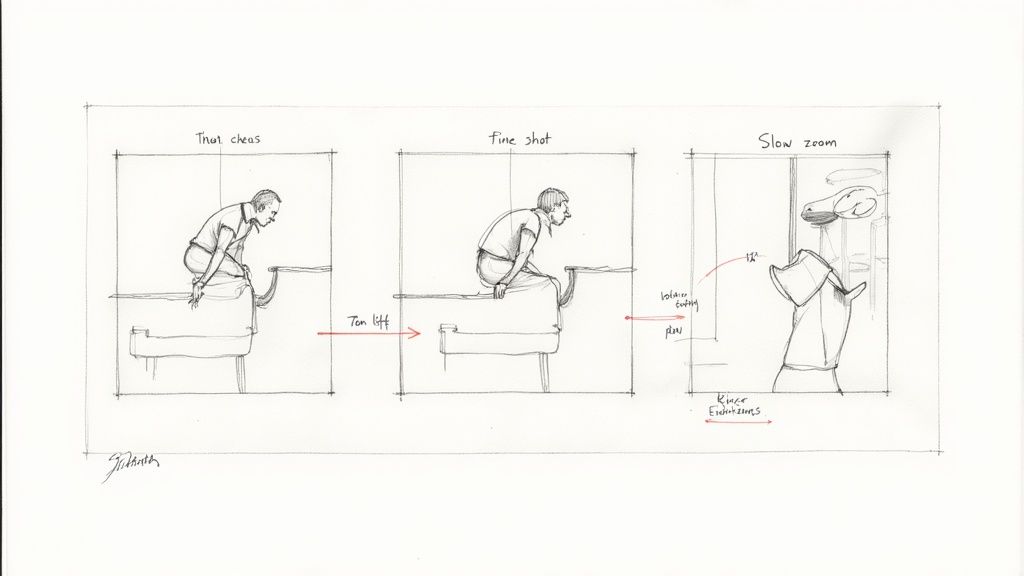
The key to all of this is breaking your idea down into its core pieces. This infographic gives you a simple flow for structuring your prompts.

As you can see, it's a structured approach: start with the main subject, describe their action, and then layer in all the stylistic details that bring the scene to life.
Assembling Your Story Clip by Clip
Free AI video generators usually create short clips, typically just 3 to 10 seconds long. If you want to tell a longer story, you’ll need to generate several clips and stitch them together. The trick is to keep everything looking consistent from one clip to the next.
To do this, you’ll want to reuse the core elements of your first prompt while only changing the action or camera angle for each new clip.
- Clip 1: "Cinematic aerial drone shot of a solo female hiker with a red backpack standing on a rocky mountain summit at sunrise..."
- Clip 2: "Close-up shot of a solo female hiker with a red backpack smiling, looking out at the misty valleys below, sunrise..."
- Clip 3: "Tracking shot following a solo female hiker with a red backpack walking along a narrow mountain ridge, sunrise..."
By keeping the subject ("solo female hiker with a red backpack") and the environment ("mountain summit at sunrise") the same, you're helping the AI produce a coherent sequence of shots. Once you have all your clips, you can use a simple, free video editor like CapCut to arrange them, add some music, and export your final story.
For those looking to get into specific tools, checking out a practical guide to Wan2.2 GGUF video generation can be really helpful. Honestly, this hands-on approach is the fastest way to build your skills and start making stuff that truly stands out.
Advanced Techniques to Elevate Your AI Videos
 Once you get the hang of basic prompting, the real fun begins. It's time to start pushing the boundaries of what a text to video ai free tool can actually do. The secret to making your content look professional isn't just generating cool clips—it's learning how to make those clips tell a story.
This means you have to stop thinking of each generation as a finished product. Instead, see it as a single shot in a longer film sequence. The biggest hurdle you'll face is keeping everything looking consistent. If you don't have a plan, you'll end up with a random jumble of scenes that feel disconnected. Let's dig into how to string your prompts together to build a real narrative where your characters and style stay the same from start to finish.
Building Scenes with Multi-Prompt Sequencing
Start thinking like a film director. You wouldn't shoot an entire scene in one long, boring take, would you? Of course not. You'd use a mix of shots: a wide shot to set the scene, a medium shot to show the action, and a close-up to capture emotion. You can do the exact same thing with multi-prompt sequencing.
This technique is all about creating a series of prompts where each one builds on the last. The end goal is to generate a handful of short clips that you can later stitch together into a seamless scene.
For example, imagine we want to create a short sequence in a blacksmith's shop:
- Prompt 1 (The Establishing Shot): "Wide angle, a medieval blacksmith's forge, embers glowing in the hearth, anvils and hammers scattered around, cinematic, moody lighting."
- Prompt 2 (The Action Shot): "Medium shot, a blacksmith with a heavy beard and leather apron hammers a glowing sword on an anvil, sparks flying."
- Prompt 3 (The Detail Shot): "Extreme close-up on the glowing sword, intricate patterns visible on the steel, heat haze rising from the metal."
By creating these three clips and then editing them in order, you've suddenly built a dynamic scene with a clear narrative arc. It’s a mini-story, not just a random animation.
Maintaining Character and Style Consistency
Consistency is what sells the illusion. Without it, your sequence falls apart. The best way I’ve found to keep things on track is to create a "master prompt" that defines your character and the overall visual style. You'll reuse this core description in every related prompt to act as an anchor for the AI.
Let's cook up a character description: A rogue space smuggler, 'Kael,' with a cybernetic eye, weathered leather jacket, and a cynical smirk.
Now, let's drop Kael into a couple of scenes:
- Scene 1: "A rogue space smuggler, 'Kael,' with a cybernetic eye, weathered leather jacket, and a cynical smirk, leaning against the wall of a neon-lit alleyway in a futuristic city."
- Scene 2: "A rogue space smuggler, 'Kael,' with a cybernetic eye, weathered leather jacket, and a cynical smirk, checking a holographic map projected from his wrist device."
Simply copying and pasting that core description dramatically increases the odds that the AI will render the same character in both clips. It's a low-tech solution, but it's incredibly effective.
The most impactful AI videos often come from creators who think like editors. They generate more clips than they need, giving them the flexibility to choose the best "takes" and cut them together for maximum effect.
There's no denying how fast this space is growing. The global AI video generator market was valued at $534.4 million and is expected to explode to $2.56 billion by 2032. That's a massive 20.0% CAGR, driven by businesses in marketing and entertainment who are using these tools to slash production costs.
Commanding the Camera with Motion Prompts
Static shots are boring. If you want to inject some energy and professionalism into your videos, you have to tell the AI's virtual camera what to do. Using specific keywords for camera movement can turn a flat scene into a dynamic and engaging shot.
Try adding these director-level commands into your prompts:
slow zoom in: Perfect for building tension or focusing on a critical detail.pan leftorpan right: Great for revealing a landscape or following a character's movement.dolly forward: This move makes the viewer feel like they are physically moving into the scene.crane shot: A big, sweeping motion that's ideal for dramatic reveals.handheld shaky cam: Use this to add a raw, documentary-style feel or a sense of urgency.
Tossing these terms right into your prompt gives you so much more control. For example, "A detective inspecting a clue, slow zoom in on his face" is infinitely more compelling than the same prompt without the camera command. To get even better, it’s worth taking some time to learn more about advanced video effects and how they can be layered in. When you combine smart sequencing with deliberate camera work, you're not just making AI clips anymore—you're telling captivating visual stories.
A Word on Ownership and Ethics in AI Video
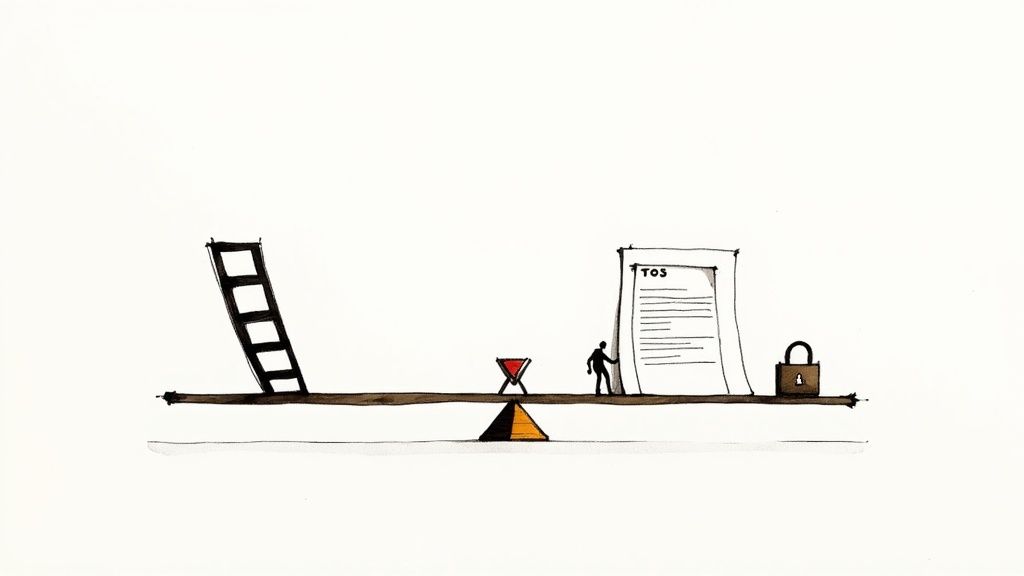
It’s easy to get caught up in the magic of creating something from nothing with a text to video AI free tool. But before you start publishing everything you make, we need to talk about the less glamorous—but absolutely critical—side of things: ownership and ethics. These platforms aren't just creative sandboxes; they have rules, and knowing them upfront can save you a world of headaches later on.
The first question every creator asks is, "Do I actually own this?" The answer, frustratingly, is "it depends." It's almost always buried in the platform's terms of service. Some free AI video generators give you full commercial rights, while others might restrict you to personal, non-commercial use only. This is a massive distinction if you're planning to use these videos for your business or on a monetized YouTube channel.
Who Owns the Content You Create?
While the trend seems to be leaning toward creators owning their work, you can't assume that's the case everywhere. A platform like Veo3 AI, for example, is pretty clear about giving you ownership, but that's not the industry standard yet. You absolutely have to read the terms.
Keep an eye out for clauses where the service grants itself a license to use or display the content you generate. This is usually for their own marketing, but it’s something you need to know.
My rule of thumb is this: if you plan to make money from it, double-check the commercial usage rights. A video for a personal blog post is a world away from a video used in a paid ad campaign.
Taking a few minutes to verify this protects you from having your content taken down or, worse, your account suspended for violating policies you never knew existed.
Staying on the Right Side of Copyright and Fair Use
The law is still playing catch-up with AI, and copyright is one of the biggest gray areas. Where things get particularly dicey is when you create videos that look a little too familiar. Prompting an AI to generate a video of a plucky boy wizard at a magic school or a space hero with a laser sword puts you on thin ice.
Even though the AI is technically creating a new asset, if it’s a clear knockoff of existing intellectual property, you could be facing an infringement claim. People often throw around the term "fair use," but it's a complicated legal defense, not a free pass to copy whatever you want.
Here’s some practical advice:
- Don't Use Protected Names: Avoid using names of celebrities, brands, or copyrighted characters in your prompts. It's the fastest way to get into trouble.
- Draw Inspiration, Don't Duplicate: Instead of "a video of Mickey Mouse," try "a cheerful, cartoon mouse with big round ears and red shorts." That subtle shift in your prompt can be the difference between an original creation and a potential lawsuit.
What Happens to Your Prompts and Data?
Finally, think about what you’re feeding the machine. Every prompt you write and every image you upload to a text to video AI free service gets sent to their servers. Many companies state in their privacy policies that they might use that data to help train their AI models.
This should make you think twice if you're working with sensitive information. I would strongly advise against uploading confidential company data, mockups of unreleased products, or private photos unless you've read the data policy and are 100% comfortable with how it will be handled. Creating responsibly is just as much about protecting the data you input as it is about the content you output.
Got Questions About Free Text-to-Video AI?
Jumping into AI video creation brings up a lot of questions. It's a brand-new space that's moving incredibly fast, so it’s natural to feel a bit lost. Let's walk through some of the most common things people ask when they first fire up a free text-to-video AI tool.
Getting these answers straight from the beginning saves you a ton of headaches down the road and helps you get the most out of these amazing tools.
Are the Free AI Video Generators Really Any Good?
Yes, absolutely—if you know how to use them. The free versions of most tools usually have some limits, like a watermark, a cap on video length, or a certain number of free exports per month. But the core technology powering them is surprisingly powerful.
You can create some fantastic content for social media, quickly mock up marketing ideas, or just have fun with a personal project. The secret is getting good at writing prompts. When you learn how to be creative within the free tool's limits, you can pump out some seriously impressive videos without ever touching your wallet.
How Do I Fix the Weird-Looking Faces and Hands?
Ah, the classic AI nightmare fuel. This used to be a huge problem, but thankfully, the models are getting smarter. Your best defense is a ridiculously specific prompt. Don't just ask for "a person waving." That's way too vague.
Instead, try something like: "close-up shot of a woman's face, smiling warmly, photorealistic detail, waving with a natural, open palm." This gives the AI much more concrete direction to follow.
Another pro tip is to use negative prompts. These tell the AI what you don't want to see. Adding --no distorted hands, blurry face, extra fingers to your prompt can clean up the final result in a big way.
So, Which Free Text-to-Video AI Is the Best?
Honestly, the "best" one changes almost weekly and really depends on what you're trying to create. Tools like Runway and Pika are incredibly popular for a reason—they offer a solid balance of power and user-friendliness. But new players are entering the game all the time.
My advice? Pick two or three of the top-rated free tools and just play with them for an afternoon. See which one feels right to you. You'll quickly discover which interface you prefer and which one nails the specific artistic style you're going for.
Some generators are masters of cinematic, realistic video, while others are built for wild animations or abstract visuals. The best tool is the one that clicks with your creative workflow.
Can I Actually Use These Videos for My Business?
This is a big one, and the answer is buried in the fine print: always check the terms of service. You have to read the licensing agreement before you even think about using an AI-generated video for commercial purposes.
Many free tools actually give you full commercial rights to anything you create, which is awesome. Others, however, strictly limit their free output to personal, non-commercial use. If you upgrade to a paid plan, a commercial license is almost always included, but you should never just assume. Read the terms!
Ready to stop wondering and start creating? Veo3 AI offers a powerful, intuitive, and completely free platform to turn your ideas into stunning videos. Get started today and see what you can build. Create your first video now.
Our Verdict
The free text to video ai free tools available in 2025 are genuinely capable and suitable for casual users and those just getting started. For regular or professional use, upgrading to a paid plan is worthwhile for the extra quality, resolution, and generation capacity. We recommend starting with the free tier of our top-ranked pick to experience the platform before investing.
Related Articles
Continue with more blog posts in the same locale.

Realistic Character Creator: A Guide to Veo3 AI
Learn to use the Veo3 AI realistic character creator. This guide covers prompts, settings, and animation for consistent characters in marketing videos.
Read article
Upscale Video AI: A Practical Guide to 4K with Veo3 AI
Learn how to upscale video AI in a Veo3 AI workflow: prep footage, choose 4K settings, control artifacts, review motion, and export cleaner clips.
Read article
10 Essential Effects for Video Editing in 2026
Master the top 10 effects for video editing. This guide covers transitions, color grading, and AI tools to elevate your videos from amateur to pro in 2026.
Read article