
How to Create Scene Transitions in Veo 3 AI Videos (2026 Guide)
Learn how to create cinematic scene transitions using Veo 3 AI video generation. Prompt templates for whip pans, push-throughs, zoom transitions, and multi-clip assembly workflow.
Emma Chen · 13 min read · Jul 26, 2026
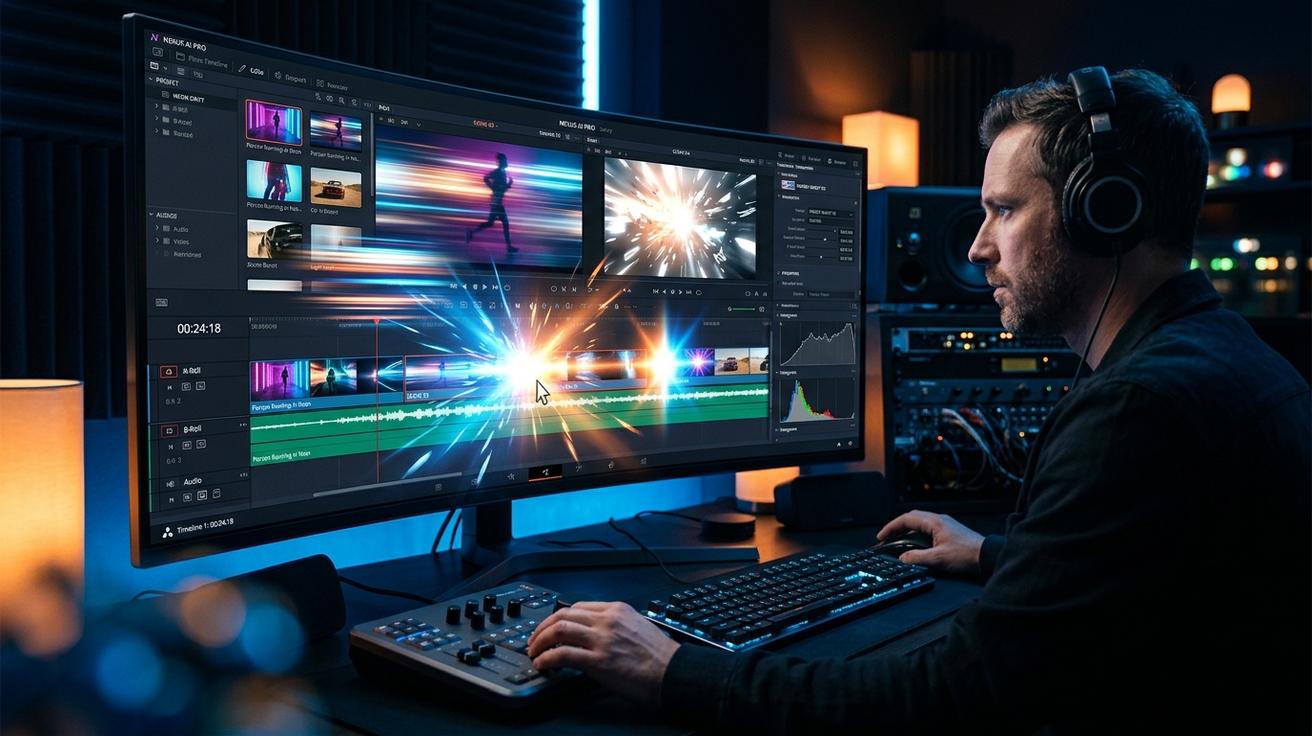
Scene transitions are one of the most important elements of professional video storytelling. A poorly executed cut breaks immersion; a well-crafted transition reinforces narrative flow and visual rhythm. With Veo 3 AI video generation available through platforms like veo3ai.io, you can now plan and prompt for transition-style motion directly in your generation workflow.
This guide covers how to use Veo 3 for scene transition video content: prompt techniques, transition types, multi-clip sequencing, and practical use cases for social media, short film, and commercial production.
What Are AI Video Scene Transitions?
In traditional video editing, a scene transition is a cut, dissolve, wipe, or motion move that connects two clips. In AI video generation, "scene transitions" can mean two related things:
-
Within-clip motion transitions: A single AI-generated clip that begins in one visual state and moves to another—a camera push through a doorway, a zoom from a wide shot into a close-up, or a whip pan that reveals a new environment.
-
Multi-clip edit transitions: Multiple Veo 3-generated clips that are assembled in a video editor, where the transition style is achieved through clip sequencing, color matching, and cut timing.
This guide covers both, with an emphasis on prompting within-clip transition-style motion that makes edits feel seamless.
Why Scene Transitions Matter in AI Video
Well-executed transitions signal production quality to viewers. On platforms like TikTok, Instagram Reels, and YouTube Shorts, the first 2–3 seconds determine watch-through rate. A dynamic, transition-driven opening holds attention.
For AI-generated content specifically, transitions also serve a technical purpose: they mask the clip boundary. Since AI video models currently max out at 5–10 seconds per clip, smooth transitions help editors assemble longer narratives without the seams showing.
Veo 3 Transition-Friendly Prompt Techniques
The key to generating useful scene transition clips in Veo 3 is specifying the camera motion and visual state change explicitly in your prompt. Vague prompts produce static or generic output; specific prompts with motion directives produce clip-ready transitions.
The Transition Prompt Formula
[Starting scene state] + [Transition motion] + [Ending scene state] + [Camera movement] + [Style/Mood]
Type 1: Camera Push Through
A camera push through a doorway, archway, window, or curtain is a classic transition element that can join two different environments in a single clip.
Prompt example:
Camera slowly pushes through an open wooden doorway. Left side: warm amber living room. Right side after crossing threshold: bright sunlit garden. Smooth continuous motion, cinematic depth of field, golden hour light.
Best used for: Scene changes in short films, travel vlogs, property tours, brand storytelling.
Type 2: Whip Pan Transition
A fast horizontal pan that blurs the frame mid-motion creates a natural cut point that feels dynamic in editing.
Prompt example:
A fast whip pan from left to right. Starts on a close-up of a coffee cup in a cafe interior. Motion blurs mid-frame. Ends on a wide view of a city skyline at dusk. Energetic pacing, urban lifestyle aesthetic.
Best used for: Social media montages, day-in-the-life content, travel and lifestyle videos.
Type 3: Zoom In / Zoom Out Transition
A dramatic zoom in or out gives the editor a clean in/out point to cut to a new scene.
Prompt example (zoom in):
Camera zooms in rapidly from a wide street scene to an extreme close-up of a person's eye. Urban environment, busy city street, fast-paced energy. Slight motion blur at peak zoom speed. Cinematic, stylized.
Prompt example (zoom out):
Camera pulls back from an extreme close-up of a keyboard key to reveal a full desk workspace. Smooth reveal motion, tech startup aesthetic, clean modern office, natural window light.
Best used for: Product reveals, dramatic moments, intro sequences.
Type 4: Light Flash / Overexposure Cut
A brief overexposure or white flash at the end of a clip creates a natural cut point that editors can use to jump to a new scene.
Prompt example:
A scene of a runner crossing a finish line. At the moment of crossing, camera exposure blooms to white. Energetic, triumphant mood. Sports documentary aesthetic. The flash lasts about half a second at the end of the clip.
Best used for: Sports content, brand campaign videos, music video-style edits.
Type 5: Object Wipe Transition
A foreground object sweeps across the frame, momentarily filling the screen—the editor cuts to the new scene at maximum coverage, then reveals it on the other side.
Prompt example:
A person walks toward the camera in a busy street. As they pass close to the lens, their jacket momentarily fills the entire frame. Shallow depth of field. Urban street photography aesthetic. The fill moment happens at approximately 3 seconds into the clip.
Best used for: Social media street content, urban lifestyle videos, music video edits.
How to Use Veo 3 Transition Clips in a Multi-Clip Edit
Generating transition clips is only half the workflow—the other half is assembly. Here's how to build a smooth multi-clip video using Veo 3 outputs:
Step 1: Plan Your Clip Sequence
Before generating, map out your full video as a storyboard with notes on what each clip shows and what transition type connects it to the next. This prevents mismatched clips that don't edit together cleanly.
Clip 1: Product on table, wide shot → ENDS with zoom-in blur
Clip 2: Hand picks up product → STARTS from close-up
Clip 3: Person using product outdoors → STARTS with whip pan reveal
Clip 4: Lifestyle close-up, camera pull-back → ENDS with light flash
Step 2: Generate Transition Clips with Matching Parameters
For clips that need to edit together, keep these parameters consistent across prompts:
- Lighting style: Use the same lighting descriptor (e.g., "golden hour natural light") across clips that appear in the same scene.
- Color palette: Specify the same overall color mood to avoid jarring color shifts at cuts.
- Aspect ratio: All clips in the sequence must be the same aspect ratio (9:16, 16:9, or 1:1).
Step 3: Assemble in a Video Editor
Import all clips into CapCut, DaVinci Resolve, Premiere, or Final Cut. Trim each clip to its cut-in and cut-out points. For smooth transitions:
- Camera push-through clips: Cut at the midpoint of the push—just after the threshold is crossed.
- Whip pan clips: Cut at the peak of the blur—the frame with maximum motion blur.
- Zoom clips: Cut at the peak zoom-in or the start of the zoom-out.
- Flash clips: Cut at maximum overexposure.
- Object wipe clips: Cut when the object fully covers the frame.
Step 4: Color Grade for Consistency
Veo 3 clips from different generations may have slight color temperature differences. Apply a consistent LUT or manual color correction pass to unify the footage before export.
Best Use Cases for Veo 3 Scene Transition Clips
Social media montages: TikTok and Reels content thrives on dynamic pacing. Use whip pans, zooms, and object wipes to keep energy high across a 15–30 second sequence.
Product reveal videos: Start wide, zoom in with increasing intensity, then cut to a close-up product shot. The transition clip carries the reveal momentum.
Travel and lifestyle content: Camera push-through clips make location changes feel intentional rather than abrupt. Great for travel vloggers and brand lifestyle campaigns.
Short film and narrative content: Use light flash and camera push-throughs to indicate time passing or scene changes in short narrative formats.
Music videos: AI-generated transition clips sync well with beat drops and tempo changes when timed carefully in the edit.
Event highlight reels: Whip pans and zoom transitions add energy to event recap videos without requiring complex post-production effects.
Advanced Tips for Cleaner Transitions
Generate transition clips at 2x your needed length. If you need a 2-second zoom-in clip, prompt for a 5-second clip and use only the most dynamic 2 seconds. This gives you more flexibility in the edit.
Use the same "neutral" shot type at both ends. If your transition starts and ends on a medium shot at similar focal lengths, the cut will feel more seamless regardless of scene change.
Test multiple model generations for each transition. Veo 3 is strong for transitions with natural camera motion; for more stylized, high-energy transitions, test Kling or Sora 2 in the same prompt to compare output dynamics.
Match motion direction across cuts. If a clip ends with a leftward camera move, the next clip should start with a leftward move or a static shot. Reversing motion direction at a cut feels jarring.
Avoid prompting for "cut to" language. AI video models generate continuous motion, not edit points. Use physical motion language ("camera sweeps to reveal," "zoom rushes in") rather than editorial language ("cut to a close-up").
Veo 3 Scene Transition Prompt Quick Reference
| Transition Type | Key Prompt Phrase |
|---|---|
| Camera push-through | "camera pushes through [threshold], revealing [new scene]" |
| Whip pan | "fast whip pan from [A] to [B], motion blur at midpoint" |
| Zoom in | "camera zooms rapidly into [subject], slight motion blur at peak" |
| Zoom out | "camera pulls back from close-up to wide, smooth reveal" |
| Light flash | "exposure blooms to white at end of clip, [duration] flash" |
| Object wipe | "[foreground object] sweeps across frame, fills screen momentarily" |
Frequently Asked Questions
Can Veo 3 generate a true scene transition in one clip? Yes—camera push-throughs, whip pans, and zoom transitions can all be prompted as single continuous clips where the visual environment changes within the shot. Results vary by generation; plan for 2–3 attempts per transition type.
What video editor works best for assembling Veo 3 transition clips? CapCut is the easiest option for social media creators. DaVinci Resolve and Premiere Pro offer more precision for commercial and narrative work. Final Cut Pro works well for Mac-based workflows. All four handle the MP4 outputs from Veo 3 cleanly.
How long should a transition clip be? 5–8 seconds is ideal for a generative transition clip. This gives you flexibility to trim to the exact cut point without running out of motion. Shorter clips (under 3 seconds) often don't complete the full motion arc.
Does aspect ratio affect transition quality? Yes. 9:16 vertical clips show camera movement differently than 16:9 widescreen. A whip pan in 9:16 covers more vertical space and less horizontal space—adjust your prompt language accordingly ("sweeps up" vs. "sweeps right").
Conclusion
Scene transitions are one of the highest-leverage AI video techniques available in Veo 3. Whether you're using within-clip push-throughs and whip pans or assembling multi-clip sequences with matching parameters, the workflow is consistent: plan your sequence before generating, write specific motion-directive prompts, generate 2–3 versions per transition type, and assemble with attention to cut points and color consistency. The result is AI video content that feels professionally edited rather than stitched together. For more on Veo 3 camera movement and prompt strategies, explore related guides on veo3ai.io.
How Veo 3 Compares to Other Models for Transitions
Not all AI video models handle transition-style motion equally well. Here's how Veo 3 compares for the most common transition types:
Camera push-throughs: Veo 3 produces smooth, continuous motion through architectural elements (doorways, archways) with good depth rendering. Sora 2 can be more photorealistic for complex environments but is slower to iterate. Seedance 2.0 handles shorter, tighter push-ins effectively.
Whip pans: Kling produces particularly clean whip pans with well-calibrated motion blur. Veo 3 is competitive here, especially when the motion blur intensity is specified explicitly in the prompt.
Zoom transitions: Veo 3 handles zoom-in transitions cleanly when the subject is well-defined. For extreme macro-to-wide zoom transitions, Sora 2 sometimes maintains subject identity better at the wide end.
Light flashes: All major models can generate overexposure flash endings; the main variable is how cleanly the scene holds before the bloom. Veo 3 and Sora 2 both perform well. Seedance 2.0 tends to flash more abruptly, which can be useful for high-energy edits.
For most commercial and social media transition workflows, Veo 3 is a strong default. Generate across two models when the output quality matters most for a specific transition type.
Troubleshooting Veo 3 Transition Clips
Even with well-crafted prompts, you'll occasionally hit generation issues. Here are the most common problems and fixes:
Transition doesn't complete the full motion arc. The camera starts pushing in but stops before reaching the endpoint. Fix: add "completes the full motion" or "camera continues through to [endpoint]" to your prompt, or generate at a longer duration and trim.
Too much scene detail changes mid-clip. The background morphs or shifts unexpectedly during the transition motion. Fix: simplify the environment description; use "consistent background throughout the motion" language; avoid complex multi-element backgrounds in transition clips.
Motion blur is too heavy or too light. Whip pans may produce too much or too little blur for your edit. Fix: add "moderate motion blur" or "subtle blur at peak motion" to calibrate intensity.
Transition starts too fast or too slow. The camera motion accelerates awkwardly. Fix: specify pacing—"slow ease-in to fast" or "constant smooth speed throughout"—rather than leaving it to the model.
Color temperature shifts mid-clip. Lighting changes during the camera move break continuity. Fix: specify the exact lighting setup at the start and end of the transition, and add "consistent lighting throughout".
Building a Veo 3 Transition Clip Library
The most efficient approach to AI video production is building a reusable library of transition clips. Once you have a set of clean push-throughs, whip pans, zoom-ins, and object wipes that work well, you can reuse them across multiple projects.
Organize by transition type: Create folders for each transition type—push-through, whip pan, zoom, flash, wipe—and save the best-quality clips with a filename that includes the source prompt keywords.
Document your best prompts: Every time you generate a transition clip that works cleanly, save the prompt in a prompt library alongside the output. You'll be able to reproduce or adapt it far faster than writing a new prompt from scratch.
Create environment-neutral versions: Transition clips with minimal background (dark room, white void, abstract gradient) are the most reusable because they can be composited onto any background in post-production.
Rate every generated clip: After reviewing each output, rate it 1–3. Clip 3 is publish-ready; clip 2 is reference-quality; clip 1 is discard. This keeps your library clean and prevents time wasted re-reviewing subpar clips.
Scene Transitions in Different Video Formats
The transition techniques above apply across formats, but the specifics vary by platform:
TikTok and Instagram Reels (9:16 vertical): Whip pans and object wipes work especially well in vertical format because the narrow horizontal field amplifies the sweep motion. Zoom-ins punch hard in vertical because the subject fills more of the frame faster.
YouTube and widescreen (16:9): Camera push-throughs feel more cinematic in widescreen. The wider horizontal field gives more visual context around the transition subject.
Square format (1:1): Zoom-ins and light flashes work best in square format. Push-throughs and whip pans can feel cramped in the equal-dimension frame.
Long-form video (15–60 seconds): For longer narratives, use transitions sparingly as chapter markers rather than between every clip. Over-transitioning in longer-form content feels gimmicky.
Combining Veo 3 Transitions with Static Clips
Not every clip in a video needs to be a transition clip. Transitions have most impact when they're placed strategically between sections of otherwise steady footage. A good rule of thumb:
- Use a transition at the opening of the video to hook viewers immediately.
- Use a transition between the setup section and the main content.
- Use a transition before the CTA or conclusion.
- Fill the rest of the edit with steadier shots that give the viewer time to absorb the content.
Over-transitioning—applying a dynamic camera move to every clip—desensitizes the viewer and dilutes the impact of each individual transition.
Conclusion
Veo 3 scene transition clips are a practical tool for making AI-generated videos feel polished and professionally edited. The approach works whether you're creating a single within-clip transition or assembling a multi-clip sequence: plan the motion intent before generating, write specific directional prompts that name the starting state, the camera move, and the ending state, generate 2–3 versions per transition, and assemble with attention to cut points, color consistency, and transition placement rhythm. The combination of Veo 3's motion quality and a disciplined editing workflow produces results that are hard to distinguish from traditional transitions. For more on Veo 3 capabilities and use cases, see the full library of guides on veo3ai.io.
Related Articles
Continue with more blog posts in the same locale.

Veo 3 Watermark Guide: Get Watermark-Free AI Videos in 2026
Understand Veo 3 watermarks and learn how to get watermark-free videos through official paid tiers and API access. Complete guide for professional creators in 2026.
Read article
Veo 3 Long Video Generation: Create Extended AI Videos in 2026
Generate long-form videos with Veo 3 in 2026. Learn scene chaining, consistency techniques, and practical workflows for creating extended AI videos for YouTube and more.
Read article
Veo 3 Animation Guide: Create Stunning AI Animations in 2026
Learn how to create stunning animations with Veo 3 in 2026. This complete guide covers animation styles, prompt techniques, and real examples for AI animation creation.
Read article