How to Animate Images with AI Your Practical Guide
Learn how to animate images with AI using practical, real-world examples. This guide covers top tools, prompting techniques, and exporting for social media.
Veo3 AI · 19 min read · Nov 22, 2025

It used to be a flight of fancy—looking at a still photo and wishing it could move. Now, you can animate images with AI by simply uploading a picture and telling the platform what you want to see. In just a few minutes, that static photo becomes a dynamic, living video clip.
Quick Answer: You can animate photos and illustrations using AI tools like Google Veo 3, Runway, Kling, or Pika—simply upload your image, describe the desired motion in a text prompt, and the AI generates a realistic animated video in seconds. No animation experience is required.
Why AI Animation Is a Game-Changer
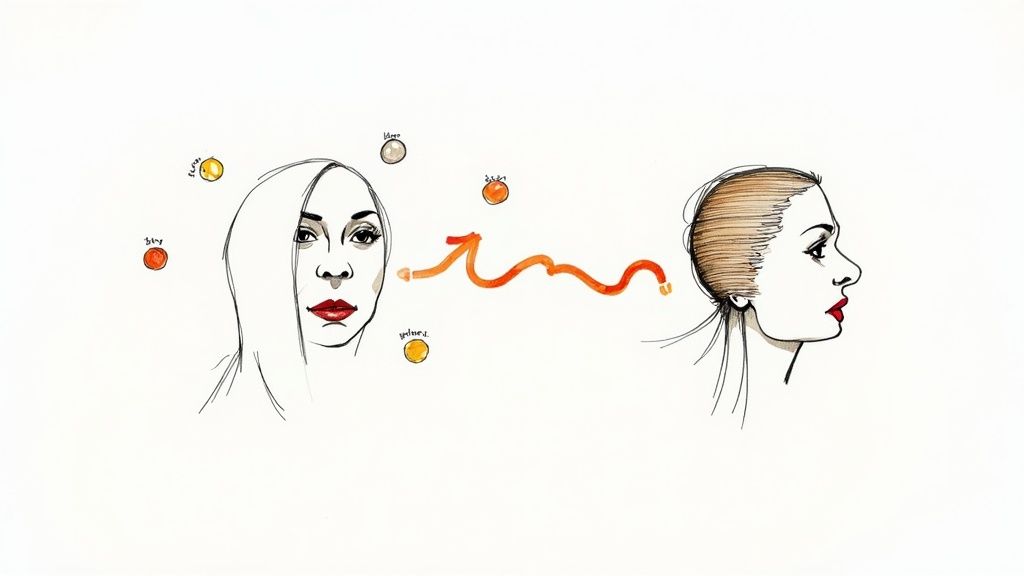
The ability to animate with AI isn't just a neat party trick; it's a massive shift in how we create content. It puts powerful motion graphics tools into the hands of everyone, not just professional animators with years of training and expensive software. For creators, marketers, and artists, this is quickly becoming a fundamental part of visual storytelling.
This goes way beyond making a funny GIF. Think about turning a static product photo into an eye-catching ad, a simple portrait into a living social media post, or a hand-drawn sketch into an animated character. The creative doors this opens are swinging wider every day.
Making High-End Animation Accessible to All
What used to take hours of tedious, frame-by-frame editing can now be done with a few clicks and a well-written prompt. This kind of accessibility is a huge deal, especially for individuals and small businesses who couldn't justify the time or cost of traditional animation.
To really get why this matters, it helps to look at the bigger picture of AI-generated content and how it’s changing the media we create and engage with.
The market is responding in a big way. Valued at around USD 435.9 million in 2025, the AI animation tool market is expected to balloon to an incredible USD 1,659.2 million by 2035. That explosive growth shows just how much demand there is for faster, more affordable animation across every industry. You can dive deeper into the research on the future of AI animation tools.
The real win here is speed and efficiency. You can prototype visual ideas, pump out social media content, and bring your concepts to life for a fraction of what it used to cost in time and money.
Learning this skill adds a powerful new tool to your creative arsenal. It allows you to:
- Boost Engagement: Let’s face it, motion grabs attention on a crowded social feed.
- Tell Richer Stories: Animation can inject emotion and narrative depth that a static image just can't match.
- Create Faster: You can produce compelling visuals without the steep learning curve or costly software subscriptions.
Picking the Right AI Animation Tool for the Job
Before you can bring your static images to life, you've got to find the right tool. The AI animation space is exploding with options, and while many promise incredible results, they don't all work the same way. Choosing the right platform from the get-go will save you a ton of frustration down the line.
The first question I always ask myself is: what am I actually trying to make? A quick, eye-catching animation for an Instagram story has very different needs than a cinematic sequence for a short film. Your end goal is the single most important factor in this decision.
Simple Tools vs. Advanced Platforms
For anyone just dipping their toes in, the simpler tools are a godsend. They're built for speed and simplicity. You typically upload an image, pick a pre-set motion style like "zoom in" or "pan left," and you're done. These are perfect when you need to create something engaging fast without getting bogged down in technical details.
On the other end of the spectrum, advanced platforms give you the keys to the kingdom. These are the tools that let you craft detailed text prompts to guide the animation, use motion brushes to paint movement onto specific parts of your image, or manually set camera paths. They take more time to master, but the level of creative control is on another level, letting you produce truly unique, professional-grade animations.
If you want a deeper dive into the specific options out there, our complete guide to the best AI animation software is a great place to start.
A quick tip from experience: don't get blinded by a long feature list. A powerful tool you can't figure out how to use is worthless. Always take advantage of free trials to see how a platform actually feels to work with before you pull out your credit card.
As you explore, you'll see a wide range of capabilities. For instance, the Soreel AI animation platform is one of many that showcase just how diverse the features can be from one tool to the next.
Key Features to Look For
When you're comparing different AI animators, a few key features will make or break your experience.
- Prompting Power: Can you give it detailed text instructions, or are you stuck with simple presets? The ability to describe the exact motion you want is a game-changer for creative control.
- Motion Control: Does it offer things like camera pathing or sliders for motion intensity? These are the features that let you create smooth, cinematic movements instead of the jerky, robotic motion that screams "AI-generated."
- Export Quality: Make sure the tool can export in a high enough resolution for your target platform (1080p is a good baseline for most social media). Also, check what file formats are available—you'll almost always need MP4, but GIF support is also a nice bonus.
To give you a clearer picture, I've put together a table comparing some of the top players in the field.
AI Animation Tool Feature Comparison
| Tool Name | Key Features | Best For | Pricing Model |
|---|---|---|---|
| Runway Gen-2 | Text-to-video, Image-to-video, Motion Brush, Camera Controls, Director Mode | Creators needing a full suite of advanced video generation and editing tools. | Freemium with Credit-based Tiers |
| Pika | Text/Image-to-video, Lip Sync, Sound Effects, Expand Canvas | Social media content creators and those looking for expressive character animation. | Freemium with Paid Tiers |
| Kaiber | Image/Video-to-video, Audio Reactivity (music visualization), Camera Controls | Musicians, artists, and creators focused on stylized, music-driven visuals. | Subscription-based with Free Trial |
| Soreel | Image-to-video with fine-grained motion and camera control prompts | Photographers and artists wanting to add cinematic, realistic motion to still images. | Credit-based Pay-as-you-go |
This table is just a starting point, but it shows how different platforms cater to different creative needs. A musician will probably gravitate toward Kaiber for its audio reactivity, while a filmmaker might prefer Runway for its comprehensive controls.
This is what a more advanced user interface can look like. Platforms such as Runway are designed as all-in-one creative hubs, packing a ton of features together to help you realize a complex vision from start to finish.
From Still Image to Living Motion
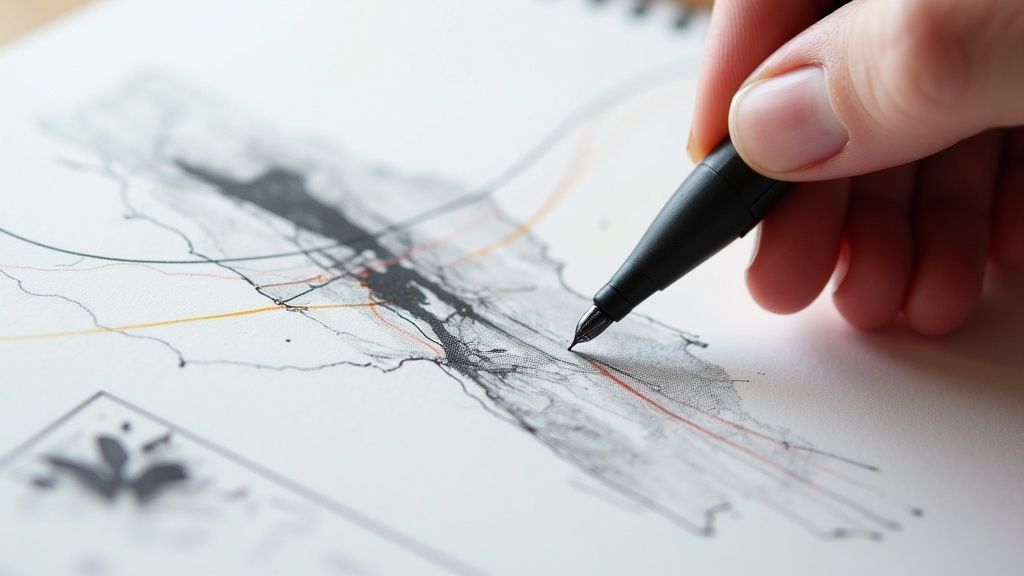
Alright, you've picked your tool. Now for the fun part: bringing a static picture to life. But before you jump in and start writing prompts, let's talk about what makes or breaks an AI animation. The secret isn't just in the prompt; it starts with the image you choose. The quality of what you put in directly dictates the quality of what you get out.
The best images to start with are clear, well-lit, and have a distinct subject. Think high-resolution. More pixels give the AI more data to play with, which means you'll get smoother, more detailed animations. If you start with something blurry or low-quality, you're almost guaranteed to get a muddy, artifact-filled video. It's just a case of garbage in, garbage out.
Preparing Your Image for Animation
Think of your source image as the foundation of a house. If the foundation is shaky, the whole thing will be unstable. Taking just a few minutes to prep your image can make a world of difference in the final result.
Before you even think about uploading, run through this quick mental checklist:
- What's the focus? Images with a clear subject—a person, an animal, a car—tend to animate more predictably. A busy, cluttered photo can seriously confuse the AI, leading to chaotic or just plain weird movement.
- What do you want to move? Consider the composition. If your goal is to have a character's hair blow in the wind, make sure their hair is actually visible and not hidden behind their shoulder or another object.
- Can it be improved? Sometimes, a quick crop to focus on the main subject or a simple brightness adjustment is all it takes. If the background is distracting, cropping it out helps the AI concentrate its efforts right where you want them.
The biggest mistake I see beginners make is just grabbing a random photo from their camera roll, tossing it into an AI tool, and expecting magic. A little prep work goes a long way in guiding the AI toward the result you're actually envisioning.
Writing Prompts That Actually Work
Your prompt is your instruction manual for the AI. If you give it vague directions like "make it move," you're going to get vague, unpredictable results. The real art of prompting is learning how to be a clear director. You need to use descriptive language to paint a picture of the exact motion you have in your head.
So, instead of being generic, get specific. What's the direction of the movement? The speed? The overall feeling?
This is the basic decision-making process you should be applying.
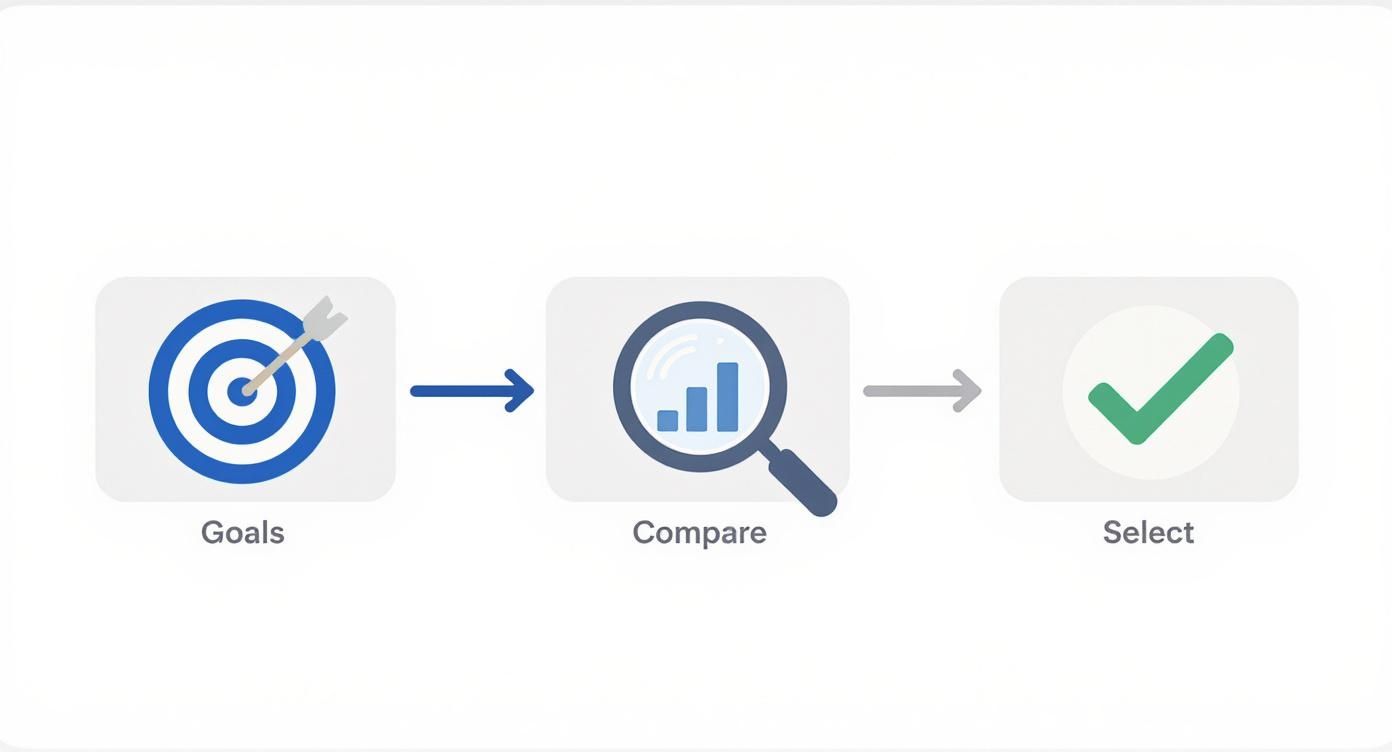
This simple flow—define your goal, compare the options, and make a selection—is the same logic you should bring to crafting your prompts.
The most effective prompts combine several elements to create a crystal-clear set of instructions. It’s all about breaking down your desired animation into distinct parts. For a deep dive into the whole workflow, check out our guide to generate video from image AI, which walks you through the entire process.
Prompt Examples From Simple to Complex
Let's get practical. Imagine you have a photo of a serene mountain lake.
Simple Prompt: "Subtle ripples on the water, clouds drifting slowly."
- What you'll get: This will likely produce a gentle, ambient animation. It’s perfect for adding just a touch of life to a landscape photo without overdoing it.
Intermediate Prompt: "Slow zoom in on the mountains, gentle waves lapping the shore, a slight breeze rustles the trees in the foreground."
- What you'll get: Now you're getting more specific. You’re directing the "camera" and defining different types of motion in separate parts of the image. The AI will try to create distinct layers of movement.
Advanced Prompt: "Cinematic dolly shot moving slowly from left to right. The water has calm, realistic ripples, and the sun glints off the surface. Wispy clouds drift lazily across the sky. Minimal motion, peaceful and serene."
- What you'll get: Here, you're using filmmaking terms ("cinematic dolly shot") and even describing the mood ("peaceful and serene"). This level of detail gives you the most control and is how you get those really professional-looking results.
Remember, every platform interprets prompts a little differently. Some are fantastic with camera movement commands, while others are better at subtle environmental effects. Your best friend here is experimentation. Start simple, see what the tool gives you, and then slowly add more complexity to your prompts until you nail the effect you're after. This process of testing and refining is the key to getting good at this.
Mastering Advanced Animation Techniques
Alright, once you've gotten the hang of writing basic prompts, it’s time to dig into the really powerful features. This is where you graduate from making simple, looping movements to directing detailed, almost cinematic sequences. These advanced techniques are what give you the fine-tuned control needed to make your AI animations look truly polished and professional.
One of the most useful tools you have for this is the negative prompt. It’s exactly what it sounds like: while your main prompt tells the AI what you want to see, a negative prompt tells it what you don't want. Think of it as your secret weapon for cleaning up messy motion and getting rid of those weird AI quirks.
Using Negative Prompts to Refine Motion
I like to think of negative prompts as guardrails for my animations. If you've ever generated a video and noticed a strange, jittery quality or that classic "wobble" effect, you can tackle it head-on with a negative prompt.
For instance, unwanted distortion is a really common problem, especially with portraits or landscapes. Just adding a few specific terms to your negative prompt can work wonders:
- For portraits: try adding things like "shaky, jitter, distortion, blurry eyes, warping"
- For landscapes: use terms like "wobble, unstable camera, flickering, morphing objects"
By telling the AI exactly what to avoid, you're essentially forcing it to find a cleaner, more stable solution. It's a small change that can make a huge difference in your final output.
Painting Movement with Motion Brushes
Now for my favorite tool: the motion brush. Some platforms call it a "region of motion," but the idea is the same. This feature is an absolute game-changer because it lets you go beyond just text and physically paint movement right onto your image.
So, instead of wrestling with a prompt to describe which part of a tree should be swaying in the wind, you can just grab the brush and "paint" over the specific branches you want to animate. The tool then isolates the animation to that exact area, leaving the rest of your image perfectly still.
This gives you an incredible level of precision. I'm talking about animating just the steam rising from a coffee cup or the flicker of a single candle flame, all while the rest of the scene remains completely static. That’s the kind of granular control you get with a motion brush.
This targeted approach is fantastic for preventing the AI from "hallucinating" movement in parts of the image that should be stationary—a common headache when you're relying on text prompts alone.
The technology behind this has been growing at a dizzying pace. Advanced models called transformers, which are amazing at understanding complex sequences, held over 52% of the market share in 2023. Their dominance is a big reason why features like motion brushes have become so effective. You can find more industry-specific AI in motion graphics insights to see where this is all heading.
Chaining Commands for Sequential Animation
Ready to get even more sophisticated? Let's talk about chaining commands. This technique is all about creating a sequence of different actions within a single, continuous prompt. It lets you direct a multi-step animation, essentially creating a tiny narrative arc instead of just a single, repetitive motion.
This definitely takes some trial and error, but the structure usually looks something like this:
"Start with a close-up on the character's face, then slowly pull back to reveal the full landscape over 4 seconds. As the camera pulls back, introduce a gentle breeze that rustles the leaves on the trees."
See what's happening here? The prompt lays out two distinct actions that need to happen in a specific order. You’re telling the AI not just what to do, but also when and how to do it. When you get the hang of this, you can animate images with AI in a way that tells a much more complex and compelling visual story.
Getting Your Animation Ready for Social Media
<iframe width="100%" style="aspect-ratio: 16 / 9;" src="https://www.youtube.com/embed/n6HC__qvV9Q" frameborder="0" allow="autoplay; encrypted-media" allowfullscreen></iframe>
You’ve put in the work to create a stunning animation, but the job isn't done yet. Now comes the crucial part: getting it seen. The final step is packaging your creation perfectly for the platforms where it will live, because each social network has its own quirks.
Tailoring your export settings is what ensures your work looks sharp and professional, not pixelated or awkwardly cropped. It’s the difference between a polished piece of content and something that feels amateur. Think of it like this: you wouldn't bake a beautiful cake just to serve it on a paper plate. Presentation is everything.
The real challenge is finding that perfect balance between visual quality and file size. A massive, uncompressed video might look amazing, but it’ll take forever to load—and people will just scroll right past. Compress it too much, though, and all your hard work turns into a blurry mess.
Nailing the Technical Settings
Before you even think about hitting that render button, pause and consider where this animation is going. The ideal settings for a vertical TikTok video are wildly different from what you'd use for a widescreen YouTube clip.
Getting this right from the start saves you the headache of seeing your animation butchered by automatic cropping or those dreaded black bars. Here's a quick cheat sheet I always keep handy for the big platforms:
- File Format: Your go-to should almost always be MP4 (H.264 codec). It’s the gold standard for web video for a reason, offering an incredible balance of quality and small file size.
- Resolution: For vertical formats like Instagram Stories or TikTok, you'll want 1080x1920 pixels. For feed posts on Instagram or Facebook, a square 1080x1080 or a 4:5 vertical 1080x1350 usually performs best. And for YouTube, the classic 1920x1080 is still king.
- Frame Rate: While movies are often 24 frames per second (fps), video for social media just feels smoother at 30 fps. Some platforms can handle 60 fps for that extra-fluid look, but sticking to 30 is a safe and reliable choice that works everywhere.
If you want to dive deeper into the strategy behind it all, our full guide on how to make social media videos covers the entire process from start to finish.
Pro Tip: The secret to truly mesmerizing social content is often the seamless loop. Try to design your animation so the very last frame flows perfectly back into the first. This creates a hypnotic effect that can seriously boost your watch time as people get caught in the loop.
The Final Polish
Most tools that animate images with AI are focused squarely on the visuals, which means sound design is left up to you. I actually see this as a good thing—it gives you complete creative control over the final experience.
Once you have your silent video file, import it into a simple video editor. Something like CapCut or Adobe Express is perfect for this. Adding a trending audio track, some subtle sound effects, or a simple music score can completely transform your animation. It takes it from a cool visual to a complete piece of content that people will want to share. This is the final layer of polish that really makes your work stand out.
Got Questions About Animating Images With AI?
Once you start playing around with AI animation tools, a few questions are bound to pop up. It's totally normal. Getting a feel for how these platforms "think" is the key to creating something you're truly happy with. Let's tackle some of the most common ones I hear.
The interest in this tech has exploded. The AI image generator market was valued at USD 418.5 million in 2024, but it's expected to rocket to USD 2,633.2 million by 2035. That's a massive jump, and it means more and more creatives are diving in. You can dig deeper into the numbers behind the AI image market's growth if you're curious.
How Much Control Do I Actually Have Over the Animation?
This really comes down to the tool you're using. Some of the simpler apps give you a menu of preset movements—think "pan left," "gentle zoom," or "float up." They're fantastic for getting a quick, reliable result without much fuss.
On the other hand, the more advanced platforms give you a director's chair. You can get super specific with detailed text prompts, fine-tune the intensity of the motion with sliders, and even map out camera paths. Honestly, the single best skill you can develop is writing a killer prompt. It's how you tell the AI exactly what you want.
What Are the Biggest Mistakes People Make at First?
I see a few common tripwires that catch beginners. If you can sidestep these, you'll save yourself a ton of headaches.
- Starting with a bad image. If your source image is blurry or poorly lit, the final animation will be too. Garbage in, garbage out.
- Writing lazy prompts. Just typing "make it move" is a recipe for chaos. The AI has no idea what you mean, so the results are all over the place.
- Doing too much. It's tempting to crank up all the motion settings, but less is almost always more. Subtle, graceful movement looks far more professional than a shaky, over-the-top effect.
Here’s a pro tip: The best animations almost always start with a high-resolution image and a crystal-clear prompt. You have to think like a film director guiding an actor, not just someone yelling vague ideas from off-camera.
Can I Animate My Own Photos and Art?
Yes, absolutely! This is where these tools truly shine. You can bring your own photos to life, add motion to digital illustrations, or even animate a company logo. The AI just needs an image to analyze before it can apply your instructions.
One crucial point, though: make sure you have the rights to use any image you animate. This is especially important for commercial work where copyright infringement can become a serious problem.
Are There Limits on How Long or High-Res the Animation Can Be?
Yep, pretty much every tool has its limits, particularly on the free plans. Most of the clips you'll generate will be short, usually somewhere between 3 and 10 seconds.
When it comes to resolution, 1080p is a common cap, although some of the high-end platforms are starting to offer 4K. These limitations are in place for a simple reason: generating high-quality video is incredibly demanding on computer hardware.
Our Verdict
After reviewing the available options and capabilities for animate images with ai, we recommend taking a hands-on approach: start with a free trial of the leading platforms, test with your actual use cases, and upgrade to the plan that best matches your volume and quality requirements. The AI tools in this space are advancing rapidly, making now an excellent time to integrate them into your content creation workflow.
Related Articles
Continue with more blog posts in the same locale.

Video Script Template: From Idea to AI-Powered Video
Unlock faster video creation with our guide. Find a pro video script template for any format and learn how to turn it into an AI video with Veo3.
Read article
Animating for Beginners: Create with Veo3 AI
Learn animating for beginners with Veo3 AI. Create your first animated social clip from text & get workflow tips. No experience needed.
Read articleHow to Animate a Logo: A Practical Guide for 2026
Learn how to animate a logo from scratch. Our guide covers planning, AI tools like Veo3, pro tips on timing, and exporting for web and social media.
Read article