Animate Still Photos A Guide to Dynamic Visuals
Learn how to animate still photos with our complete guide. Discover AI tools, parallax effects, and pro techniques to turn your images into engaging visuals.
Veo3 AI · 19 min read · Nov 20, 2025
So, what does it actually mean to animate a still photo? At its core, you're taking a static image and using software to introduce movement, turning it into a short, looping video or a GIF. This could be as simple as making the wind appear to blow through a field or as complex as making a person seem to walk across the frame.
Quick Answer: You can animate photos and illustrations using AI tools like Google Veo 3, Runway, Kling, or Pika—simply upload your image, describe the desired motion in a text prompt, and the AI generates a realistic animated video in seconds. No animation experience is required.
The idea is to take a single, frozen moment and breathe life into it, transforming it into a dynamic, visual story that grabs your attention.
The Power of Motion: Why Animate Still Photos?
Let's be honest—our social feeds are incredibly noisy. A static image, no matter how beautiful, can easily get scrolled past in the blink of an eye. Adding a touch of motion is one of the simplest and most effective ways to make someone pause. Our brains are just wired to notice movement, which gives an animated photo an immediate edge over a still one.
This isn't just about adding a cool effect; it’s a smart move. You're turning a flat image into a living scene, guiding the viewer’s eye and telling a much richer story in just a few seconds.
Turning Moments into Narratives
When you animate a photo, you're really becoming a storyteller. That portrait isn't just a face anymore; it’s a person whose hair is gently blowing in the breeze. That landscape shot becomes an immersive scene, with clouds lazily drifting by and water rippling in the foreground.
These small details make a huge difference:
- They boost engagement. Time and again, content with motion gets more likes, comments, and shares on social media than static posts. It just works.
- They’re more memorable. People are far more likely to remember a dynamic visual than a plain old photo they scrolled past.
- They pack an emotional punch. Subtle movement can completely amplify the mood of an image, whether it's the calm of a flowing river or the chaotic energy of a city street.
The Growing Demand for Dynamic Content
The move toward motion isn't just a gut feeling; the numbers back it up. The global animation market was valued at around $394.6 billion in 2022 and is expected to hit nearly $528.8 billion by 2030. People spend about 100 minutes a day watching online videos, and video is projected to account for over 82% of all internet traffic by 2025.
The data is crystal clear: retention for video messages hovers around 95%, which completely blows away the 10% retention rate for text. This is exactly why learning to animate your photos is such a valuable skill for any creator or marketer today.
This massive shift shows a clear preference for visuals that move. By adding this skill to your toolkit, you're creating content that aligns with how people are already consuming information online. For a deeper dive, you can read more about the growth of the animation industry and its statistics.
Choosing and Preparing Your Photos for Animation
The secret to a stunning animation doesn't start with the software; it starts with the photo you choose. This choice is the bedrock of your entire project, and it has a massive impact on how believable and polished your final animation will feel.
Think of it like this: even the most powerful animation tool can't save a blurry, low-resolution image. You need to feed it good ingredients. I always look for photos that are sharp and clear, with plenty of detail. A high-resolution image gives the AI more information to work with, which means you'll get smoother motion without any of that ugly digital artifacting.
What Makes a Photo a Great Candidate for Motion?
Beyond just being a sharp picture, the composition is everything. The best photos for this kind of work have a really clear separation between the main subject and the background. This depth is what allows you to create that cool parallax effect, where the foreground and background seem to move independently.
I’ve found that certain types of images just work better than others. Keep an eye out for photos with elements that are just begging to be moved:
- Landscapes: Got a photo with fluffy clouds, rolling waves, or a field of tall grass? These are perfect for adding subtle, natural motion.
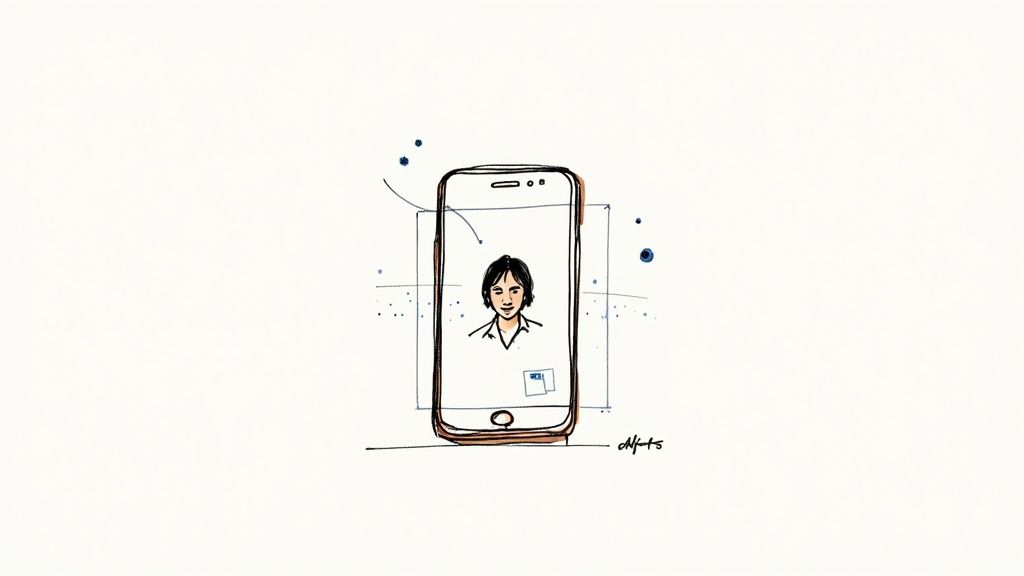
- Portraits: If your subject has long, flowing hair or is wearing a scarf or dress, you can easily create the illusion of a gentle breeze.
- Cityscapes: Photos of cities with dramatic skies or even distant car light trails are fantastic for bringing a static scene to life.
On the flip side, I'd steer clear of images that look too "flat," where the subject and background just kind of mush together. Overly busy photos can also be a headache. More often than not, a simpler composition will give you a much more striking result.
The Cleanup Crew: Isolating Your Subject
Once you've picked your winner, it's time for a little prep work. This is where you roll up your sleeves in a tool like Adobe Photoshop to isolate your subject from its background.
The whole point here is to get your main subject onto its own transparent layer. When you cut out the subject, you get total freedom to move it around without affecting the background at all. This is the core technique behind any convincing 2.5D or parallax animation. The same principles apply to other dynamic formats, too. For a different take on this, check out our guide on how to turn a Live Photo into a video.
After you've lifted your subject off the background, you'll see a big hole where it used to be. Don't panic. This is what Photoshop’s Content-Aware Fill was made for. Use it to seamlessly paint in the missing background, making it look like your subject was never there.
Honestly, don't skip this step. Taking a few extra minutes to create a clean background plate is what separates amateur work from professional results. It ensures that when your subject starts to move, you won’t see any weird gaps or artifacts, completely preserving the illusion. A little prep goes a long, long way.
A Practical Guide to Photo Animation Techniques
With a clean, prepped photo in hand, you get to the fun part—choosing how to bring it to life. This isn't just about picking a cool effect; it's about deciding what story you want to tell. The right animation style can completely change the mood of a static image, turning a simple picture into a captivating visual.
You've got a few solid options, and each one excels at something different. Getting familiar with them is the first step toward creating animations that feel purposeful and professional, not just like a cheap trick. The goal is always to enhance the photo, not overshadow it.
To help you decide, here’s a quick rundown of the most popular animation styles and where they shine.
Choosing Your Animation Style
| Animation Style | Best For | Key Characteristic | Software/Tool Suggestion |
|---|---|---|---|
| Parallax (2.5D) | Landscapes, portraits with layered backgrounds, or any image with clear foreground and background separation. | Creates a sense of 3D depth by moving different layers at different speeds. | Adobe After Effects, CapCut |
| Subtle Motion | Nature scenes (clouds, water), food photography (steam), or environmental portraits (wind in hair). | Isolates and animates small, natural elements to make a scene feel alive and realistic. | Plotagraph, Veo3 AI |
| Cinemagraph | Product shots, fashion, moody portraits, or any scene where you want to create a mesmerizing focal point. | A mostly still image with one small, isolated element moving in a perfect, seamless loop. | Adobe Photoshop, Flixel |
Ultimately, the best choice depends entirely on your original photo and the feeling you're aiming for. A dramatic mountain shot begs for a parallax effect, while a quiet coffee shop scene is perfect for a subtle steam cinemagraph.
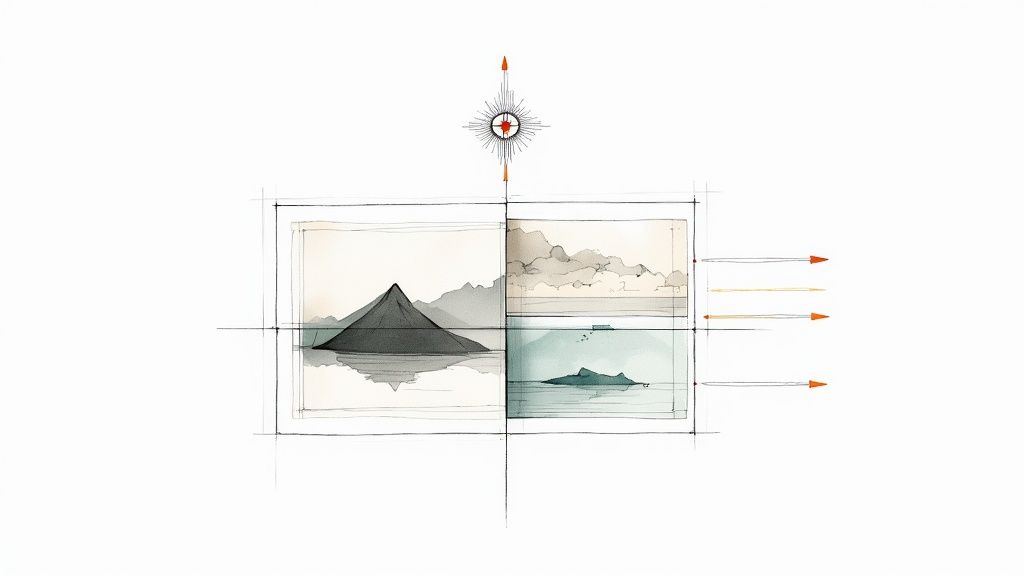
Creating Depth with the Parallax Effect
You've probably seen the parallax effect (often called the 2.5D effect) even if you didn't know its name. It’s a brilliant way to fake three-dimensional depth in a flat image. The magic happens by moving foreground and background layers at different speeds—the stuff up close moves faster, and the stuff in the back moves slower. It perfectly mimics how our eyes perceive depth in the real world.
This is your go-to technique for photos that already have distinct layers. Think of a portrait where the subject is sharp in the foreground and the background is a bit blurry, or a landscape with rocks up close, trees in the middle, and mountains way in the back. A classic example? An image of a hiker looking out over a valley. By having the hiker move just slightly while the distant mountains barely budge, you create a powerful, cinematic feeling that immediately elevates the shot.
Adding Realism with Subtle Motion
Sometimes the most powerful animations are the most understated. That's the whole idea behind subtle motion. Instead of moving the entire frame, you animate just one or two natural elements to breathe life into the scene. Imagine clouds drifting slowly across the sky, steam gently rising from a hot coffee mug, or the soft flicker of a candle flame.
The key to making this work is properly isolating the element you want to animate.

By masking off just the part you want to move, you can keep the rest of the image completely still, which is what sells the effect. This style is perfect for adding a touch of peaceful realism. Use it on nature photos, food shots, or any scene where you want to create a calm, immersive atmosphere without shouting for attention. Remember, less is more here.
Mesmerizing Loops with Cinemagraphs
A cinemagraph is a beautiful hybrid—part photo, part video. The concept is simple: the vast majority of the image is frozen in time, while one small, isolated section moves in a seamless, repeating loop. The result is hypnotic, pulling the viewer into a single, unending moment.
The secret to a great cinemagraph is a flawless loop. The motion has to start and end so perfectly that you can't tell where it begins or finishes.
Think of a photo of someone reading by a fireplace. The room, the person, the book—all are perfectly still, except for the endlessly crackling flames. This technique is fantastic for creating a strong focal point and adding a touch of elegance or wonder. I’ve seen them used incredibly well for high-end product shots (like a watch with a sweeping second hand) and fashion photography (a model is still, but her dress gently flutters in the wind).
Using AI Tools for Instant Photo Animation
https://www.youtube.com/embed/Ws4BJIP8wR4
Manual animation techniques are great for precise control, but let's be honest—they can take forever. This is where artificial intelligence has completely flipped the script. Now, animating a still photo is a matter of minutes, not hours. Tools like Veo3 AI, RunwayML, and Pika Labs are leading the charge, using simple text prompts to generate motion and unlocking creative avenues for just about anyone.
The growth here is pretty wild. The global AI GIF generator market hit about $1.5 billion in 2024 and is on track to blow past $8.2 billion by 2033. That boom tells you everything you need to know about the demand for fast, eye-catching animated content.
Crafting Text Prompts That Actually Work
The prompt is everything when you're using an AI animation tool. You're basically the director, and the AI is your (very literal) artist. If you give vague instructions, you'll get vague, and sometimes weird, results. Specific, descriptive language is your best friend here.
Forget just writing "make the photo move." Get detailed.
Think about the type of motion, its direction, its speed, and even the mood you're trying to set. For instance, instead of saying "Animate the clouds," try something like, "Subtle, slow-moving clouds drifting lazily from left to right." See the difference?
Here are a few prompt formulas I've found work really well:
- For environmental touches: "Gentle wind blowing through her hair and the tall grass in the background."
- For camera movement: "Slow dolly zoom forward, focusing on the mountain peak."
- For atmospheric effects: "Steam slowly rising from the coffee cup in a soft, gentle wisp."
Don't be afraid to just mess around and experiment. Combining different commands in one prompt can lead to some surprisingly cool results.
This is a great example of how it works. A simple, descriptive prompt gets fed into the tool, and out comes a dynamic video clip. It shows how the AI can take creative direction from just a few words and run with it.
Mastering the AI Animation Settings
Beyond the prompt, most AI tools give you a control panel of sliders and toggles. This is where you can really start to fine-tune the output and get it just right. Getting comfortable with these settings is what takes an animation from "cool" to "wow."
Here are the key settings I always look for:
- Motion Intensity: This slider controls how subtle or dramatic the movement is. Nine times out of ten, I dial this way down for a more realistic look. A gentle breeze is usually more believable than a full-blown gale.
- Camera Control: Many tools let you add simulated camera moves like pans, tilts, or zooms. A slow, subtle pan can add a polished, cinematic quality to a static landscape shot.
- Noise Level: Sometimes called "chaos" or "variation," this injects a bit of randomness. A little noise can make the motion feel more organic and less robotic, but cranking it up too high can make things look jittery.
My go-to advice? Always start with a low motion intensity and build from there. It's way easier to add more movement later than to try and tone down an animation that's already gone completely off the rails.
When you combine a well-crafted prompt with thoughtful adjustments to the settings, you can guide the AI to create something that's not just technically impressive but also genuinely artistic. For a deeper dive into this technology, check out our complete guide to AI animation software. And to round out your toolkit, you might want to explore the best AI tools for content creators that can help with all sorts of visual projects.
Getting Your Animated Photos Ready for the World
You've done the creative work and brought a static image to life. Awesome. But that's only half the battle. Now comes the critical part: exporting your animation so it looks just as good on someone else's screen as it does on yours.
Your export settings are the bridge between your editor and the audience. Get them wrong, and you end up with a pixelated, clunky file that stutters or gets butchered by social media compression algorithms. It's all about striking that perfect balance between stunning visual quality and a manageable file size.
Choosing the Right File Format
Your first big decision is the file format, and this choice is dictated almost entirely by where you plan to post your creation. Each format has its own set of pros and cons, so let's break them down.
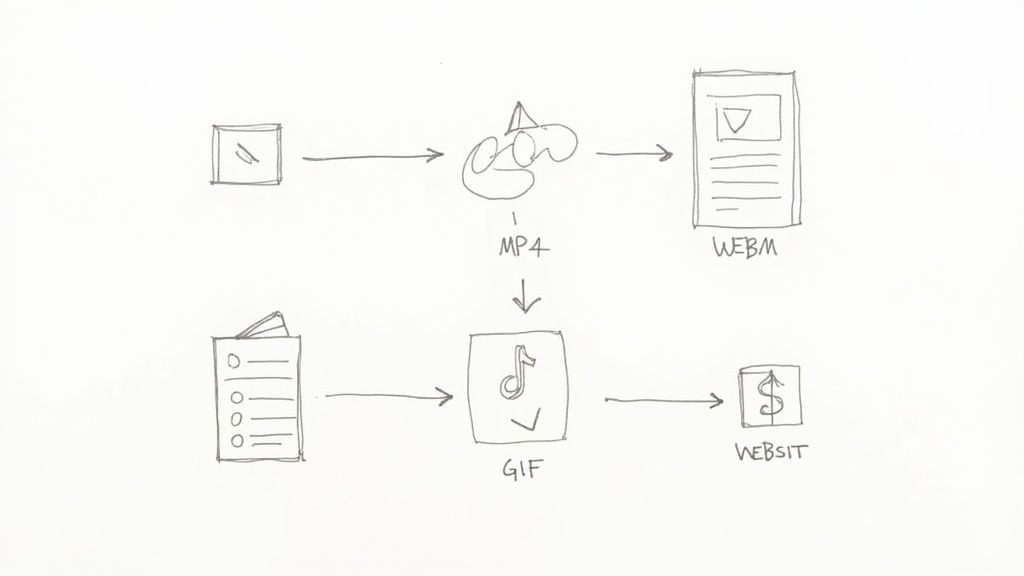
- MP4: This is the undisputed king of social media. It delivers fantastic quality in a small, efficient package, making it the go-to for platforms like Instagram, TikTok, and Facebook. When in doubt, you can't go wrong with an MP4.
- GIF: The classic looping format. While GIFs are universally supported everywhere, they're limited to only 256 colors, which can make your smooth animation look a bit grainy or dithered. Still, they're perfect for quick email embeds or website elements where video isn't practical.
- WebM: Think of WebM as a modern, high-quality alternative to the GIF. It offers much better visual fidelity at a fraction of the file size, making it a great choice for web designers. The only downside is that it isn't quite as universally supported across all platforms yet.
This whole process of turning images into shareable loops is big business. The market for GIF converters alone was valued at $4.35 billion back in 2021 and is expected to climb to $5.52 billion by 2025. You can dig into more of the numbers and learn about the GIF converter market growth if you're curious about the trend.
Nailing the Settings for Each Platform
Okay, so you've picked your format (probably MP4). Now you have to fine-tune the export settings. Every platform has its own "preferred" specifications, and uploading a file that matches them is the best way to avoid ugly compression or awkward cropping.
My best advice is to create export presets for your most-used platforms. A one-size-fits-all approach rarely works, and having presets saves you a ton of time while guaranteeing optimal results for Instagram, TikTok, and your website.
For platforms like Instagram Reels or TikTok, a vertical 1080x1920 resolution is your target. I always aim for a frame rate of 30 FPS and a bitrate between 10-15 Mbps to keep things looking sharp.
If you're embedding the animation on a website, you can usually get away with a lower bitrate to help with page load speeds. You’d be surprised how much you can lower it without a noticeable drop in quality. For a deeper dive, our guide on how to convert an image to video online for free has some more great tips on this.
Got Questions About Animating Photos? We've Got Answers
Once you start dipping your toes into photo animation, you’ll quickly run into a few common questions. It happens to everyone. Getting these sorted out early on will save you a ton of headaches and help you sidestep those initial frustrating moments. Let's break down some of the big ones I hear all the time.
Honestly, the biggest hurdle is just figuring out where to start. You see all these different tools and apps, and it’s easy to get analysis paralysis. The truth is, the "best" software really comes down to what you're trying to create and how deep you want to go.
What’s the Best Software to Animate a Still Photo?
This is the million-dollar question, and the answer is: it depends. There’s no single "best" tool, but there’s definitely a best tool for you and your project.
If you’re just starting out and want to see impressive results without a steep learning curve, AI-powered tools like Veo3 AI or Pika Labs are your best bet. They do all the complicated work behind the scenes, so you can focus on the creative side of things.
Need more granular, professional-level control for something complex like a multi-layered parallax effect? The industry has leaned on Adobe After Effects for years for a reason. And for quick, powerful edits on your phone—think cinemagraphs or adding a bit of subtle motion—apps like Motionleap or CapCut are surprisingly robust.
My advice? Start with a simple AI tool. It’s a great way to learn the basic principles of what makes motion look good. Once you get the hang of it, you can graduate to something like After Effects to really fine-tune your work with surgical precision.
Can I Animate Any Photo?
Technically, you can feed any image into an animation tool, but the results can be… unpredictable. The single most important factor for creating a believable animation is the quality of your original photo.
High-resolution images with a sharp, well-defined subject and a clear separation from the background are gold. That distinction between foreground and background is what you need to create a real sense of depth, especially for a parallax effect.
You'll get the best results with photos that have elements we naturally expect to see in motion:
- Water (crashing waves, flowing rivers, shimmering lakes)
- Skies (drifting clouds, twinkling stars)
- Fire (flickering candles, roaring campfires)
- Nature (trees swaying in the wind, tall grass)
On the flip side, low-resolution, blurry, or super cluttered photos are a nightmare for animation software to interpret. This is where you get those weird, distorted, or "wobbly" artifacts that scream "fake."
How Do I Make My Animations Look More Realistic?
The secret to realism is subtlety. When you first start, the urge is to make everything move dramatically, but that’s the fastest way to make it look cheesy. Trust me on this one: less is almost always more.
Focus on small, believable movements. A gentle puff of wind is far more convincing than a full-blown gale. To create depth, make sure things in the background move slower than things in the foreground—it’s a simple trick that mimics how our eyes perceive motion in the real world. A tiny, almost unnoticeable camera drift can also sell the illusion of a real video.
And don't forget the details! Pay close attention to light and shadow. If a candle flickers, the shadows it casts should dance along with it.
Should I Use a GIF or an MP4 Video?
For pretty much any modern use case, especially social media, MP4 is the hands-down winner. It's not even close.
MP4 files support a huge range of colors, giving you much higher visual fidelity, and they deliver significantly smaller file sizes than a GIF of the same quality. Platforms like Instagram and TikTok are optimized for video, so your MP4 will look great and loop perfectly.
GIFs aren't totally obsolete, of course. They still have a place for very simple, low-color animations in things like email signatures or on old-school forum posts. But when you want to show off your best work, you should be exporting to MP4.
Ready to stop reading and start creating? With Veo3 AI, you can jump right in and bring your own images to life without the complex software. Just upload a photo, write a simple prompt describing the motion you want, and watch it happen. Try Veo3 AI for free and see for yourself!
Our Verdict
After reviewing the available options and capabilities for animate still photos, we recommend taking a hands-on approach: start with a free trial of the leading platforms, test with your actual use cases, and upgrade to the plan that best matches your volume and quality requirements. The AI tools in this space are advancing rapidly, making now an excellent time to integrate them into your content creation workflow.
Related Articles
Continue with more blog posts in the same locale.

Animating for Beginners: Create with Veo3 AI
Learn animating for beginners with Veo3 AI. Create your first animated social clip from text & get workflow tips. No experience needed.
Read articleHow to Animate a Logo: A Practical Guide for 2026
Learn how to animate a logo from scratch. Our guide covers planning, AI tools like Veo3, pro tips on timing, and exporting for web and social media.
Read article
Minimax Hailuo AI: A Guide to Cinematic Video Generation
Unlock cinematic video with our guide to Minimax Hailuo AI. Learn its capabilities, how it compares to other models, and how to use it in your workflow.
Read article