- Blog
- Convert Image to Video Online Free with AI
Convert Image to Video Online Free with AI
You've probably seen those AI tools that can turn a simple photo into a short video clip, and it’s surprisingly easy to convert image to video online free. These platforms take your static pictures and add a little life to them in just a few minutes. You don't need to be a video editor—just upload a picture, pick an animation style, and let the AI do the heavy lifting.
Why Turn Static Images Into Dynamic Videos?

Think about the last time you were scrolling through your social media feed. What caught your eye? Chances are, it was something that moved. A static photo can be stunning, but a video always tells a richer story. That small difference is why turning images into videos is such a popular tactic for grabbing attention.
The secret sauce here is engagement. A little bit of animation can make someone pause for just a few extra seconds, and that's often all you need for your message to stick. It’s a tiny change that has a huge impact on how people see and share your content.
Practical Scenarios for Image-to-Video Conversion
This isn't just a trick for big marketing agencies. It’s a genuinely useful tool for creators, small businesses, and just about anyone looking to make their content stand out.
Here are a few real-world examples I've seen work wonders:
- Small Businesses: Imagine a local bakery with a great photo of a fresh croissant. Now, picture that same photo as a short video with steam gently rising from it. It's instantly more mouth-watering and perfect for a social media ad.
- Travelers: Instead of just posting a photo gallery, a traveler can animate their best shots. A panoramic mountain view with clouds drifting by, or a busy market scene with subtle, bustling motion. It turns a simple snapshot into a compelling Instagram Story.
- Artists and Designers: A graphic designer can bring their portfolio to life by animating logos or illustrations. This doesn't just show off the final design; it gives potential clients a peek into the creative energy behind the work.
The data backs this up, too. The huge demand to convert image to video online free is part of a larger shift. In 2024, video content accounted for roughly 82% of all global internet traffic. For businesses, the payoff is obvious: 90% of marketers report a positive ROI from video, and 87% say it directly increased their sales. If you want to dive deeper, Insivia has some great findings on the power of video marketing.
The real goal is to stop the scroll. Adding motion gives people a reason to pause, connect with what you're sharing, and actually remember it. You’re turning a passive snapshot into an active experience.
At the end of the day, turning a photo into a video is all about using motion to create a stronger connection. It’s a simple, effective way to make your content more memorable and impactful.
Creating Your First AI Video Project
Diving into a new piece of software can feel like a chore, but honestly, modern AI video tools make it surprisingly painless. You can forget about wrestling with complicated software downloads or endless sign-up forms. Most of these platforms, like the one we're using for this walkthrough, Veo3 AI, let you jump right in from your web browser.
The first thing you’ll probably see is a big, friendly "Upload" button. That’s it. These free online converters are built for speed and simplicity, letting you get straight to the creative part without needing an account first.
Preparing Your Images for Animation
Before you upload anything, take a second. What story are you trying to tell with this video? Are you stringing together a few product shots for an ad, or do you want to bring a single, stunning piece of art to life for a social media post? The goal dictates the approach.
My advice? Gather all the photos you plan to use and pop them into one folder. It sounds basic, but it saves a ton of time hunting for files later. I even like to name them in order, like mountain_view_01.jpg, mountain_view_02.jpg, etc. It just helps keep everything organized when you see it on the tool's timeline.
When you're set, you can either drag your images right into the upload box or click to browse your computer. The whole process is designed to be as smooth as possible.
Finding Your Way Around the Editor
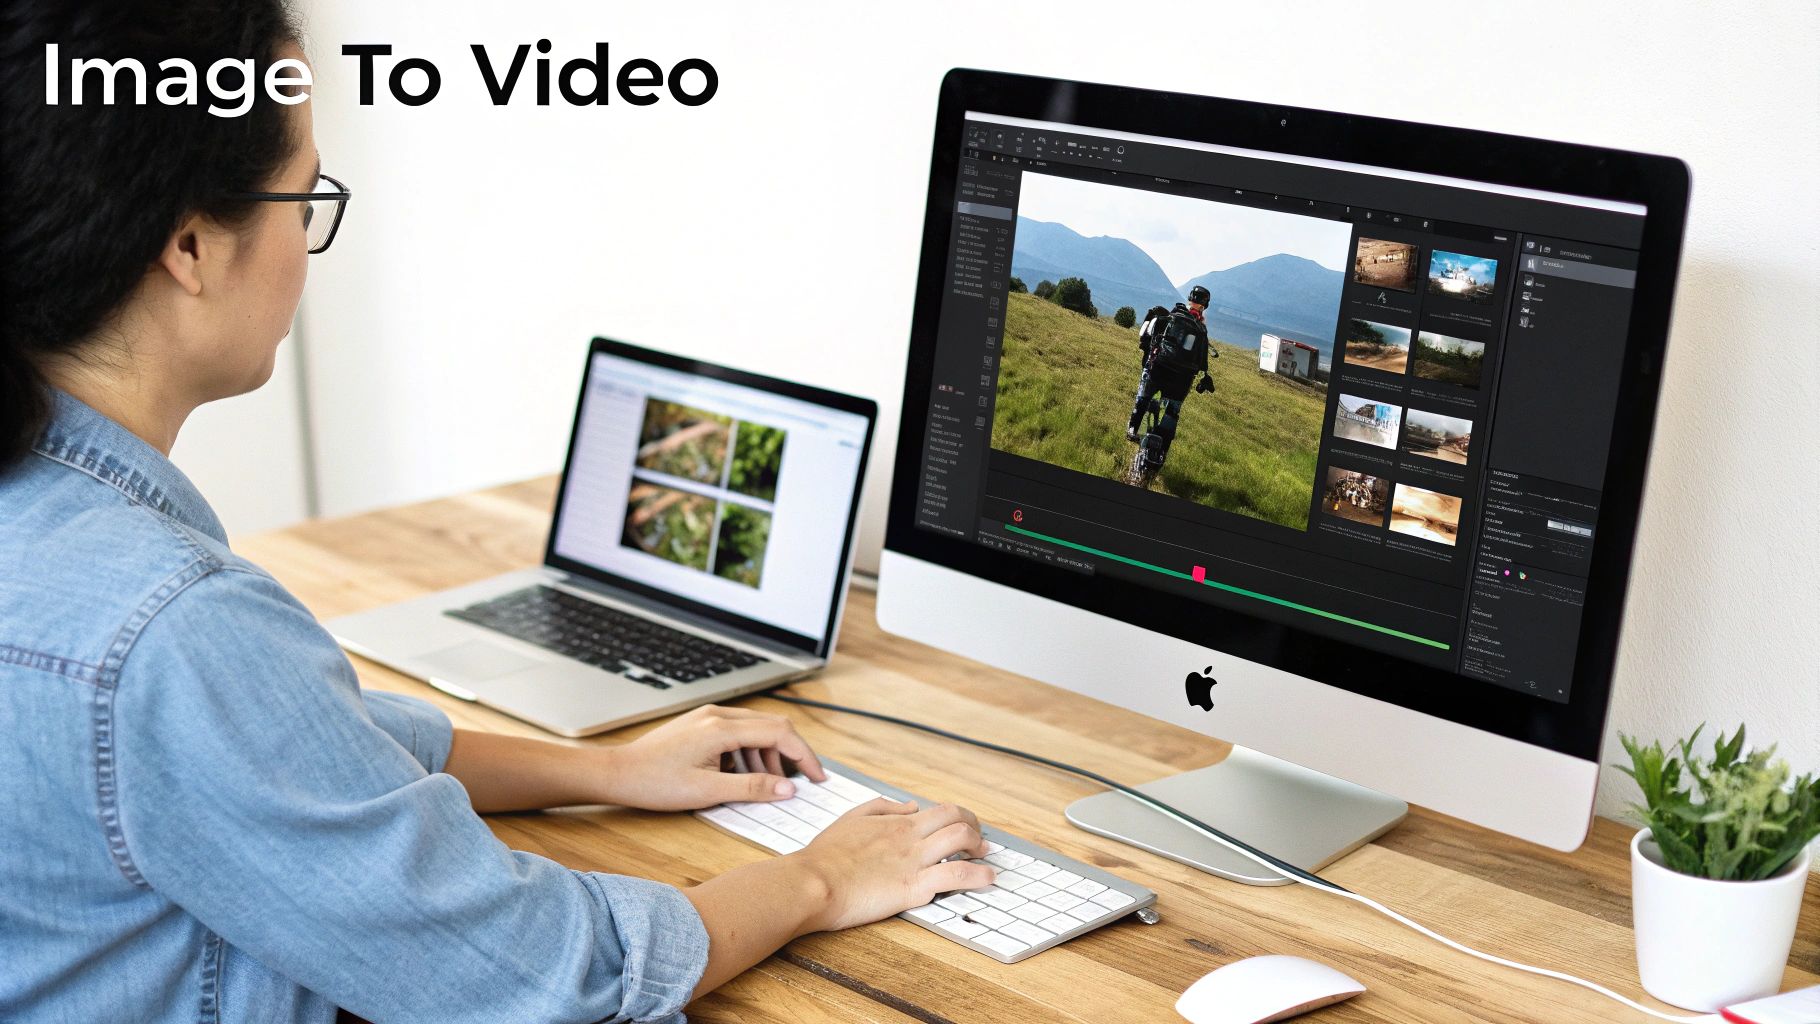
Once your images load into the editor, you'll see them on a timeline. This is where you become the director. Just drag and drop your photos to arrange them in the order you want your story to unfold.
Think of it like a mini-movie:
- The Opener: Start with an image that sets the scene or grabs attention.
- The Details: Follow up with shots that zoom in on important features or moments.
- The Closer: End on a powerful note or a clear call-to-action.
This simple framework can turn a jumble of pictures into something that actually connects with people. There are a lot of platforms out there, so it's worth finding one that clicks with your style. To see what's available, you might want to check out this list of the 12 best AI video creation tools for creators.
For your first try, the main goal is just to get comfortable with the process. Don't stress about making it perfect. Just focus on learning the ropes from uploading your images to hitting that final render button. You can always come back and polish your skills.
Before committing to a tool, it's helpful to know what features really matter.
Key Features of Free Online Image to Video Converters
Here’s a quick look at what you should be looking for in any free online converter. This table breaks down the essentials to help you make a smarter choice right from the start.
| Feature | Why It Matters for You | Typical Availability in Free Tools |
|---|---|---|
| No Watermark | A clean, unbranded video looks far more professional for business or personal branding. | Often limited; many free tools add their logo. |
| High-Resolution Output | You need at least 1080p for your video to look crisp on modern screens. | Varies greatly. Some cap free exports at 720p. |
| Variety of Animation Styles | Different styles (e.g., zoom, pan, cinematic) give you creative control over the final feel. | Usually a small, curated selection of popular styles. |
| Fast Rendering Speed | You don't want to wait hours for a short clip. Faster processing gets your content out sooner. | Generally decent for short videos, but can be slow. |
| No Account Required | This lets you test the tool's capabilities instantly without handing over your personal info. | Increasingly common for basic, one-off projects. |
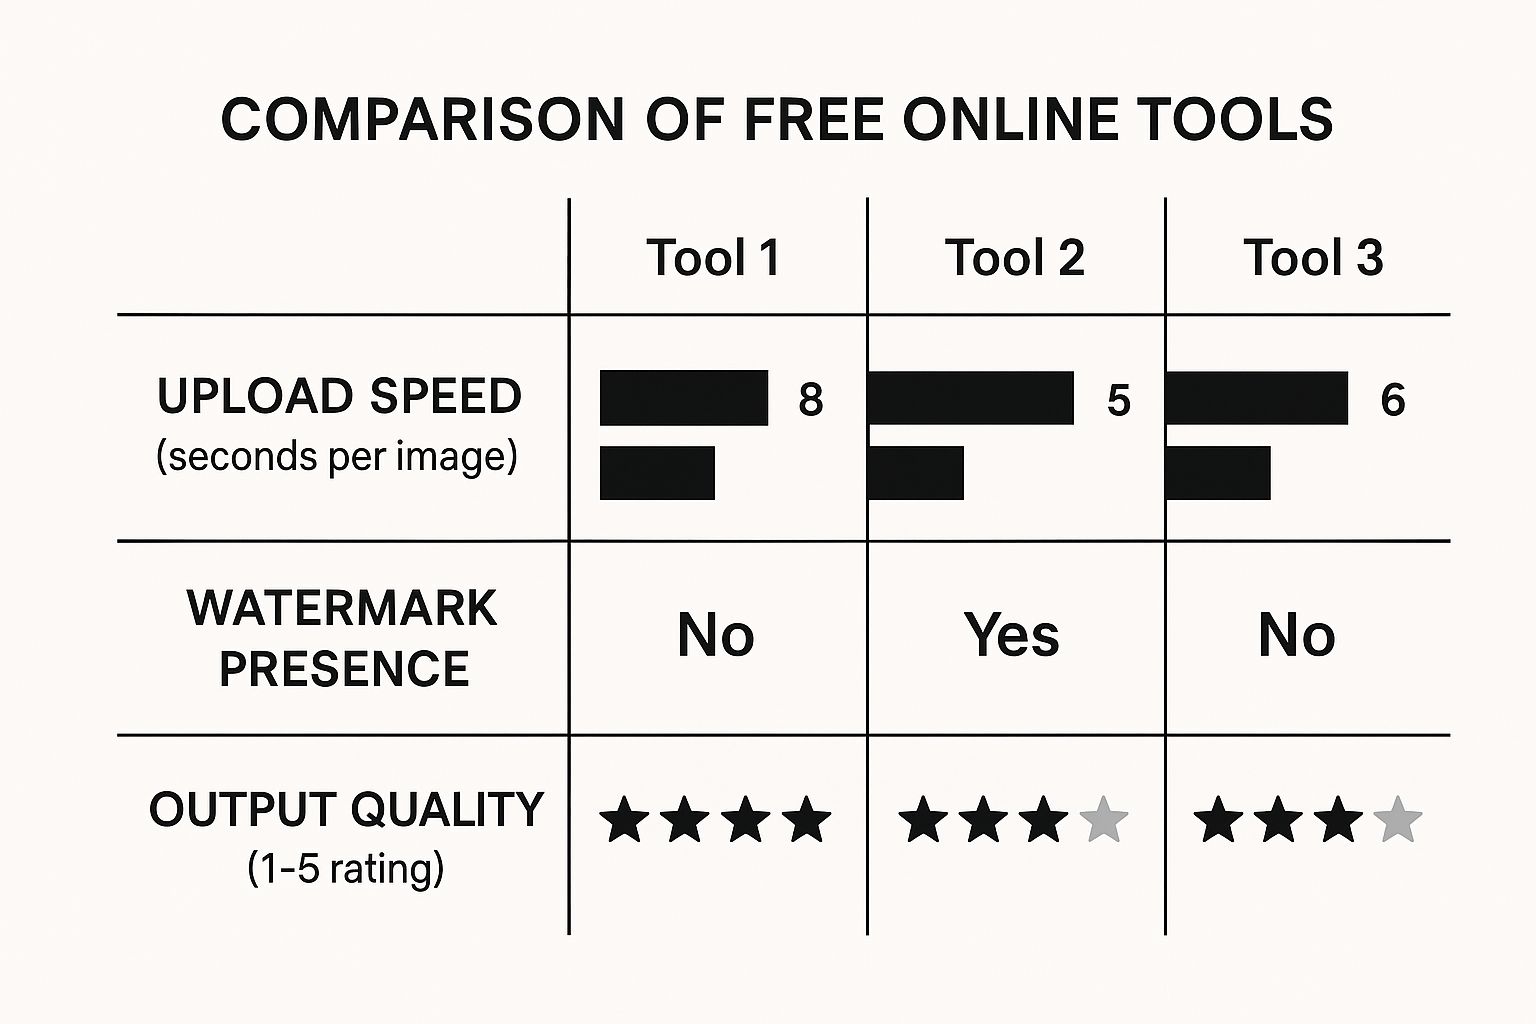
This comparison highlights the typical trade-offs you'll encounter. You might have to sacrifice output quality for speed or accept a watermark in exchange for more features. It's all about finding the right balance for your specific project.

This chart really drives home the point: different platforms prioritize different things. Some are built for speed, while others focus on giving you the highest quality output, even if it takes a bit longer.
With your images uploaded and in order, you’re ready for the fun part. If you want to dive in and try it yourself, you can learn more about how to convert image to video online free with an AI generator.
Choosing a Visual Style That Tells Your Story

Alright, your images are uploaded and in order. Now comes the fun part—deciding on the "feel" of your video. The visual style is so much more than a simple filter; it's the emotional lens your audience will experience your story through.
Take a moment and think about your goal. Are you piecing together a sleek portfolio from your latest design projects? A soft, slow fade between images might be just the ticket. If you're building a high-energy clip for social media, something with quick, dynamic zooms will probably work better. Making a deliberate choice here is what elevates a basic slideshow into a genuinely compelling video.
Most tools that let you convert image to video online free will give you a library of presets. These are fantastic starting points, usually designed for common scenarios like a "Cinematic" feel for drama or a "Playful" one for something more lighthearted.
Matching Style to Purpose
The real secret is aligning the animation with your message. A mismatch here can be jarring and confuse your viewers. Think about it: using a chaotic, fast-paced effect on a serene nature photo just doesn't feel right, does it?
Let's walk through a few common examples:
- Product Showcase: Here, the product is the star. You'll want to use subtle pans or gentle zooms that draw attention to key features. The motion should make the product look appealing without being distracting.
- Travel Montage: This is your chance to get more dynamic! Quick cuts, energetic slides, and varied zooms can bottle up the excitement of a trip. The movement should mirror the energy of your adventure.
- Personal Story: For a more thoughtful, nostalgic mood, go with slower transitions like fades or dissolves. Pacing is everything here—let each image linger long enough for viewers to connect with the moment.
The best visual style doesn't scream for attention. It quietly supports the story your images are already telling, guiding the viewer's eye and setting the emotional rhythm of the video.
Getting a handle on this relationship between motion and emotion is a game-changer. For a closer look at how animation can lift your content, check out our guide on using an AI video generator from an image. https://www.veo3ai.io/blog/ai-video-generator-from-image
Customizing Transitions and Pacing
Presets are great, but the real magic begins when you start tweaking things yourself. Most platforms will let you adjust how long each image stays on screen and the specific transition between them. This is your control panel for the video's pacing.
Leaving an image on screen longer can build suspense or invite reflection. Shorter durations create a sense of speed and excitement. Don't be afraid to mix it up to keep your video from feeling monotonous. You can even find inspiration from unexpected places, like exploring creative backgrounds for lyric video to see how motion and visuals can work together.
The need for strong visual content has never been greater. Since the mid-2010s, online video has completely reshaped how we consume information. On social media, for instance, video posts on LinkedIn see three times more engagement than plain text, and social videos generate a staggering 1200% more shares than text and images combined. This massive shift is exactly why learning simple video creation is no longer optional—it's essential.
Bringing Your Video to Life with Music and Text

You've successfully animated your image, but the job isn't done yet. A silent video is just moving wallpaper; sound and text are what give it a soul and a purpose. These final touches are what separate a simple animation from a compelling story that actually connects with people.
Think of it this way: music sets the emotional stage, while text provides the script. One tells your audience how to feel, and the other tells them what to think. When you convert an image to video online for free, look for tools that give you easy control over both.
Finding the Perfect Soundtrack
First up, let's talk audio. The music you choose is the emotional backbone of your video. Are you trying to create a sense of wonder, urgency, or maybe a relaxed, laid-back vibe for a travel montage? The soundtrack does most of the heavy lifting.
Thankfully, you don't need to be a music producer. Most modern creators like Veo3 AI come loaded with libraries of royalty-free music. This is a game-changer, as it means you can post your creation on YouTube or Instagram without worrying about copyright strikes.
Here are a few things I always keep in mind when picking a track:
- Pace is Everything: Does your video have quick cuts and lots of action? You'll want an upbeat track to match. For a slow, panning shot of a landscape, a more cinematic, ambient piece will feel right.
- Keep it Instrumental: Vocals can be distracting. Unless the lyrics are the point of your video, stick with instrumental tracks so your message—whether visual or text-based—remains the star of the show.
- Test a Few Options: Don't just settle for the first track you hear. Try out two or three different options and see how each one changes the entire feel of your video. You'll be surprised at the difference it makes.
Getting the audio right is a huge part of the creative process. For more tips on putting together compelling visual stories, you can explore our guide on how to create AI videos from the ground up.
Crafting Text That Clicks
Now for the text. Your words are the guideposts for your viewer. You can use them to introduce an idea, call out a key feature, or give a clear call-to-action (CTA). With text overlays, the golden rule is that less is more. You're adding context, not writing a novel.
A great text overlay answers the essential questions a viewer might have: What am I watching? Why should I care? What should I do next? It provides clarity and purpose without cluttering the screen.
I've found this simple three-part structure works for almost any short video:
- The Hook: Start with a bold, simple title. Something like "Our Biggest Sale Yet!" or "A New Way to Explore." It should immediately tell people why they should stick around.
- The Details: Use short, punchy phrases to highlight what's happening. If you're showing off a new product, you could use text like "100% Recycled Materials" or "Limited Edition" as the item appears.
- The Ask: End with a clear, direct instruction. What do you want them to do? "Shop The Collection," "Learn More," or "Follow Us" leaves no room for confusion.
When you carefully pair the right music with clear, concise text, your video becomes a complete package. It doesn't just look professional—it communicates effectively and leaves a lasting impression.
You’ve done the creative work—you’ve picked your images, found the perfect style, and set it all to music. Now for the final hurdle: exporting the video. This is where you lock in the quality and make sure your creation looks just as good on someone else's screen as it does on yours.
Getting these last few settings right is what separates a polished, professional video from something that just looks… off.
Getting the Technicals Right: Resolution and Aspect Ratio
The two settings that matter most are resolution and aspect ratio.
Think of resolution as the sharpness or clarity of your video. For just about anything you'll be doing, 1080p (1920x1080 pixels) is your go-to. It’s the sweet spot for crisp, clear video that looks fantastic on phones, laptops, and pretty much everywhere else.
Aspect ratio is all about the shape of your video. This is where you need to put on your audience's hat. Where are they going to be watching this?
Match the Format to the Platform
A widescreen video squished into a vertical phone screen looks tiny and awkward. You lose all the impact. That's why you have to format your video for its final destination.
Here's the simple breakdown:
- YouTube & Websites (16:9): This is your standard widescreen format. If you expect people to be watching on a computer or TV, this is the one you want.
- TikTok, Instagram Reels & YouTube Shorts (9:16): This is the king of mobile. A vertical video fills the entire phone screen, which is absolutely critical for grabbing and holding attention on these scroll-heavy platforms.
Making sure your video fits the screen isn't just a "nice-to-have." It’s fundamental. If you want to dive deeper into the specifics for TikTok, Reels, and Shorts, this is an excellent resource: A Creator's Guide to Vertical Video Dimensions.
This stuff really matters. A recent study found that 91% of consumers say video quality directly impacts their trust in a brand. And with 73% of video marketers now producing explainer videos, viewer expectations for clear, professional content are higher than ever. For more stats like these, Wyzowl offers deep insights into video marketing statistics.
Your 30-Second Pre-Flight Check
Before you click that big "Render" button, pause. Take 30 seconds to do one last sweep. Trust me, catching a mistake now beats the frustration of re-exporting the whole thing later.
Do a final once-over. Is the timing of each image right? Are there any typos in your text? Does the music fade out smoothly? A quick check now saves a huge headache later.
Once you’re happy with it, you're ready to export. Keep in mind that most tools that let you convert image to video online free will place a small watermark on the final product. It's the standard trade-off for using a free service. For a quick social post or a personal project, it's usually no big deal.
With your settings locked in, you’re all set to get your video out into the world.
Got Questions? Here’s What to Know Before You Convert Images to Video
Jumping into a new creative tool always sparks a few questions. When you start to convert an image to video online for free, you'll probably wonder about things like quality, watermarks, and what you can actually do with the video once it's made. Let's tackle some of the things people ask about most often.
What's the Deal with Watermarks?
One of the first things people worry about is the watermark. It's a classic trade-off with free online tools. So, yes, most free services, including many AI video generators, will place a small logo on your final video. It’s their way of signing their work for letting you use the tool without charge. For a personal project or a quick post on social media, this is usually no big deal.
But if you're making something for a professional portfolio or a client, that little logo can look out of place. In those situations, you'll almost certainly need to upgrade to a paid plan to download a clean, unbranded version. My advice? Always check a tool's watermark policy before you get too deep into the creative process.
Can I Actually Get High-Quality Video for Free?
This is another huge question. Can a free tool really produce a sharp, professional-looking video? The honest answer is, it depends. Many free converters limit your output resolution to something like 720p. That's perfectly fine for a small video on a webpage or an Instagram Story, but it might not look so great on a bigger screen.
The good news is that some platforms are more generous and offer 1080p exports even on their free plans, which is standard HD quality. The key is to poke around the export settings before you start. This simple check saves you from the disappointment of spending time on a video only to find out the final quality isn't what you hoped for.
My Two Cents: Always grab the highest resolution the free plan offers. Even if the video is just for a phone screen, starting with a better-quality file gives you more options and just plain looks better.
Let's Talk About Music and Content Rights
This one is a big deal, and it's easy to overlook. So you found the perfect track in the tool's built-in library and made a fantastic video. Awesome! But can you use it in a paid ad for your business?
Usually, the music inside these tools is royalty-free, which is a lifesaver for avoiding copyright strikes on platforms like YouTube or Instagram.
But here are the things you absolutely need to double-check:
- Commercial Use: Does the free plan explicitly allow you to use the video for business purposes? Some tools draw a hard line between personal and commercial projects.
- Attribution: Do they require you to give credit to the platform or the musician? It's less common these days, but it's still worth a look in their terms.
- Ownership: While you own your original images, the platform’s policies might dictate how the final combined video can be used.
I know, nobody enjoys reading the fine print. But spending five minutes scanning the usage rights can prevent a world of trouble later on. It’s the difference between sharing your creation with confidence and worrying about potential issues.
Ready to stop wondering and start creating? With Veo3 AI, you can turn your images into eye-catching videos in just a few clicks. See what AI video generation can do for your ideas and bring them to life today. Get started for free at veo3ai.io.
