Animated Explainer Video Maker: Create Compelling Content
Discover how the animated explainer video maker helps you craft engaging scripts, visuals, and distribution for powerful content.
Veo3 AI · 20 min read · Nov 23, 2025
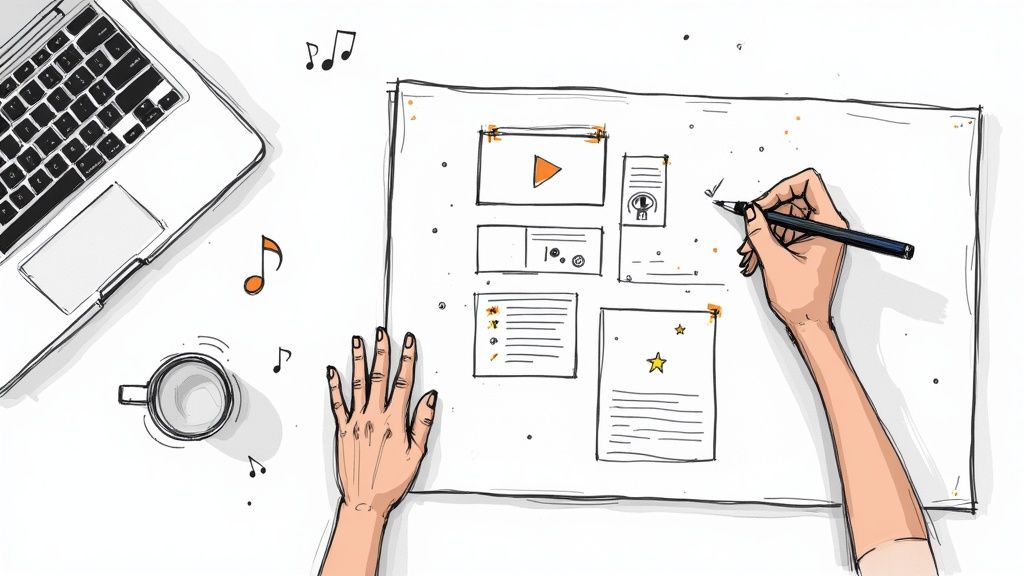
An animated explainer video maker is essentially a creative shortcut. It’s a tool that helps you build those clean, engaging, cartoon-style videos that make complicated ideas feel simple. What’s really changed the game are platforms like Veo3 AI, which use artificial intelligence to translate your text prompts directly into professional-looking animations. This opens the door for anyone to create high-quality videos without a lick of technical experience, saving a ton of time and money compared to the old-school production route.
Quick Answer: You can animate photos and illustrations using AI tools like Google Veo 3, Runway, Kling, or Pika—simply upload your image, describe the desired motion in a text prompt, and the AI generates a realistic animated video in seconds. No animation experience is required.
Why Animated Videos Just Work
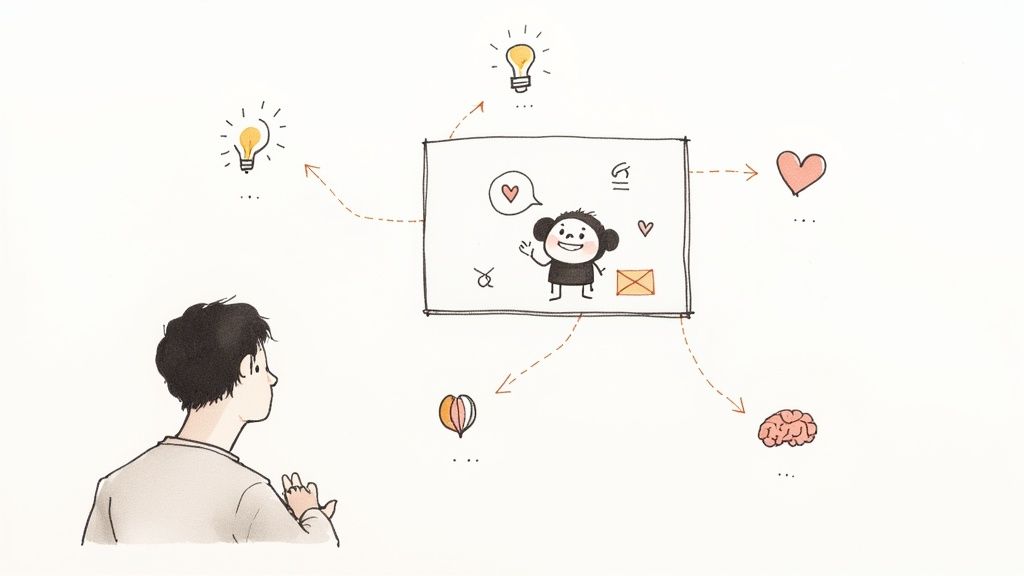
Have you ever noticed how a quick animation can clarify a concept that would take pages of text to explain? There's a bit of brain science behind that. We're visual creatures, hardwired to process images an incredible 60,000 times faster than text. Animation taps directly into that, boiling down complex ideas into characters, symbols, and stories that everyone can grasp almost instantly. In a world of endless content, that's a powerful way to get—and keep—someone's attention.
Making the Complex Simple
Think of animated videos as a visual cheat sheet. They excel at deconstructing tricky subjects—whether it’s a software walkthrough or the nuances of a new service—and rebuilding them as simple, memorable stories. Instead of just telling someone how a process works, you get to show them. That visual demonstration forges an immediate connection and a much deeper level of understanding.
This kind of storytelling packs a serious punch for a few key reasons:
- It Makes Information Stick: People are far more likely to remember a message they saw and heard in an engaging video than one they just read.
- It Builds an Emotional Bridge: Good characters and a clear narrative make your brand feel more human, relatable, and trustworthy.
- It Keeps People Watching: The constant movement, vibrant colors, and clear audio of animation are fantastic at holding a viewer's focus.
The magic of animation isn't just about making things look cool. It's about using a universal visual language to connect with your audience on a human level. It’s the difference between talking at someone and sharing an idea with them.
AI is Supercharging Animation
The effectiveness of this medium isn't a secret, and the numbers prove it. The global animation market was already valued at around USD 462.32 billion in 2025, and it’s on a trajectory to nearly double to USD 895.71 billion by 2034. You can dig into these impressive animation market growth projections to see the full picture.
Tools like Veo3 AI are a huge part of this explosion, putting the power of animation into everyone's hands. You don't need a massive budget or a team of artists anymore. Now, you can just describe what you want to see, and the AI will generate the scenes, characters, and motion for you. It's an incredible way to turn your ideas into polished videos that actually tell a compelling story and drive results.
How to Plan Your Explainer Video for Success
Jumping straight into an AI animation tool without a plan is a classic rookie mistake. It’s a bit like starting a road trip without a map—you'll definitely go somewhere, but probably not where you intended. A truly great video starts with a solid strategy long before you even think about generating the first frame.
The absolute first thing you need to pin down is a single, measurable goal. What do you really want this video to achieve? It’s tempting to list a bunch of objectives, but a video trying to do everything at once will ultimately accomplish nothing. Get laser-focused.
- Are you trying to increase free trial sign-ups by 15%?
- Maybe you want to reduce customer support tickets about a specific feature by 30%.
- Or perhaps the goal is to improve landing page conversion rates by 5%.
Having one clear goal becomes your North Star. It guides every single decision you make, from the script's tone all the way to the final call-to-action.
Define Your Audience and Core Message
Once you have your goal, you need to know exactly who you're talking to. And no, "everyone" is not an audience. Get specific. Picture one ideal customer. What are their biggest frustrations? What problems are keeping them up at night? Your video has to speak directly to those pain points to have any real impact.
When you understand their problem, you can frame your product as the obvious solution. This isn't the time to rattle off a long list of features. Instead, craft a simple, powerful statement that answers the viewer's most important question: "What's in it for me?"
Pro Tip: Try boiling down your core message into a single, punchy sentence. Something like, "Our app helps busy professionals save 10 hours a week by automating their scheduling." This kind of clarity is the bedrock of a strong script.
Scripting for Animation
Writing a script for an animated explainer is a different beast than writing a blog post. You have to think visually from the get-go and keep your language incredibly tight. I always recommend a conversational tone and short sentences—they're just easier for a voiceover artist to narrate and for viewers to digest.
I’ve found that the most effective explainer videos almost always follow a simple, proven narrative structure:
- The Problem: Kick things off by introducing a relatable problem your target audience deals with.
- The Solution: Present your product or service as the hero that solves this exact problem.
- How It Works: Briefly show how your solution works in a super simple, easy-to-follow way.
- The Call-to-Action (CTA): End by telling the viewer exactly what you want them to do next.
This structure is popular for a reason—it just works. Explainer videos have become a huge part of modern marketing. By 2025, 73% of video marketers were making explainer videos their main tactic, which makes sense when you learn that 85% of people are more likely to buy after watching one. If you're curious about the numbers, you can dig into some detailed explainer video statistics.
A well-planned script doesn't just tell a compelling story; it also makes the visual side of things a thousand times easier. As you write each line, start picturing what’s happening on screen. This early visualization is the first step to creating a solid storyboard. For a more detailed walkthrough on that, check out our guide on how to storyboard a video.
Mastering AI Prompts to Create Your Animation
Alright, this is where the magic really happens. You've got your script, and now it's time to turn those words into a visual story using an animated explainer video maker like Veo3 AI.
Think of yourself not as someone just typing commands, but as an art director collaborating with a very talented, but extremely literal, artist. The quality of the animation you get back is a direct reflection of the quality of the instructions you provide.
Vague, one-line requests will give you generic, unpredictable results. The real power comes from painting a detailed picture for the AI.
This is why all that upfront planning—your objective, your audience, your script—is so important. It all feeds directly into this creative stage, ensuring the visuals you generate actually serve the story you're trying to tell.
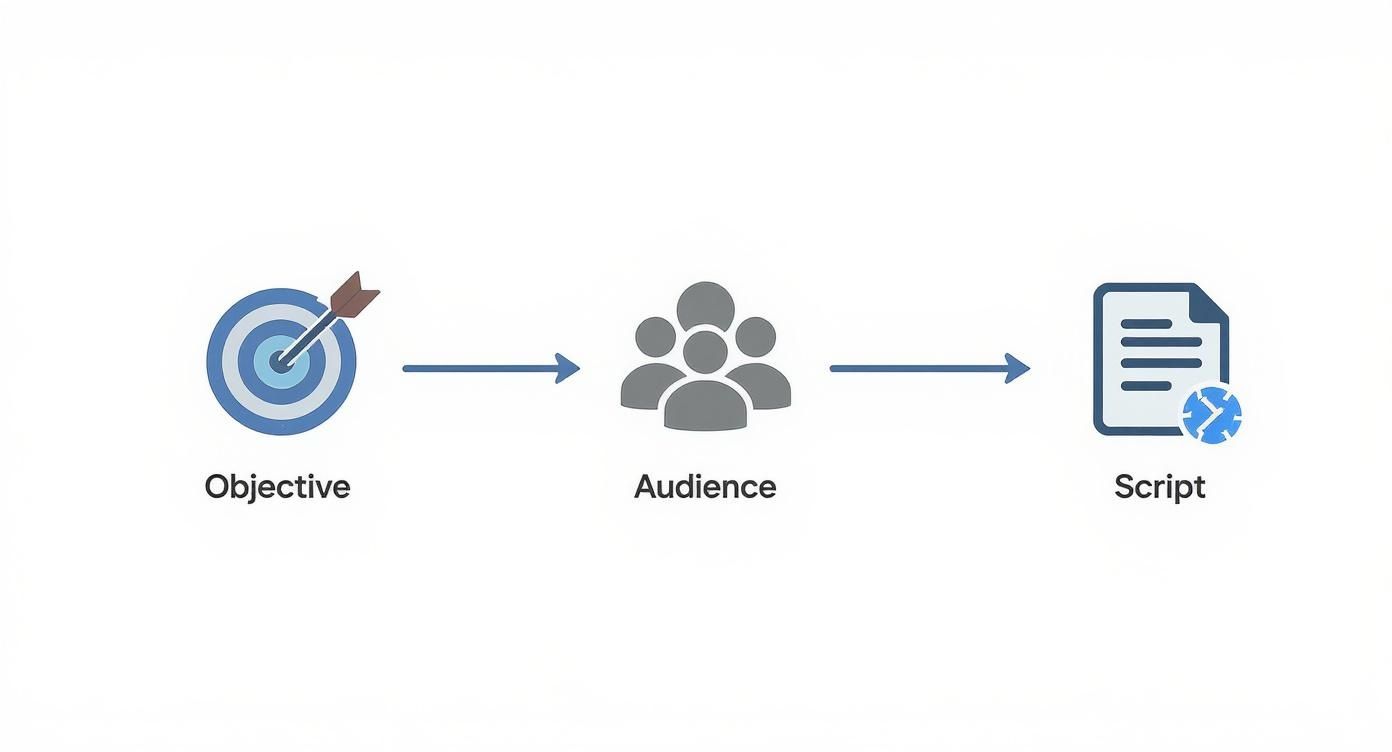
As you can see, a solid plan makes the animation phase so much smoother and more effective.
Writing Prompts That Actually Work
So, what makes a good prompt? It's all about descriptive language. A great prompt is a recipe, and you need to provide the AI with all the key ingredients: the subject, their action, the environment, and the artistic style.
Let’s break down what a truly effective prompt needs:
- Subject & Action: Who's the star of the scene and what are they doing? Be specific. "A friendly robot mascot waving at the camera" is much better than "a robot."
- Setting & Environment: Where is this happening? Describe the background. Think: "in a modern, sunlit startup office with large windows and plants."
- Art Style: This is absolutely critical for a consistent look and feel. Is it "minimalist 2D vector art" or something else? Define it.
- Color Palette: Don't leave color to chance, especially if you have brand guidelines. Specify it: "using a color palette of navy blue, coral, and off-white."
- Camera Angle: You're the director, so frame the shot. Is it an "eye-level medium shot" or a "dynamic low-angle shot"?
When you put it all together, you can see the difference. A lazy prompt like "robot in an office" becomes a powerful, direct instruction.
Powerful Prompt Example: "Minimalist 2D vector art of a friendly robot mascot waving at the camera, eye-level medium shot, in a modern, sunlit startup office with large windows and plants, using a color palette of navy blue, coral, and off-white."
This level of detail takes the guesswork out of it and gives you visuals that are incredibly close to what you pictured in your head.
The Secret to Consistent Characters and Style
One of the trickiest parts of making AI animation is keeping your characters and overall style looking the same from scene to scene. If your main character looks different in every shot, your video will feel disjointed and unprofessional.
The solution is to create a "character sheet" within your prompt—a core description you reuse every single time that character appears.
Let’s say the AI generated a robot you love. We'll name him Sparky. Nail down his description.
Your reusable character prompt could be: "Sparky the friendly robot mascot, white and navy blue, with a single coral-colored eye, simple rounded body shape."
Now, you just tack this description onto the front of your action prompt for each new scene:
- Scene 1: "Sparky the friendly robot mascot... waving at the camera in a modern office."
- Scene 2: "Sparky the friendly robot mascot... pointing to a graph on a digital whiteboard."
- Scene 3: "Sparky the friendly robot mascot... giving a thumbs-up, close-up shot."
Using this method, you're essentially training the AI on your character, which leads to a much more cohesive final video. Keeping an eye on the latest trends in AI content generation can also reveal new techniques for achieving even better consistency as the technology evolves.
A Look at Effective Prompt Structures
To really see the difference, let’s compare some basic prompts with more advanced, detailed versions that an experienced creator would use. The goal is always to remove ambiguity and give the AI a clear blueprint.
| Effective AI Prompt Structures for Explainer Videos | | :--- | :--- | :--- | :--- | | Scene Goal | Basic Prompt Example | Advanced Prompt Example | Key Elements to Include | | Introduce a character | A happy business person | 2D vector art of a female entrepreneur with brown hair in a bun, wearing a blazer, smiling confidently. Medium shot, eye-level. | Character description, art style, camera angle, action. | | Show a product UI | A person using a phone | Clean animation of a user's thumb scrolling through a sleek mobile app on an iPhone. The UI is minimalist with a blue and white color scheme. | Specific action, UI details, color palette, platform. | | Explain a complex idea | A lightbulb over a head | Metaphorical animation: a network of glowing nodes connecting to form a brain shape, symbolizing interconnected ideas. Flat design, dark background. | Metaphor, style, colors, specific imagery. | | Before-and-after shot | A sad person and a happy person | Split-screen: Left side in muted grays, a character slumps over a messy desk. Right side in bright, warm colors, the same character smiles at a clean desk. | Color psychology, split-screen command, emotional cues. |
As you can see, the advanced examples aren't just longer—they're packed with specific, directorial choices that guide the AI toward a professional-quality result.
Quick-Start Prompt Templates
Sometimes, you just need a starting point. Feel free to grab these templates and customize them with your own details.
Introducing a Product Interface:
- "Clean screen recording animation of a user scrolling through a mobile app dashboard. Showcasing charts and notifications. Minimalist UI, bright and friendly color scheme. Smooth, simple transitions."
Visualizing an Abstract Concept (e.g., "Security"):
- "2D vector art of a digital shield deflecting abstract virus icons. The shield glows with a protective blue light. Dark background with network lines. Metaphor for data protection."
Showing a Customer's "Before and After":
- "Split screen animation. Left side: frustrated person surrounded by messy paperwork, muted colors. Right side: same person smiling and relaxed at a clean desk using a laptop, bright, warm colors. Flat character design."
By really digging in and mastering these prompting techniques, you shift from simply using a tool to truly directing your animated video. If you want to go even deeper on this topic, our guide on how to create AI videos has even more tips.
Putting the Final Polish on Your AI Video
Getting your raw animated clips from Veo3 AI is a great feeling, but the real magic happens in the editing room. This is where you transform a collection of AI-generated scenes into a polished, professional story that actually connects with people. Think of it as assembling the high-quality parts into a finished product.
Honestly, this final step is what separates a decent video from one that feels credible and keeps viewers hooked. It’s all about weaving your visuals together with a great audio track, nailing the pacing, and adding the branding that makes the video unmistakably yours.
Adding a Compelling Voiceover
The voiceover is the heart and soul of an explainer video. It's the guide that walks your audience through the story and gives your brand a human personality. You’ve got a few solid options here. Recording it yourself adds a personal, authentic touch. Hiring a professional voice actor delivers that premium, broadcast-quality sound. Or, for speed and consistency, a high-quality AI voice generator can be surprisingly effective.
Whichever path you choose, the audio must be crystal clear and the tone has to fit your brand. I've found that a warm, conversational style almost always works best for explainers—it feels less like a sales pitch and more like a helpful conversation.
The single most important job during this phase is to sync the on-screen action with the narration. When the voiceover mentions a new feature, that feature needs to pop up on screen at that exact moment. This sync is what makes the video easy to follow.
Getting your audio and video perfectly aligned takes patience, but it’s a non-negotiable part of making your video look professional. If you want to get really good at this, our guide on how to sync audio to video breaks down the process with some practical techniques.
Choosing the Right Soundtrack and Effects
Music is the emotional engine of your video. A good background track can make your message feel more exciting, trustworthy, or inspiring. It completely sets the mood.
When you're browsing for music, keep a few things in mind:
- Complement, Don't Compete: The music should always support the voiceover, never fight it. I stick to instrumental tracks and mix the volume low enough that the narration is always front and center.
- Match the Vibe: A high-energy, upbeat track is perfect for a product launch video. For a more educational piece, something calmer and more thoughtful will fit much better.
- Use Sound Effects (SFX) Wisely: A subtle whoosh on a transition or a click on a button press adds a fantastic layer of polish. Just don't overdo it. Too many sound effects will quickly make your video feel cluttered and distracting.
Final Touches for a Professional Look
Okay, your audio is locked in. Now it’s time for those final visual details that tie everything together and reinforce your brand. These small tweaks make a huge difference in the final product.
Key Polishing Moves:
- Add Text Overlays: Use clean, simple text to highlight key statistics or important phrases from your script. Make sure the font is on-brand and easy to read.
- Incorporate Your Logo: Place your logo in a corner—usually the top right or bottom right—and keep it there for the duration of the video. It's a subtle but powerful way to build brand recognition.
- Refine Scene Transitions: Ditch the abrupt jump cuts. Use smooth fades or slides to move between scenes. This simple change makes the viewing experience feel much more fluid and professional, guiding the viewer seamlessly from one point to the next.
Getting Your Video Out There for Maximum Impact
https://www.youtube.com/embed/WeWQQhjZk-0
Alright, you've done the hard part and created a fantastic animated video. That's a huge win, but your job isn't quite finished. An amazing video that nobody sees isn't going to move the needle for your business.
Now it's time to shift from creator to strategist. This last leg of the journey is all about turning that polished video into a real-world asset that gets views, sparks conversations, and drives results. We'll start with the nuts and bolts of exporting from the animated explainer video maker and then dive into a smart distribution plan.
Dialing in the Right Export Settings
First things first, you need to get your video out of Veo3 AI and ready for the world. The platform gives you a few different export options, and picking the right one is crucial for how your video looks on different sites. This is a small detail that makes a big difference.
Here’s a quick cheat sheet for the most common platforms:
- YouTube & LinkedIn: Stick with a 16:9 aspect ratio. This is the standard widescreen format that looks great on desktops and TVs. For quality, 1080p (Full HD) is the gold standard—it’s sharp and professional without being an enormous file.
- Instagram Reels, TikTok & YouTube Shorts: Go vertical. A 9:16 aspect ratio is non-negotiable here. It fills the entire phone screen, which is exactly what you need to capture attention on these fast-paced platforms. Again, 1080p is your best bet for resolution.
Trust me, choosing the wrong aspect ratio is a rookie mistake. It leaves you with those awkward black bars that just scream "unprofessional." Always export with your primary distribution channel in mind.
Winning the Discovery Game on YouTube
Think of YouTube as less of a video library and more of the world's second-biggest search engine. If you want people to find your video, you have to play the SEO game. Your title and description are your most valuable weapons here.
Your title needs to be both compelling and packed with the keywords your audience is searching for. Ditch the generic "Company Explainer Video" and get specific. Something like "How Our App Automates Invoicing for Freelancers" works much better.
Your video description is prime real estate. Use it to write a mini-blog post summarizing the video, include relevant keywords naturally, and add a clear call-to-action with a link to your website right at the top.
Creating Shareable Social Media Posts
When you move over to platforms like LinkedIn, X (formerly Twitter), or Facebook, your goal changes. Here, you're trying to start a conversation. Simply dropping a link to your video won't cut it. You need to frame it with a hook.
Try leading with a provocative question or a surprising statistic from the video itself. It gets people to stop scrolling.
For instance, you could post: "Did you know that teams waste an average of 10 hours a week on manual data entry? Our new animated video shows how to get that time back. What would you do with an extra 10 hours?"
This kind of post invites engagement, which is exactly what social media algorithms are designed to reward. Of course, to really hit your goals, you'll want a complete strategy. For that, check out this an easy guide to video distribution to help you build a more robust plan.
Common Questions About Explainer Video Makers
Diving into AI animation for the first time usually sparks a few questions. I've found that getting these fundamentals right from the beginning is what separates a decent video from a truly effective one. Let's walk through some of the things people ask most when they start using an animated explainer video maker.
How Long Should My Explainer Video Be?
One of the first things people want to nail down is the length. The sweet spot for most explainer videos is between 60 and 90 seconds. That's just enough time to hook the viewer, present the core problem, introduce your solution, and wrap up with a clear call-to-action before their attention starts to wander.
If you’re creating content specifically for social media feeds, you'll want to think even shorter. Aim for something in the 30 to 60-second range to make an immediate impact.
Can AI Really Match My Brand's Style?
This is a big one. People worry that an AI tool will produce something generic that doesn't feel like their brand. The good news is, you can absolutely maintain your brand identity—you just have to be specific with your instructions.
To keep things consistent, you can directly feed the AI your brand's color palette right in the prompt.
- For instance, you could specify: "…using a color palette of navy blue (#001f3f), coral (#FF6F61), and off-white (#F8F8F8)."
- You can also guide the visual style to match your existing assets by requesting things like "in a flat 2D vector art style" or "minimalist line art animation."
Once the video is rendered, adding your logo as a permanent overlay during the final edit really ties everything together for a polished, professional look.
I see a lot of people make the same mistakes: their video is too long, they cram in way too much information, or they forget a call-to-action. Stick to one core message and always, always tell the viewer what you want them to do next.
The best way to sidestep these issues is to keep your script focused. You're not trying to explain every single feature; you're just giving them enough to get curious and take the next step. Always end with a direct instruction, like "Visit our website to learn more" or "Start your free trial today."
Ready to bring your ideas to life? Start creating stunning videos in minutes with Veo3 AI. Try Veo3 AI for free!
Our Verdict
After reviewing the available options and capabilities for animated explainer video maker, we recommend taking a hands-on approach: start with a free trial of the leading platforms, test with your actual use cases, and upgrade to the plan that best matches your volume and quality requirements. The AI tools in this space are advancing rapidly, making now an excellent time to integrate them into your content creation workflow.
Related Articles
Continue with more blog posts in the same locale.

Animating for Beginners: Create with Veo3 AI
Learn animating for beginners with Veo3 AI. Create your first animated social clip from text & get workflow tips. No experience needed.
Read articleHow to Animate a Logo: A Practical Guide for 2026
Learn how to animate a logo from scratch. Our guide covers planning, AI tools like Veo3, pro tips on timing, and exporting for web and social media.
Read article
Minimax Hailuo AI: A Guide to Cinematic Video Generation
Unlock cinematic video with our guide to Minimax Hailuo AI. Learn its capabilities, how it compares to other models, and how to use it in your workflow.
Read article