Veo 3 Tutorial for Beginners: Complete Step-by-Step Guide 2026
Learn how to use Veo 3 with this comprehensive beginner guide. Master text-to-video and image-to-video generation with step-by-step tutorials, prompt techniques, and troubleshooting tips.
Emma Chen · 14 min read · Apr 12, 2026
Introduction
Artificial intelligence has revolutionized the way we create video content, and Google's Veo 3 stands at the forefront of this transformation. Whether you're a content creator looking to produce engaging videos without expensive equipment, a marketer seeking to scale your visual content production, or simply curious about the latest AI video generation technology, this comprehensive Veo 3 tutorial will guide you through everything you need to know to get started.
Veo 3 represents a significant leap forward in AI video generation capabilities. With its ability to create high-quality, realistic videos from simple text descriptions or static images, it has opened up new possibilities for creators of all skill levels. In this beginner-friendly guide, we'll walk you through the entire process—from understanding what Veo 3 is to creating your first AI-generated video and mastering advanced techniques.
By the end of this tutorial, you'll have the knowledge and confidence to use Veo 3 effectively, understand its features and limitations, and create compelling video content that meets your needs. Let's dive into the world of AI-powered video creation with Veo 3.
What is Veo 3?
Veo 3 is Google's most advanced AI video generation model, developed by DeepMind and Google Research. Building upon the success of its predecessors, Veo 3 introduces significant improvements in video quality, consistency, and user control. The model can generate high-resolution videos up to 1080p quality with remarkable realism and temporal coherence.
Key Features of Veo 3
High-Quality Video Generation: Veo 3 produces videos with impressive visual fidelity, supporting resolutions up to 1080p. The generated videos feature smooth motion, consistent lighting, and realistic physics that make them suitable for professional use cases.
Text-to-Video Capabilities: The core functionality allows users to create videos by simply describing what they want to see. The AI interprets natural language prompts and translates them into visual content, making video creation accessible to anyone regardless of technical expertise.
Image-to-Video Transformation: Veo 3 can animate static images, bringing photographs and illustrations to life. This feature is particularly valuable for creators who want to add motion to existing visual assets or create dynamic content from still images.
Extended Duration: Unlike earlier AI video models that were limited to a few seconds, Veo 3 can generate longer video sequences, providing more flexibility for storytelling and content creation.
Enhanced Prompt Understanding: The model demonstrates sophisticated comprehension of complex prompts, including camera movements, scene compositions, lighting conditions, and specific visual styles.
Why Choose Veo 3?
For beginners entering the world of AI video generation, Veo 3 offers several compelling advantages:
Accessibility: The intuitive interface and natural language processing make it easy for anyone to create videos without learning complex software or video editing techniques.
Cost-Effectiveness: Compared to traditional video production, which requires expensive equipment, studio space, and professional expertise, Veo 3 provides a budget-friendly alternative.
Speed: What might take hours or days to produce traditionally can be accomplished in minutes with Veo 3, dramatically accelerating content production workflows.
Creative Freedom: The AI can generate scenes and scenarios that would be impossible or prohibitively expensive to film in real life, unlocking unlimited creative possibilities.
Continuous Improvement: Google consistently updates Veo 3 with new capabilities, better quality, and enhanced features. As a user, you benefit from these improvements automatically without needing to learn new software versions or pay for expensive upgrades.
Versatile Applications: Whether you're creating content for social media, marketing campaigns, educational materials, or personal projects, Veo 3 adapts to your needs with flexible output options and customizable parameters.
Getting Started with Veo 3
Step 1: Accessing Veo 3
To begin using Veo 3, you'll need to access it through the official platform. Visit veo3ai.io to get started. The platform provides a user-friendly interface designed specifically for beginners while offering advanced features for experienced users.
Upon visiting the site, you'll be greeted with a clean, intuitive dashboard. If you're new to the platform, you'll need to create an account. The registration process is straightforward—simply provide your email address, create a password, and verify your account through the confirmation email.
Step 2: Understanding the Interface
Once logged in, take a moment to familiarize yourself with the main interface components:
Dashboard: This is your central hub where you can access all Veo 3 features, view your generated videos, and manage your account settings.
Creation Panel: Located prominently on the main screen, this is where you'll input your prompts and configure generation settings.
Video Library: All your generated videos are stored here, organized by date and searchable by keywords or tags.
Settings: Access your account preferences, subscription details, and generation parameters from this section.
Step 3: Setting Up Your First Project
Before generating your first video, it's helpful to plan your content:
-
Define Your Goal: What do you want to achieve with your video? Are you creating content for social media, a presentation, or personal experimentation?
-
Choose Your Approach: Decide whether you'll use text-to-video or image-to-video generation based on your available resources and desired outcome.
-
Prepare Your Assets: If using image-to-video, have your source images ready. For text-to-video, draft a clear, detailed description of what you want to create.
-
Consider Your Audience: Think about who will watch your video and what platforms they'll use. This influences your choice of aspect ratio, duration, and style.
-
Create a Simple Storyboard: Even a rough sketch or written outline helps visualize the sequence of events you want to capture in your video.
Text-to-Video Tutorial
Text-to-video is the most popular way to use Veo 3, allowing you to create videos from scratch using only written descriptions. Here's how to master this feature:
Step 1: Crafting Effective Prompts
The quality of your generated video depends heavily on the quality of your prompt. Follow these guidelines for best results:
Be Specific: Instead of "a dog running," try "a golden retriever puppy running through a sunny meadow with wildflowers, captured in slow motion with a tracking shot."
Include Technical Details: Mention camera angles, lighting conditions, and visual styles. For example: "cinematic wide shot, golden hour lighting, shallow depth of field."
Describe Motion: Clearly articulate how elements should move within the scene. Use terms like "panning," "zooming," "tracking," or "static."
Set the Mood: Include emotional and atmospheric descriptors like "peaceful," "energetic," "mysterious," or "joyful."
Step 2: Configuring Generation Settings
After entering your prompt, you'll need to configure several parameters:
Duration: Select how long you want your video to be. For beginners, start with shorter durations (4-8 seconds) to get familiar with the tool before attempting longer videos.
Resolution: Choose your output quality. Higher resolutions produce better-looking videos but take longer to generate and consume more credits.
Aspect Ratio: Select the appropriate format for your intended platform—16:9 for YouTube, 9:16 for TikTok/Reels, 1:1 for Instagram posts.
Style Presets: Apply style filters if you want a specific aesthetic like "cinematic," "animated," or "vintage."
Step 3: Generating Your Video
Once your prompt and settings are configured:
- Click the "Generate" button to start the creation process
- The AI will process your request, which typically takes 30 seconds to 2 minutes depending on complexity and server load
- You'll see a progress indicator showing the generation status
- When complete, your video will appear in the preview window
Step 4: Reviewing and Refining
After generation, carefully review your video:
Check for Consistency: Ensure that elements remain consistent throughout the video—objects shouldn't suddenly change color or shape.
Evaluate Motion Quality: Look for smooth, natural movement. Jerky or unnatural motion may require prompt refinement.
Assess Overall Quality: Consider whether the video meets your needs or if adjustments are necessary.
If the result isn't perfect, don't worry—AI video generation often requires iteration. Adjust your prompt based on what you observed and generate again.
Image-to-Video Tutorial
Image-to-video allows you to animate existing images, opening up creative possibilities for photographers, designers, and marketers.
Step 1: Preparing Your Source Image
For best results with image-to-video:
Choose High-Quality Images: Start with clear, well-composed images at sufficient resolution. The AI works best with photos that have good lighting and clear subjects.
Consider Composition: Images with clear foreground and background elements typically animate better than flat or overly busy compositions.
Select Appropriate Subjects: People, animals, vehicles, and natural elements (water, clouds, trees) tend to animate more convincingly than abstract objects.
Step 2: Uploading and Configuring
- Click the "Image to Video" option in the creation panel
- Upload your image by dragging and dropping or selecting from your device
- Wait for the image to process and display in the preview window
- Configure your generation parameters similar to text-to-video
Step 3: Describing the Animation
Even when using image-to-video, you'll need to provide a text description of how you want the image to animate:
Specify Motion Type: Describe the kind of movement you want—"gentle camera pan from left to right," "subject slowly turns toward camera," "leaves rustling in breeze."
Control Intensity: Indicate how subtle or dramatic the motion should be—"subtle, barely perceptible movement" versus "dynamic, energetic motion."
Add Context: If relevant, describe what should happen outside the frame or how the environment should respond.
Step 4: Generation and Refinement
Generate your video and evaluate the results:
Check Image Fidelity: Ensure the original image details are preserved during animation. Assess Motion Naturalness: The movement should feel organic rather than artificial. Verify Continuity: The animation should loop smoothly if intended for repeated playback.
Advanced Prompt Techniques
As you become more comfortable with Veo 3, these advanced techniques will help you achieve professional-quality results:
Camera Movement Language
Mastering camera movement descriptions dramatically improves video quality:
Dolly/Truck: Camera moves forward/backward or left/right parallel to the subject Pan/Tilt: Camera rotates horizontally or vertically while maintaining position Crane/Jib: Sweeping vertical movements that add cinematic drama Handheld/Shaky: Intentional instability for documentary or action aesthetics Steadicam/Glide: Smooth, floating movements ideal for professional productions
Lighting and Atmosphere
Control the mood through lighting descriptions:
Golden Hour: Warm, soft light from sunrise or sunset Blue Hour: Cool, twilight illumination with deep shadows High-Key: Bright, even lighting with minimal shadows Low-Key: Dramatic contrast with deep blacks and selective highlights Neon/Artificial: Urban night scenes with colorful artificial light sources
Style Modifiers
Apply artistic styles to your videos:
Cinematic: Film-like quality with proper color grading and composition Documentary: Natural, unscripted appearance with available lighting Animated: Cartoon or illustration-like aesthetic Vintage: Period-appropriate look with film grain and color shifts Futuristic: Clean, high-tech appearance with enhanced details
Negative Prompting
Sometimes specifying what you don't want is as important as what you do:
Use negative prompts to exclude unwanted elements: "no text, no watermarks, no blurry areas, no distorted faces."
Common Issues and Troubleshooting
Even experienced users encounter challenges with AI video generation. Here's how to address common problems:
Issue: Inconsistent Elements
Problem: Objects change color, size, or shape during the video Solution: Add consistency constraints to your prompt: "maintain consistent colors throughout," "subject remains the same size," "lighting conditions don't change."
Issue: Unnatural Motion
Problem: Movement appears robotic or physically impossible Solution: Reference real-world physics in your prompts: "natural human walking gait," "realistic water physics," "gravity-obeying movement."
Issue: Poor Image Quality
Problem: Videos appear blurry, pixelated, or artifacted Solution:
- Increase resolution settings if available
- Simplify your prompt to reduce complexity
- Ensure source images for image-to-video are high quality
- Try generating at a lower resolution first, then upscale
Issue: Slow Generation Times
Problem: Videos take too long to generate Solution:
- Reduce video duration for faster results
- Lower resolution settings
- Generate during off-peak hours when server load is lighter
- Consider upgrading your subscription for priority processing
Issue: Unwanted Elements
Problem: AI generates unexpected or inappropriate content Solution:
- Use more specific, detailed prompts
- Employ negative prompting to exclude unwanted elements
- Adjust the "creativity" or "randomness" settings if available
- Break complex scenes into simpler, sequential generations
Issue: Text and Typography Problems
Problem: Generated text is garbled, misspelled, or nonsensical Solution:
- Avoid relying on AI-generated text within videos
- Add text overlays in post-production using video editing software
- If text must be in the generation, use simple, common words
Frequently Asked Questions
How long can Veo 3 videos be?
Veo 3 can generate videos ranging from a few seconds up to several minutes in length, depending on your subscription tier and the complexity of the generation. For beginners, we recommend starting with shorter videos (4-8 seconds) and gradually working up to longer durations as you become more comfortable with the tool.
Can I use Veo 3 videos commercially?
Yes, videos generated with Veo 3 can be used for commercial purposes, including marketing, advertising, and content monetization. However, you should review the current terms of service on veo3ai.io as usage rights may be subject to your subscription level and specific platform policies.
What file formats does Veo 3 support?
Veo 3 typically outputs videos in MP4 format with H.264 encoding, ensuring compatibility with most platforms and devices. For image inputs, common formats like JPG, PNG, and WebP are supported. Always check the latest documentation for any format updates or additional supported types.
How much does Veo 3 cost?
Veo 3 offers various pricing tiers to accommodate different user needs:
Free Tier: Limited generations per month with basic features Pro Tier: Increased generation limits, higher resolutions, and priority processing Enterprise Tier: Custom solutions for high-volume commercial use
Visit the pricing page on veo3ai.io for current rates and feature comparisons.
Can I edit videos after generation?
While Veo 3 doesn't provide extensive editing capabilities, you can download generated videos and edit them using traditional video editing software like Adobe Premiere Pro, Final Cut Pro, or DaVinci Resolve. This allows you to add music, transitions, text overlays, and combine multiple AI-generated clips.
Conclusion and Next Steps
Congratulations! You've completed this comprehensive Veo 3 tutorial and now have the knowledge to create impressive AI-generated videos. From understanding what Veo 3 is and how it works to mastering text-to-video and image-to-video generation, you're equipped with the skills to bring your creative visions to life.
Key Takeaways
- Start Simple: Begin with straightforward prompts and short durations as you learn the tool
- Iterate and Refine: Don't expect perfect results on the first try—experimentation is key
- Be Specific: Detailed, descriptive prompts yield significantly better results
- Combine Techniques: Use both text-to-video and image-to-video approaches for different projects
- Post-Process: Download and edit your AI-generated videos for professional polish
Recommended Next Steps
- Practice Regularly: The more you use Veo 3, the better you'll understand how to craft effective prompts
- Join the Community: Connect with other Veo 3 users to share tips, prompts, and inspiration
- Stay Updated: AI video technology evolves rapidly—keep an eye on new features and improvements
- Explore Use Cases: Consider how Veo 3 can enhance your specific projects, whether personal or professional
- Provide Feedback: Help improve the platform by sharing your experience and suggestions with the development team
Start Creating Today
Now that you have this knowledge, it's time to put it into practice. Head over to veo3ai.io and create your first video. Remember, every expert was once a beginner, and with Veo 3's intuitive interface and powerful capabilities, you're already well on your way to becoming proficient in AI video generation.
The future of video creation is here, and you're now part of it. Happy creating!
Related Articles
Continue with more blog posts in the same locale.

Veo 3 Talking Head Video: How to Create AI Presenter Videos (2026)
Create AI presenter videos with Veo 3: character prompts, lip sync, platform formats, brand spokesperson, social persona, and training video host — with ready-to-use templates.
Read article
Veo 3 Drone Shot Prompts: How to Create Aerial Camera Moves (2026)
Veo 3 drone shot prompts: aerial camera vocabulary, pull-back reveal, orbit, tracking shots, environment examples for real estate, travel, sports, and documentary.
Read article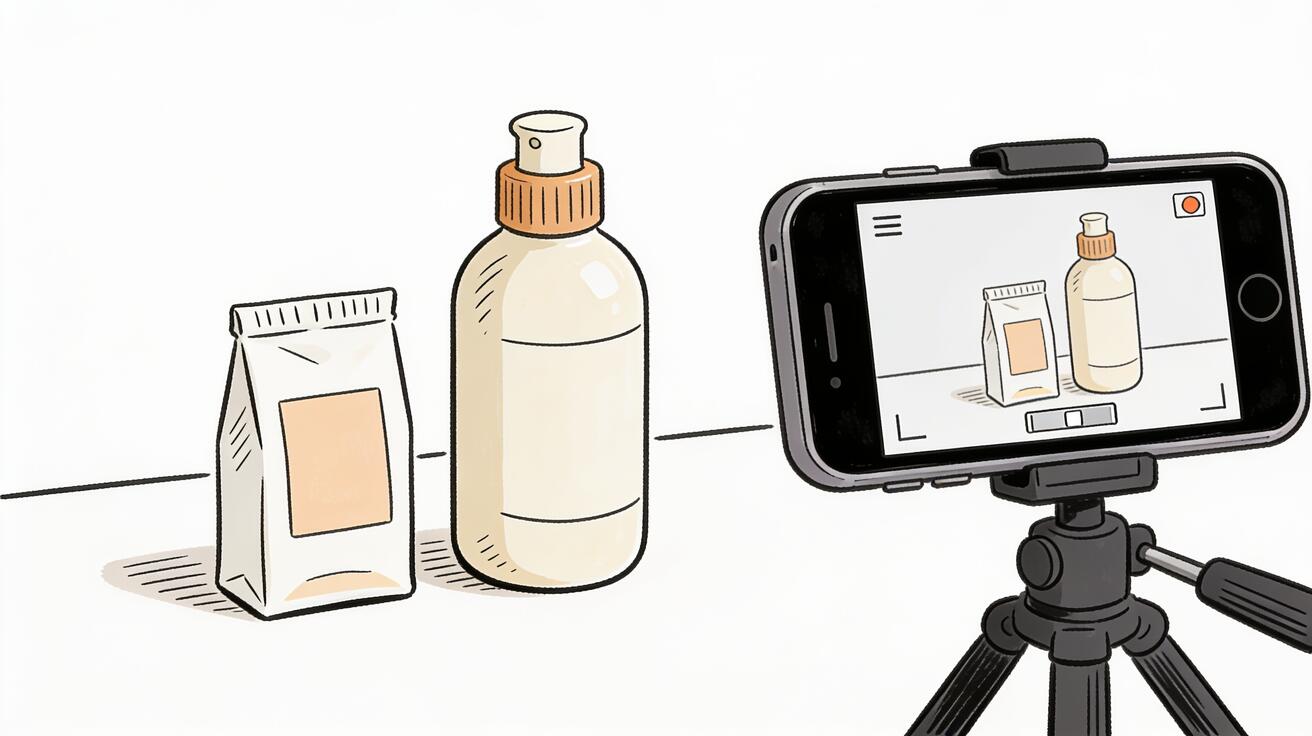
Veo 3 for E-Commerce: AI-Generated Product Videos That Convert (2026)
Learn how to use Veo 3 for e-commerce product video: I2V packshot prompts, platform specs, category playbooks for fashion, food, cosmetics, and home goods, plus QA checklists.
Read article