
AI Video Editing Explained: Workflows, Tools and Limits
Learn what ai video editing does well, where it still needs human review, and how to build a reliable workflow from raw footage to export.
Veo3 AI · 16 min read · Nov 20, 2026
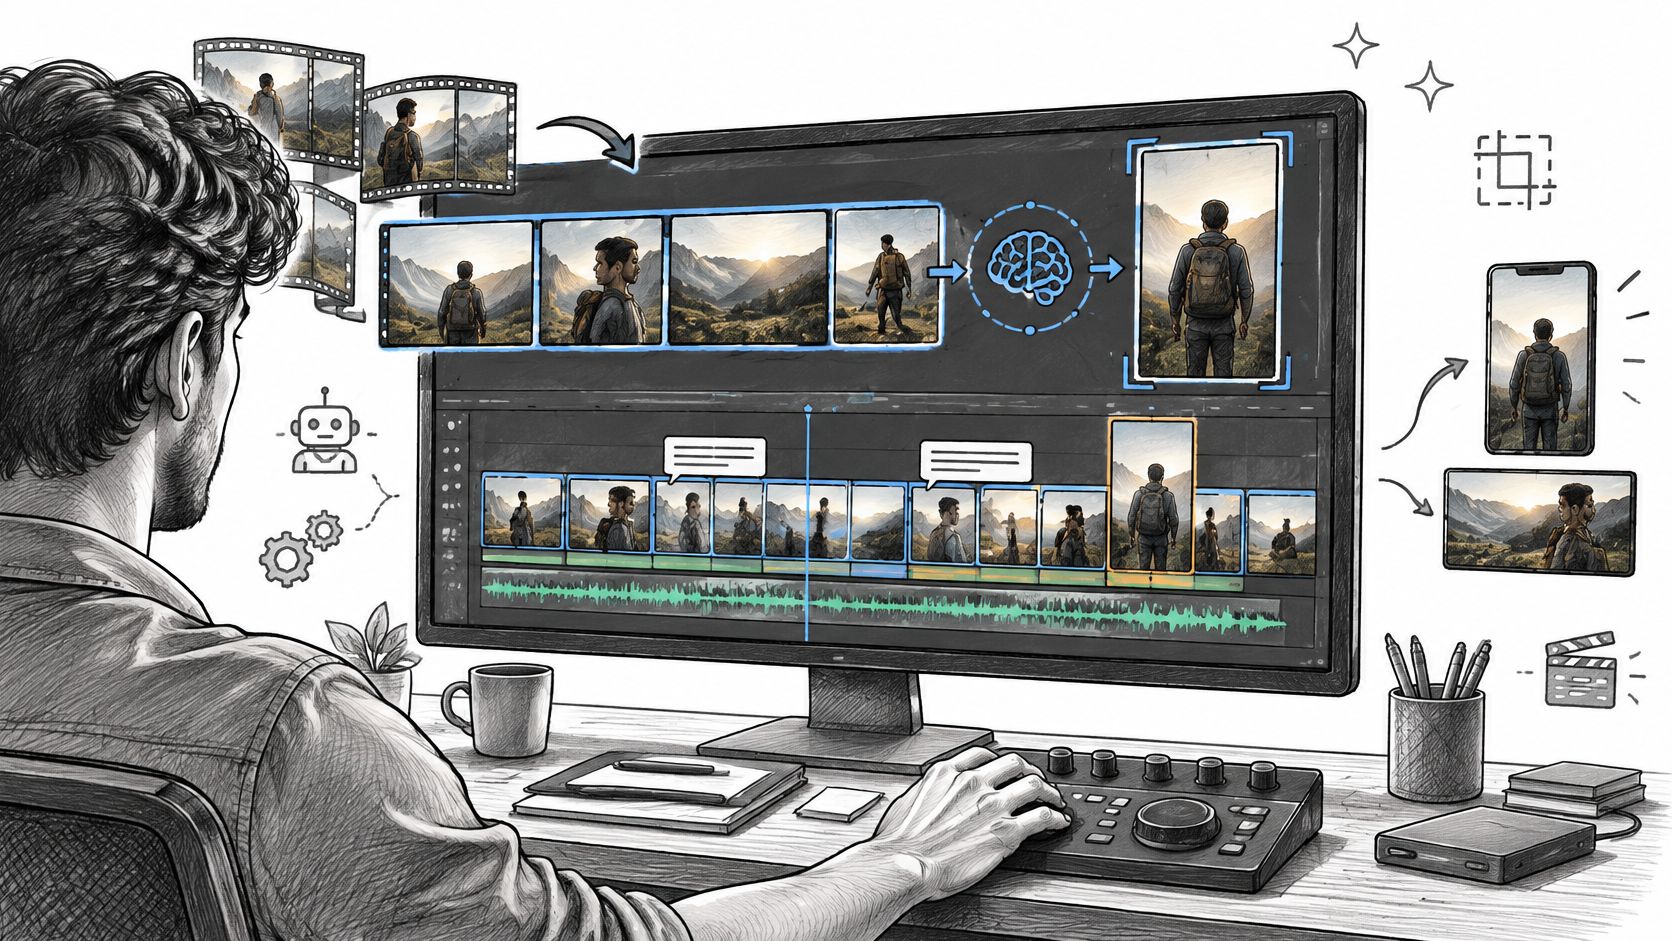
You've got two hours of raw footage, a deadline, and a brief for a 30-second social cut. Before you can make anything engaging, you need to find the usable takes, trim pauses, clean up speech, add captions, and keep the subject inside a vertical frame.
AI video editing can take over much of that mechanical work. But it doesn't remove the editor's job. It shifts your attention toward choosing the story, describing precise changes, checking continuity, and verifying what the audience will read and hear.
Table of Contents
- What AI Video Editing Covers Today
- Editing Tasks AI Handles and What You Still Control
- How an AI Editing Workflow Runs from Footage to Export
- Generating and Extending Clips with Veo 3.1
- Checking Quality and Limits Before You Publish
- Captions, Translation and Language Checks
- Build Your First AI Editing Workflow Today
<a id="what-ai-video-editing-covers-today"></a>
What AI Video Editing Covers Today
AI video editing means using machine learning to analyse, organise, improve, or alter video during post-production. It includes familiar jobs such as finding scene boundaries, removing silences, generating captions, masking backgrounds, matching colour, and adapting footage to another aspect ratio.
Think of a spell checker. It catches typos and suggests corrections, but it doesn't decide what your essay should argue. AI editing works similarly when it assists with footage: it can identify a pause, but it can't reliably decide whether that pause creates suspense or wastes the viewer's time.
<a id="three-kinds-of-ai-editing"></a>
Three kinds of AI editing
The easiest way to understand the field is to separate the work by what happens to your material.
- Assistive editing analyses and suggests. Scene detection, transcript-based selection, silence removal, and automatic rough cuts help you review footage and assemble an initial version.
- Generative editing creates or changes visual content. A text prompt or still image can produce a new shot. Other tools can replace a background, add an object, or alter part of an existing scene.
- Enhancement editing improves recorded material. Audio cleanup, upscaling, and colour matching aim to make your existing footage more usable rather than invent a different scene.
These categories overlap inside editing applications. An interview project might use assistive transcription, enhancement for noisy speech, and a generated establishing shot. That doesn't mean every task needs a generative model.
<a id="the-editor-still-owns-the-outcome"></a>
The editor still owns the outcome
Your decisions determine the message, pacing, and emotional emphasis. Removing every hesitation from an interview might make it shorter while making the speaker sound rushed or unnatural.
For a practical reference point on short-form production, video editing from SimpleLab Digital helps frame the work as a complete editing assignment, not just a collection of automatic effects.
Practical rule: Choose the edit you need before choosing the AI feature.
Note which category best matches your current project. Are you trying to find and arrange existing material, improve its technical quality, or create something the camera never recorded? That distinction prevents unnecessary generation and makes tool selection much easier.
<a id="editing-tasks-ai-handles-and-what-you-still-control"></a>
Editing Tasks AI Handles and What You Still Control
AI is strongest on repetitive, measurable tasks and weakest on judgement that depends on context. Finding a silent stretch is different from deciding whether a speaker's hesitation makes a statement more credible.
Use the comparison below to assign work rather than assume an automatic feature produces a finished result. These are typical capabilities, not guarantees. Footage quality, camera movement, overlapping speech, and the tool's controls all affect the outcome.
<a id="common-editing-tasks-what-ai-handles-and-what-the-editor-controls"></a>
Common editing tasks: what AI handles and what the editor controls
| Task | What AI handles | What you still control |
|---|---|---|
| Rough cut from long footage | Detects scenes and suggests cut points | Story order, pacing and what to drop |
| Captions and subtitles | Transcribes speech and styles subtitles | Names, numbers, line breaks and reading speed |
| Background removal and masking | Masks and replaces regions frame by frame | Edge cleanup and consistency across shots |
| Colour matching | Matches tone to a reference clip | Final look and skin tones |
| Audio cleanup | Reduces noise and removes unwanted sounds | Dialogue balance against music |
| Reframing 16:9 to 9:16 | Tracks the subject across the new frame | Text placement and face framing |
| Image-to-video animation | Generates motion from a still image | Motion direction and character identity |
The pattern is a shift from mechanics to review. Instead of manually drawing every mask boundary, you inspect difficult edges. Instead of typing every subtitle, you verify the transcript and timing.
That review isn't interchangeable with a quick preview. A background mask can look convincing while the subject stands still, then break when a hand crosses their face. A vertical crop can follow a presenter while cutting off the product they're demonstrating.
<a id="choose-tools-by-the-correction-youll-need"></a>
Choose tools by the correction you'll need
For Reels, prioritise an editor that lets you adjust the automatic crop, revise subtitle timing, and export without rebuilding the project. Gainsty's guide to top video editor apps for Reels is a useful comparison resource when you're choosing a short-form editing environment.
For an interview, searchable transcripts and editable cuts may matter more than visual effects. For a product demonstration, masking controls and reliable colour adjustments may be more important than automatic highlight selection.
A practical test is to deliberately correct an AI mistake before committing to a tool. Move a caption, restore a removed pause, or adjust a tracking frame. If making a small correction requires regenerating everything, the apparent convenience may disappear during revisions.
<a id="measure-the-complete-job"></a>
Measure the complete job
Don't judge speed by how quickly the first draft appears. Track preparation, analysis, prompt revisions, rendering, review, and cleanup through to the accepted export.
For a straightforward trim or exact brand-colour adjustment, conventional timeline controls may be the shorter route. For finding relevant interview passages or exploring an atmospheric insert, AI may remove more work than it creates. The useful comparison is time to an acceptable result, not time to the first generated preview.
<a id="how-an-ai-editing-workflow-runs-from-footage-to-export"></a>
How an AI Editing Workflow Runs from Footage to Export
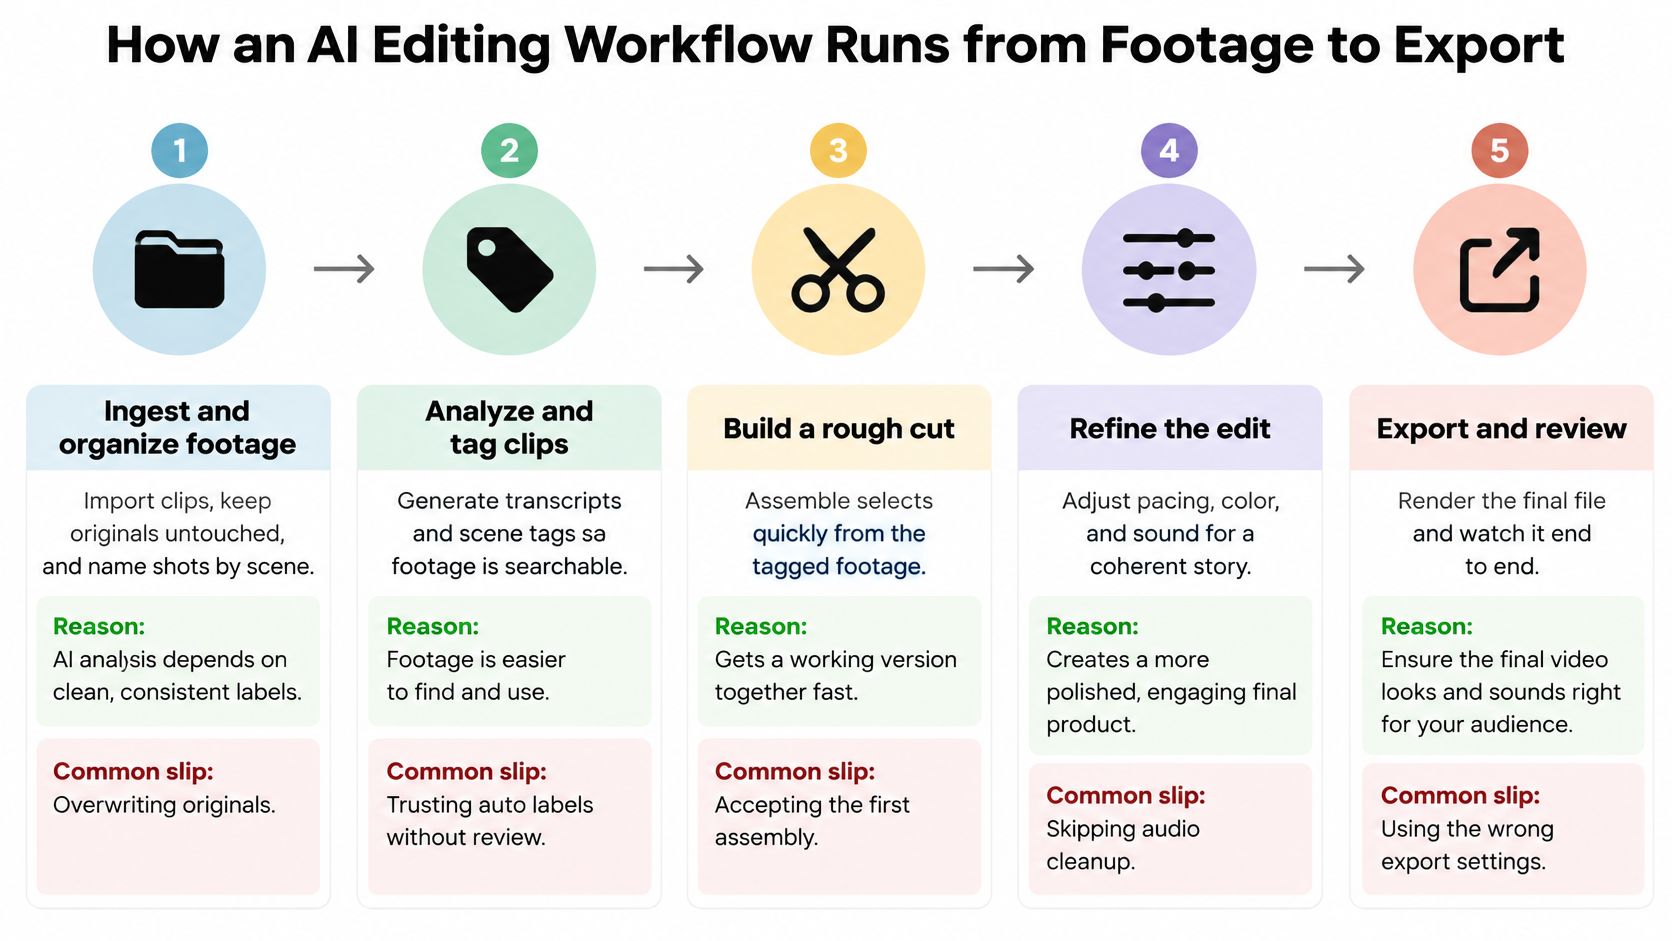
A dependable workflow keeps the original footage recoverable and makes every automated decision easy to inspect. Use your editing timeline as the controlled master, even when some shots come from a separate generation tool.
The diagram groups the production process into broad phases. The working sequence underneath separates the review tasks that are easiest to overlook.
<a id="from-organised-footage-to-a-controlled-edit"></a>
From organised footage to a controlled edit
-
Ingest and organise footage. Import clips into folders named by scene or subject, keep camera originals untouched, and identify preferred takes. Consistent labels make search and review easier; the common slip is overwriting the only clean source with an enhanced or generated version.
-
Run automatic analysis. Generate transcripts and detect scenes, speakers, and silences to create a searchable map of the material. Treat labels as navigation aids, not editorial truth, and don't skip watching the footage because the transcript appears complete.
-
Build the rough cut. Select the strongest takes and arrange them around the message the viewer should remember. Avoid accepting the first assembly because it flows smoothly; an attractive sequence can still leave out the essential explanation.
-
Apply targeted AI edits. Change a specific element, such as a background, colour treatment, or caption style, and compare it with the saved version. Changing everything together makes problems harder to diagnose, while regenerating an entire shot to repair a small detail can introduce unrelated changes.
<a id="from-review-to-delivery"></a>
From review to delivery
-
Review against the brief. Watch the complete cut at normal speed and assess timing, continuity, generated faces, and visible text in context. Don't approve shots only in isolation, because an acceptable close-up can still clash with the surrounding sequence.
-
Caption and verify audio. Generate subtitles after the dialogue edit is stable, then correct names and numbers against an approved reference. Listen to the exported sound as well as the timeline, since aggressive cleanup or an overlooked music track can make speech difficult to understand.
-
Export and reframe. Produce the master, create platform-specific versions, and check caption placement against interface overlays and frame edges. The common slip is approving the master while assuming the vertical version and final export settings are also correct.
Keep a short change log with the version name, intended edit, and unresolved issues. This is especially helpful when another reviewer needs to distinguish a deliberate creative choice from a generation error.
A successful preview isn't a finished deliverable. Review the actual file your audience will receive.
The workflow is finished when a reviewer can watch the export without spotting an unexplained glitch, missing information, or a mismatch with the brief. If a correction changes the timing, check the captions and soundtrack again before delivery.
<a id="generating-and-extending-clips-with-veo-31"></a>
Generating and Extending Clips with Veo 3.1
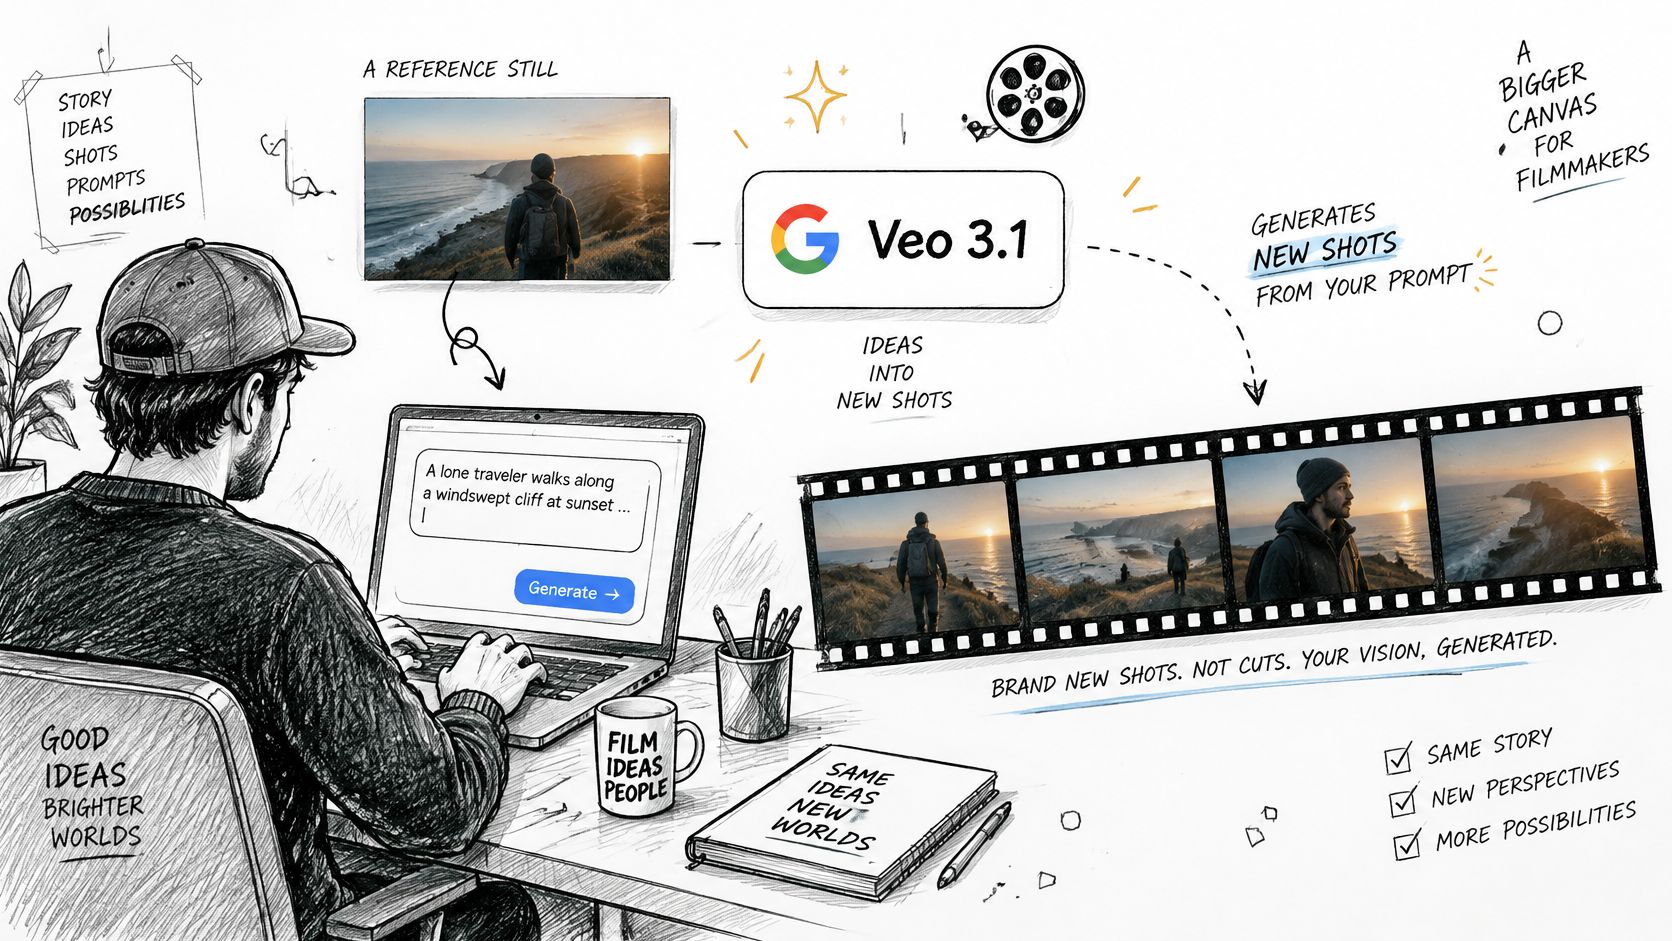
Generative editing produces new shots rather than merely cutting recorded ones. Google's Veo 3.1 is relevant when you need to turn a prompt or image into moving footage, then bring that result into an edited sequence.
This illustration shows the prompt-to-shot side of the process.
<a id="controls-that-shape-a-usable-shot"></a>
Controls that shape a usable shot
Native audio lets generated footage include dialogue, synchronised sound effects, and ambient sound, according to Google's Veo model overview. That can reduce separate sound-building work, but you should still listen for unwanted words, distracting ambience, and mismatched levels.
Reference images guide the appearance of a character, object, or setting. Choose references that clearly show the features you need preserved, rather than images with conflicting costumes, lighting, or product details.
Scene extension continues an existing clip. Describe what should happen next while keeping the camera direction and subject action compatible with the outgoing shot; the AI video extender guide provides a focused starting point for planning these continuations.
First- and last-frame control gives you visual endpoints for a transition. You still need a plausible movement between them: a compatible camera angle and subject position give the model a clearer assignment than unrelated compositions.
Google's Gemini API creative-capabilities announcement documents up to three reference images, successive extensions reaching a minute or more, and transitions between two supplied images with accompanying audio.
The following demonstration offers another way to examine generated motion and sound before planning your own test.
<iframe width="100%" style="aspect-ratio: 16 / 9;" src="https://www.youtube.com/embed/SfRqij60h8U" frameborder="0" allow="autoplay; encrypted-media" allowfullscreen></iframe>
<a id="veo-31-controls-and-what-each-one-means-for-editing"></a>
Veo 3.1 controls and what each one means for editing
The duration and resolution requirements below come from Google's Gemini API documentation, which lists 4-, 6-, or 8-second generations and 720p, 1080p, or 4K output, with the feature restrictions shown.
| Setting | Veo 3.1 option | Editing consequence |
|---|---|---|
| Duration | 4, 6 or 8 seconds | 8 seconds is required for reference images, extension, 1080p or 4K |
| Resolution | 720p, 1080p or 4K | 1080p and 4K are limited to 8-second generations and render more slowly |
| Reference images | Up to three images | Guides a character, object or scene identity across shots |
| Scene extension | Extends an existing clip | Sequences can reach a minute or more through successive extensions |
| First and last frame | Two supplied images | Generates the transition between both endpoints, with audio |
Storyboard around the required control, not just the desired shot length. Reserve longer generation settings for hero moments requiring references, extension, or high-resolution delivery. Use shorter inserts when those controls aren't needed, and test movement before spending additional rendering time on a final-resolution version.
These are model/API specifications. Confirm which controls your chosen interface exposes before designing a sequence around them.
<a id="checking-quality-and-limits-before-you-publish"></a>
Checking Quality and Limits Before You Publish
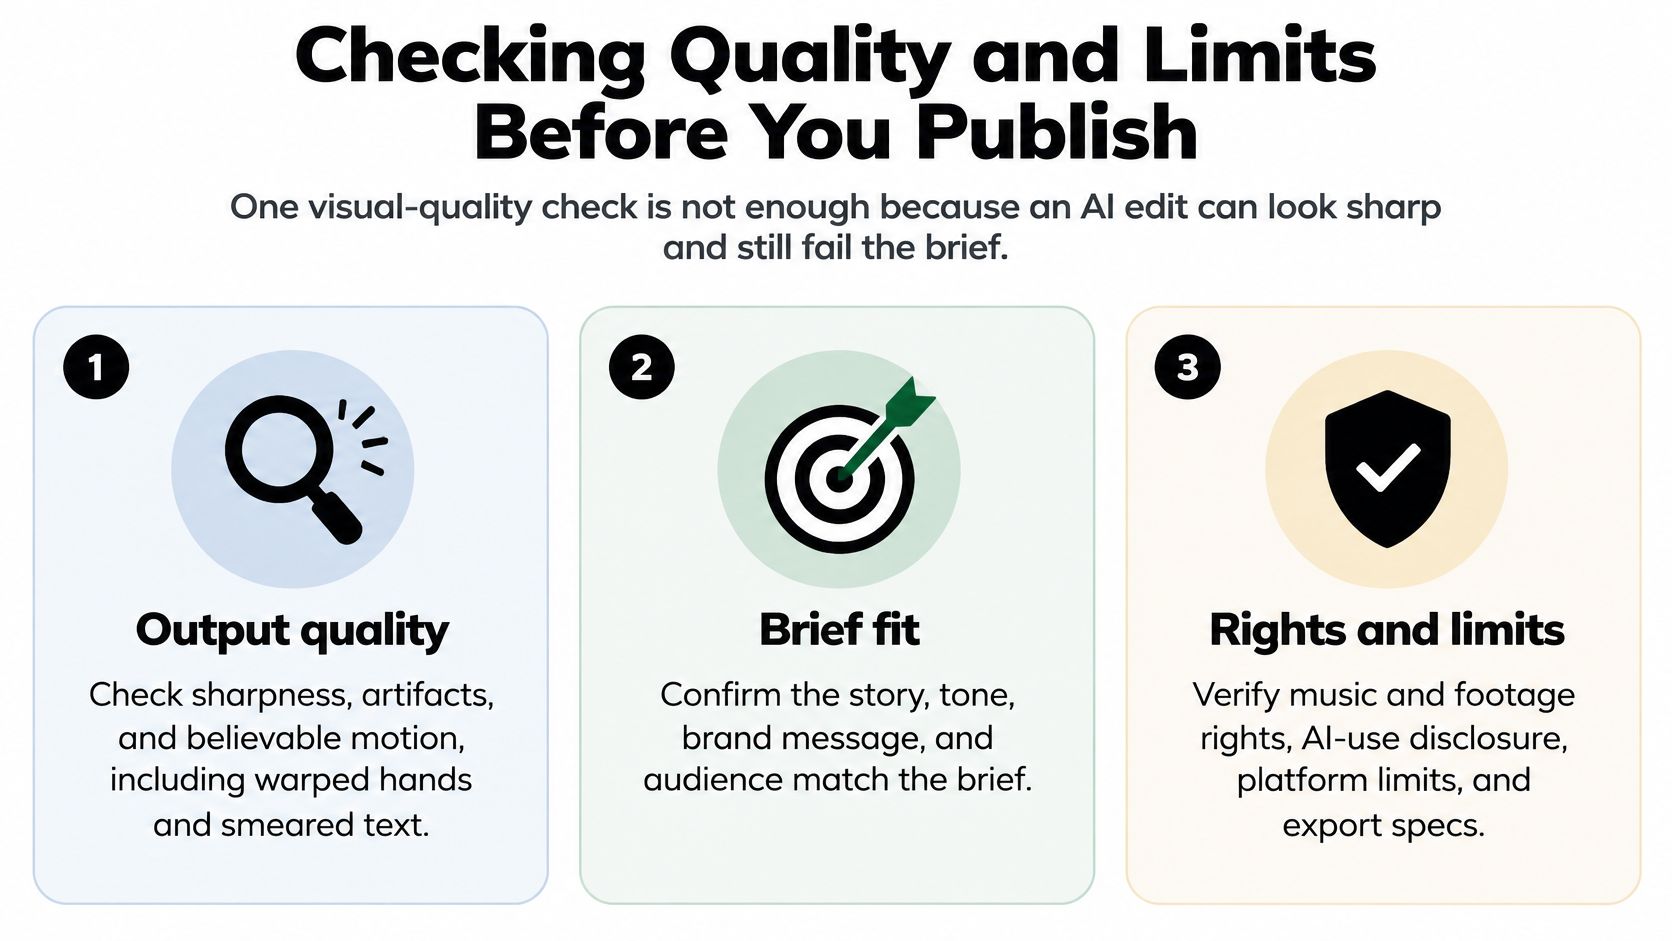
One visual-quality score can mislead you. An AI edit may look sharp while changing a product label, ignoring the instruction, or altering the person you intended to preserve.
The IVEBench benchmark distinguishes output quality, instruction compliance, and source fidelity, and also evaluates temporal flicker. That separation is useful for practical review because passing one test doesn't compensate for failing another.
<a id="separate-appearance-from-correctness"></a>
Separate appearance from correctness
- Output quality: Inspect sharpness, compression-like artefacts, believable movement, and malformed details. Look closely at hands, reflections, hair, and small text.
- Instruction compliance: Check whether the requested change happened. A polished daytime background fails if the scene should be set in the evening.
- Source fidelity: Compare protected elements with the original. The person, product, performance, and setting should remain unchanged unless you explicitly authorised those changes.
Add a temporal check across all of these. Flicker is an unstable change between frames; drift is a gradual departure from the intended appearance or identity. Neither is reliably visible in a single thumbnail.
For longer sequences, inspect each join between generated segments. Compare the outgoing and incoming subject position, lighting, texture, and camera movement rather than waiting until the whole sequence is assembled.
The checklist graphic adds delivery concerns to the visual review.
<a id="run-an-acceptance-pass"></a>
Run an acceptance pass
Use a fixed review order so an impressive effect doesn't distract you from an incorrect detail.
- Watch at full speed: Notice jumps, unnatural movement, distracting sound, and edits that interrupt comprehension.
- Freeze on faces and text: Examine eyes, mouths, logos, packaging, and lettering for changes that disappear during casual viewing.
- Compare shot boundaries: Check the opening and closing moments of each shot for identity, wardrobe, lighting, and direction.
- Check against the original: Place the source beside the edit when reviewing product details or any region that should be preserved.
- Return to the brief: Confirm the intended message, tone, audience, and required information remain intact.
Image-to-video animation deserves close attention because the model must infer movement from a static source. Localised replacement needs a boundary check around the altered region, while long-form work needs repeated continuity checks throughout.
Also verify that you have permission to use footage, music, and likenesses, and check the destination's disclosure and delivery requirements. Don't assume a technically successful generation resolves those questions.
Accept the edit only when it passes output quality, instruction compliance, and source fidelity. A beautiful result that changes the wrong thing is still a failed edit.
<a id="captions-translation-and-language-checks"></a>
Captions, Translation and Language Checks
Fluent-looking captions can still be wrong. A subtitle may read naturally while changing a name, dropping a qualification, or giving a product claim a stronger meaning than the speaker intended.
That matters for Japanese- and Korean-language creators, multilingual interviews, and marketers adapting the same message for different audiences. A Nordlys post-production workflow report highlights the need for human transcript review in smaller languages, where an incorrect client name or number can be worse than no caption.
<a id="review-meaning-before-styling"></a>
Review meaning before styling
Don't treat transcription, translation, and subtitle timing as the same task. Transcription checks what was said, translation checks what it means in another language, and subtitle editing checks whether viewers can read it comfortably while watching.
Run a deliberate language pass:
-
Compare speech with the transcript. Listen for omitted words, overlapping speakers, accents, and mixed-language passages. Check borrowed English terms rather than assuming the recogniser handled the switch correctly.
-
Verify names, numbers, and claims. Match people, brands, prices, quantities, and product statements to an approved source document. Don't use the generated transcript as proof of its own accuracy.
-
Review politeness and context. Ask a native speaker to assess honorifics, formality, and implied meaning. A grammatically correct line can still sound inappropriate for the speaker's relationship with the audience.
-
Inspect subtitle timing and layout. Keep related phrases together, avoid awkward line breaks, and allow enough reading time. Translate AI's guide to fix common subtitle sync errors is useful when captions arrive late, disappear early, or drift away from the dialogue.
-
Watch with sound off, then on. Without sound, check whether captions communicate the intended message and identify meaningful non-speech audio where needed. With sound restored, confirm timing, speaker changes, and whether cleanup has damaged consonants or made speech sound artificial.
<a id="keep-accessibility-in-the-final-decision"></a>
Keep accessibility in the final decision
Use readable contrast and placement, and don't let captions cover a demonstration or essential on-screen text. When translating, judge reading speed in the target language rather than copying the original subtitle timing unchanged.
Trust check: Have a native speaker approve any translated line that carries a commercial, health, safety, or other consequential claim.
Multilingual AI editing can help you reach another audience. Careful verification is what makes that reach trustworthy.
<a id="build-your-first-ai-editing-workflow-today"></a>
Build Your First AI Editing Workflow Today
Choose a single, manageable social clip rather than your most complicated project. For example, make a 30-second product demonstration from footage you already understand, with a clear opening, demonstration, and closing action.
Run it through the numbered production workflow, starting with assistive tasks whose mistakes are easy to spot. Generate a rough assembly, correct the captions, and create a vertical version. Keep a conventional edit available so you can compare the finished results fairly.
<a id="make-the-experiment-small-enough-to-evaluate"></a>
Make the experiment small enough to evaluate
Attempt one generative change after the basic cut works. Animate a still product image or test a background replacement on a separate copy, with a written description of what must stay untouched.
- Save the baseline: Keep an approved version without the generated change.
- Record the effort: Note time spent prompting, waiting, checking, and repairing.
- Set a stopping condition: Return to a manual method if repeated generations keep altering protected details.
- Compare finished exports: Judge the improvement in the actual viewing context, not only inside the generation preview.
For the generative part, our Veo 3 AI video generator is one option. Veo3 AI offers text-prompt generation, video editing and enhancement tools, multiple styles and formats, and creative content management; its tools include Flow AI Video, Text to Video, Image to Video, Reference to Video, Product Ads, Product Photos, Logo Animation, YouTube Videos, TikTok & Reels, and Animate Old Photos. We also offer Veo 3.1 with native audio generation, output up to 4K, and first- and last-frame control. Compare the available plans before committing to a larger production.
Plan your test around the controls you need, then inspect the result before extending it into a longer sequence. Send the finished export through output-quality, instruction-compliance, and source-fidelity checks before publishing.
Your first success isn't using every AI feature. It's identifying a repeatable task that AI helps you complete without lowering the standard of the final video.
Veo3 AI offers text-to-video, image-to-video, reference-based generation, and editing tools for building and refining video assets. Visit Veo3 AI to test a focused shot, compare it with your original, and decide where generation belongs in your editing workflow.
Related Articles
Continue with more blog posts in the same locale.
AI Video for Social Media: Formats, Workflow and Trust
Learn how to use AI video for social media on TikTok, Reels and Shorts, with platform specs, a build workflow and disclosure tips.
Read article
Online Video Generator Guide: How AI Video Tools Work
Learn how an online video generator turns prompts and images into video, which features matter, and how to use one for social and marketing clips.
Read article
AI Video for Business: Uses, Workflow and ROI in 2026
Learn how AI video for business works across marketing, product demos, internal training and localization, with workflow, measurement and trust guidance.
Read article