
Tribute Video Maker Guide: Plan, Create, and Share
Learn how a tribute video maker works and follow a clear process to plan, build, and share heartfelt tribute videos for memorials, birthdays, and milestones.
Veo3 AI · 17 min read · Sep 23, 2026
Someone has asked you to make the tribute video, the service date is already fixed, and the footage is scattered across family phones, old laptops, messaging apps, and cloud folders. One relative has sent vertical clips, another has uploaded faded scans, and someone else keeps promising a voice message “tomorrow.” You want the finished film to feel warm and honest, not rushed or technically distracting.
A tribute video maker can simplify the editing, but software can't solve an unplanned story or a disorganized collection process. The strongest results come from making a few decisions early, collecting material in a way that respects contributors, and using automation only where it supports the person being remembered. This guide walks through that process, from first outline to final archive.
Why Tribute Videos Are Harder Than They Look
A tribute video may be created for a funeral, retirement, milestone birthday, reunion, or another important gathering. In every case, the emotional stakes are higher than they are in an ordinary slideshow. People watching usually knew the subject personally, so an awkward crop, an incorrect caption, or a badly chosen sequence can feel more noticeable than a technical mistake in a promotional video.
Good intentions aren't enough to create a coherent edit. The organizer still has to coordinate contributors, inspect inconsistent files, make decisions under pressure, and protect the tone of the occasion.
The three problems that derail first attempts
The first problem is coordination. Several relatives may send material in different formats and through different channels. One person uses a shared folder, another sends compressed clips through a messaging app, and a third records a message but forgets to include their name. If you don't create one simple submission route, you'll spend your editing time searching for missing context.
The second problem is technical inconsistency. A phone video from years ago may be low-resolution and horizontal, while a recent clip may be sharp, vertical, and recorded in a different color profile. Photos may include scans, screenshots, portraits, and images with very different brightness. None of this makes the material unusable, but it does require a deliberate visual treatment.
The third problem is deadline pressure. A service or celebration gives you a fixed playback time, often with little tolerance for a late export or a corrupted drive. Editing right up to the event leaves no room to discover that text is unreadable on a television, a video is missing audio, or the chosen music triggers a platform restriction.
Practical rule: Treat the event date as the delivery deadline, not the editing deadline. Build your workflow so the finished file exists before the room fills.
Tribute videos also differ from marketing clips and social posts. A polished transition can't compensate for an insensitive order of memories, an overly loud soundtrack, or an AI-generated face that feels unlike the person. The aim isn't to sterilize the material into a perfect product. It's to give genuine memories enough structure that viewers can receive them.
Planning the Story Before You Touch Any Software
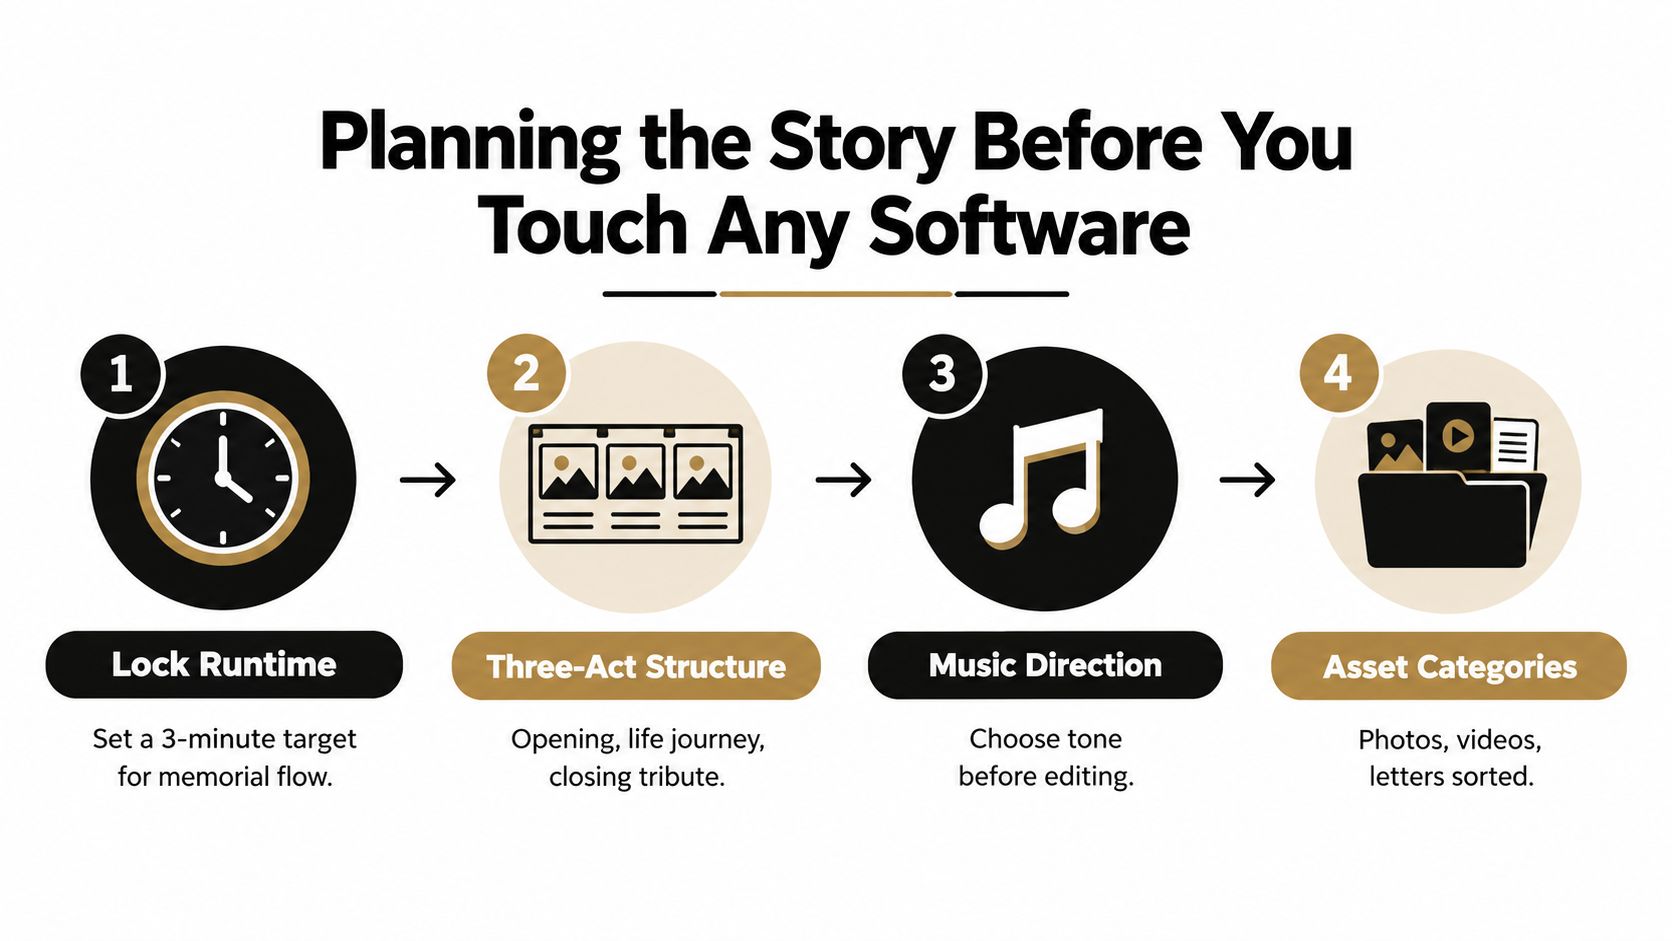
Before opening an editor, open a notebook or plain text file. Decide the runtime, structure, music direction, and asset categories first. The DIY memorial video guidance from Tribute places most memorial videos in the 3-to-7-minute range, so choose a target length before collecting clips into a timeline.
For a three-minute memorial piece, use a compact three-act plan:
- Opening, about 10 seconds: Introduce the person with a name card, quiet image, or brief visual montage.
- Life journey, about two minutes: Move through childhood, family, work, interests, and relationships in a clear order.
- Closing, about 30 to 45 seconds: Allow room for a final message, dedication, meaningful image, or gentle fade-out.
A five-minute milestone video can give the middle section more space, extending it to about three and a half minutes. These figures are planning benchmarks, not rules. Sparse material usually works better as a shorter video with deliberate choices than as a long sequence padded with repeated images.
Choose music before editing
Music sets the emotional shape of the timeline. A slower memorial piece often suits music around 60 to 80 BPM, while a birthday or retirement tribute may need more energy. Select a track for its relationship to the subject, not just for how impressive it sounds alone. Leave enough space for spoken messages.
Tempo also determines how long each image remains on screen. The memorial pacing guidance from Stardust Memorials recommends 5 to 7 seconds per image, or roughly 10 to 15 photos per minute. With upbeat music, reduce each slide to about 3 to 5 seconds so the sequence follows the rhythm without feeling slow.
Create a beat sheet before editing. For each segment, record its purpose and the material it needs:
- Opening identity, name card, establishing image, and music entrance.
- Early life, older photographs, family context, and a short caption if needed.
- Shared life, celebrations, travel, work, hobbies, and home footage.
- Voices, recorded memories or short spoken tributes.
- Closing, final image, dedication, and music resolution.
Write titles, captions, and spoken introductions now. Your editor should be arranging a decided story, not inventing one while a deadline approaches. A video storyboarding guide can help convert that beat sheet into a visual sequence, especially when several contributors supply material with different emotional weight. Reserve AI for planning support or clearly labeled visual gaps. It can organize ideas, but generating a sentimental face or replacement memory may feel emotionally tone-deaf and unlike the person being honored.
Gathering and Preparing Photos, Clips, and Audio
The collection system matters more than the editing application. Give every contributor one clear route for sending material, ideally a shared folder or upload page that works on a phone without requiring unfamiliar software. The EventUploader photo gallery guide is useful when you need a structured way to collect event photos and videos from several people.
Create three top-level folders:
- Photos: Scans, portraits, family photographs, and artwork.
- Video clips: Home footage, phone recordings, and contributor messages.
- Audio: Voice notes, interviews, music files, and readings.
Ask contributors to name files with their name and the date or life period, such as Maria_2018_Birthday.mp4. Set a firm collection deadline and protect a 48-hour buffer before the editing day. That buffer gives you time to send one reminder, replace a damaged upload, and identify a missing permission.
Triage the incoming material
Sort files by era or theme, not by contributor. A folder called “Childhood,” another called “Family,” and another called “Celebrations” helps you build a story. A folder containing everything sent by one person forces you to reconstruct the chronology later.
Flag the strongest, highest-resolution material first. A practical shortlist has two levels:
- Must use: Images or clips that define the subject, include essential people, or carry a specific memory.
- Nice to have: Repeated group shots, similar portraits, and extra footage that can be removed without weakening the story.
Don't enlarge a small photo aggressively and assume it will become sharp. If a scan is below 1920 by 1080, cautious upscaling may help, but excessive enlargement can emphasize blur and compression. If you want to animate an especially old image, review the guide to animating old photos before applying motion.
Standardize vertical phone clips by placing them inside a 16:9 matte rather than stretching or cropping away important faces. For audio, convert spoken material to 48 kHz WAV before editing so voice clips behave consistently on the timeline.
| Asset Type | Target Spec | Reason |
|---|---|---|
| Photos | 1920 by 1080 or larger when available | Gives the image enough detail for a large display |
| Horizontal video | Match the project frame shape | Reduces unnecessary cropping and empty space |
| Vertical phone video | Place inside a 16:9 matte | Preserves faces and important action |
| Spoken audio | 48 kHz WAV | Creates a consistent editing format |
| Music | Licensed file with a known source | Reduces playback and platform problems |
Before anyone uploads, ask for written confirmation that they have the right to share each file and that the material may be used for the intended event or publication. This is especially important for private voice messages, children visible in the frame, and photographs owned by another family member. A respectful collection process protects both the project and the relationships around it.
AI Generation Versus Traditional Editing
AI tools are useful when they remove repetitive technical work. They become risky when they begin inventing emotional content. A tribute should feel specific to a real person, so speed isn't a sufficient reason to surrender decisions about speech, identity, or meaning.
| Scenario | AI can help with | Manual editing remains safer when |
|---|---|---|
| Restoring an old damaged photo | Repairing minor damage, lifting detail, and improving a small image | The restoration changes facial features or removes meaningful imperfections |
| Creating a talking portrait | Adding restrained motion to a still image | The tool fabricates speech or makes a deceased person appear to speak |
| Building a narrated montage | Producing a rough first assembly from organized assets | The sequence needs careful emotional order and personal judgement |
| Matching clips from different phones | Reducing obvious differences in color and exposure | Automatic corrections make skin tones or important objects look unnatural |
A restoration tool can earn its place when an old photograph is damaged or too small for the planned frame. Review the result at full size and compare it with the original. If the software invents an eye, smooths away a distinctive feature, or changes the expression, keep the original or use a restrained repair.
Subtle animation can also work on a still image, particularly for a short opening or social clip. It can backfire when the motion looks like a simulation of life rather than a respectful presentation of a photograph. Never fabricate a speech, lip movement, or voice for a deceased person without explicit agreement from the closest family members. Even with consent, show the result privately before including it in a public tribute.
Decide what deserves human control
Traditional timeline editing gives you exact control over a beat drop, a quote, a pause, and the order in which people appear. That control matters when a contributor's final sentence needs a moment of silence afterward or when a caption must appear beside the correct photograph.
AI generation is better suited to a first draft, repetitive enhancement, subtle movement, and rough sorting. Manual editing should own the emotional beats, titles, spoken-message order, music entrance, and final pacing. Tools such as the Keptbits subtitle tool guide can help you think through captions and accessibility, but automatic subtitles still need a careful human review of names, places, and emotionally sensitive wording.
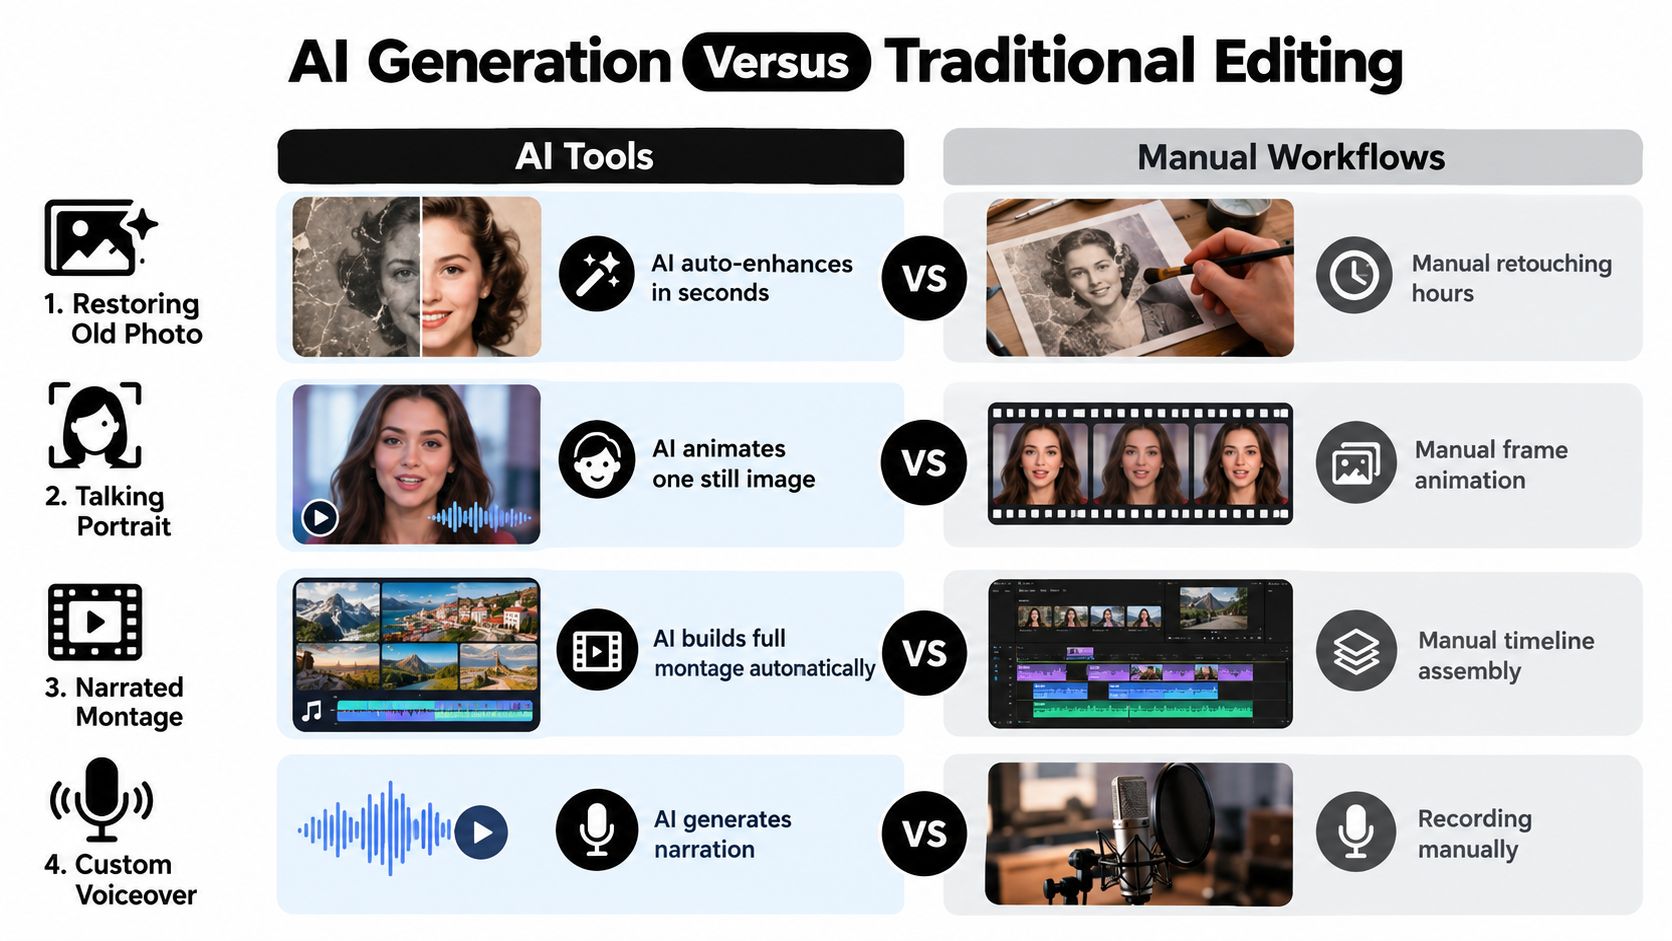
The most dependable approach is hybrid. Let automation handle cleanup and a rough arrangement, then replace generic choices with the photographs, pauses, captions, and voices that only the family can identify as meaningful.
Assembling the Edit With Pacing and Music
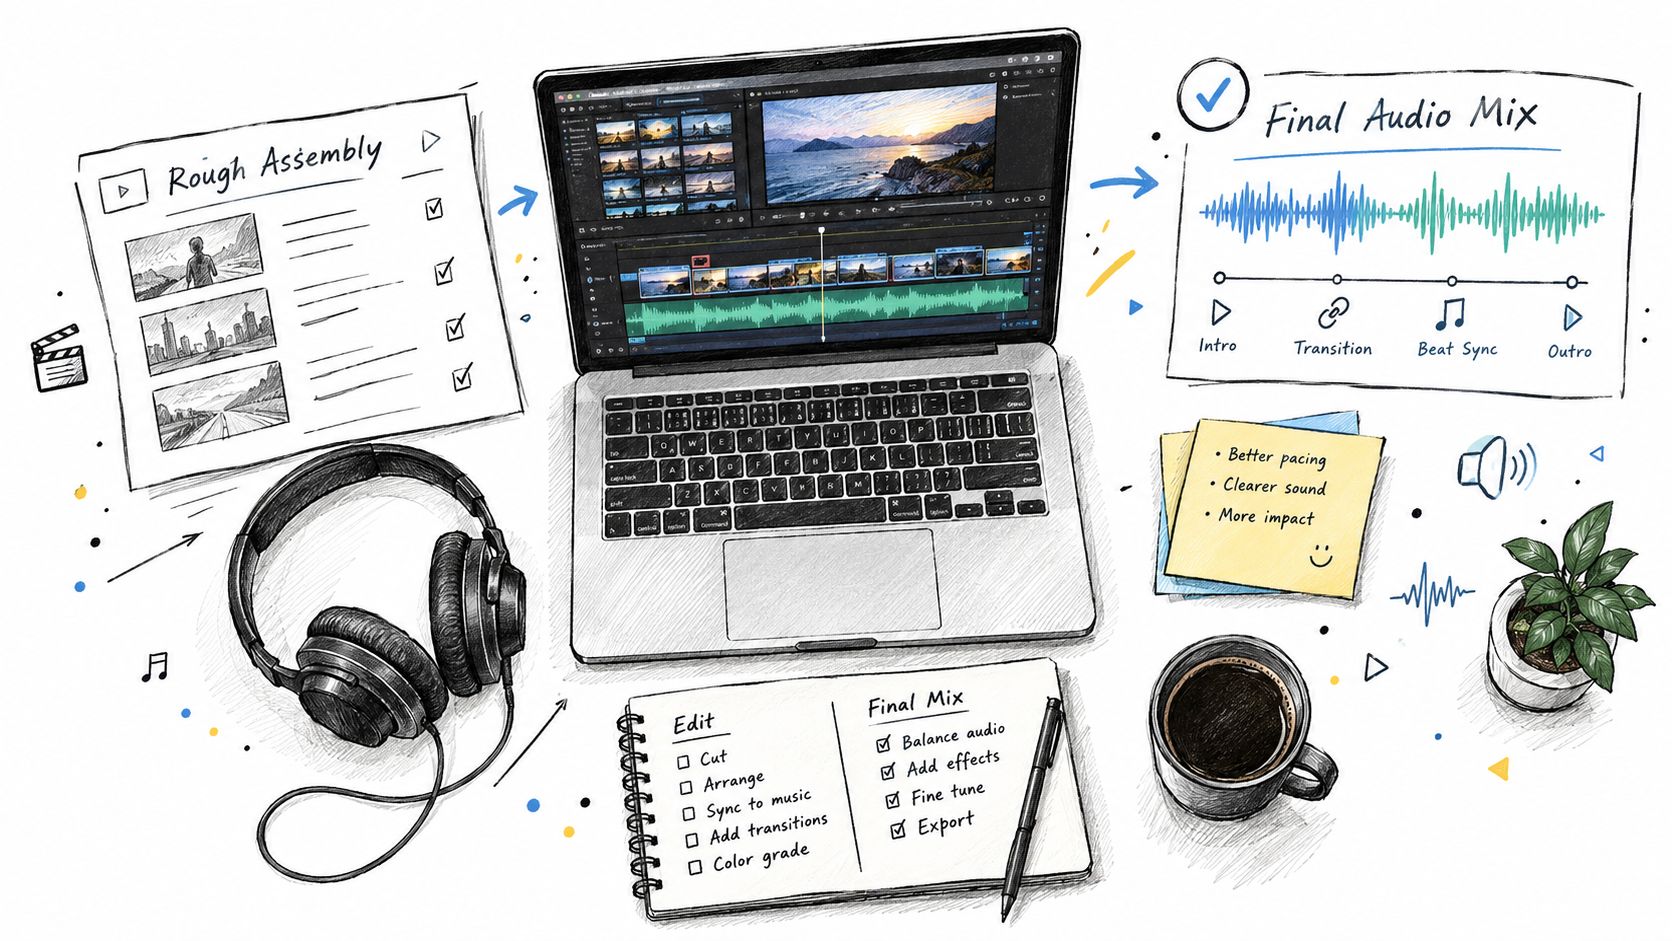
Start with a rough assembly, not a polished timeline. Place every usable photograph, clip, and voice recording in story order. Ignore perfect duration for the first pass. Your goal is to find gaps, repetitions, abrupt changes, and missing context before you spend time on transitions.
Shape the rhythm
Once the rough order works, mark the waveform's clear beats or transient points. For a photo-led tribute, begin around 3 to 5 seconds per image. For video, try 5 to 10 seconds per clip before trimming based on content. These ranges give viewers enough time to recognize a face without making the sequence feel static.
Don't force every change onto a beat. A hard cut can work on a strong musical entrance, but a spoken memory may need to finish naturally even if the next beat arrives. Use cross-dissolves as the default transition, then reserve hard cuts for deliberate moments. Star wipes, page peels, spinning effects, and novelty transitions usually draw attention to the software instead of the person.
Use titles consistently:
- Lower thirds: Identify a speaker or person when viewers may not know them.
- Quiet captions: Clarify a location, year, relationship, or spoken tribute.
- Closing dedication: Use one final card rather than several competing messages.
Keep captions large, high-contrast, and brief. A sentence that looks readable on a laptop may disappear on a television or projector. Read every name aloud during the review, because spelling mistakes in a tribute are difficult to overlook.
Mix voice and music carefully
Put spoken tributes on their own audio track. Keep the music underneath the voice at approximately -18 to -12 dB, then listen through ordinary speakers rather than relying only on studio headphones. If the editor supports keyframes or sidechain compression, duck the music automatically during quotes and restore it gradually when the speaker finishes.
A clean mix needs pauses. Don't fill every second with music, narration, or captions. Silence before a closing image can carry more feeling than another transition.
The workflow below shows why beat markers and restrained transitions matter in practice.
<iframe width="100%" style="aspect-ratio: 16 / 9;" src="https://www.youtube.com/embed/oWXJXXrOxD4" frameborder="0" allow="autoplay; encrypted-media" allowfullscreen></iframe>
Export a short review copy and watch it away from the editing interface. Check whether faces remain visible, captions stay on screen long enough, and voice recordings remain understandable when you aren't concentrating on the timeline. That viewing test catches problems that a technically correct project file can hide.
Export Settings for Every Screen You'll Play It On
Export for the actual playback destination, not the editor's default preset. A file that looks sharp on a laptop may show weak contrast on a projector, upload slowly, or play without sound on an older television. Keep one high-quality master, then create delivery copies for each screen and platform.
For a large TV or event display, use 1920 by 1080 or 3840 by 2160 with H.264. A bitrate of 15 to 25 Mbps provides enough image data for HDMI scaling and projector compression, while 320 kbps AAC keeps music and spoken tributes clear. Test the exported file on the same type of screen used at the event. Small captions and dark shadows can disappear outside a laptop display, so review the picture from the audience distance, not only beside the editing desk.
Match the file to its destination
Instagram Reels and TikTok need a vertical edit rather than a cropped version of the master. Export at 1080 by 1920, use 8 to 12 Mbps, and shorten the story for mobile viewing. The planning benchmarks are 90 seconds for Reels and 3 minutes for TikTok. Treat each social version as its own edit, with a clear opening and readable captions, instead of forcing the full event cut into a narrow frame. A fast-start MP4 can help playback begin more smoothly after upload.
For a YouTube memorial page, upload at 3840 by 2160 when the source supports 4K. A VBR two-pass master around 35 to 45 Mbps gives YouTube a strong file to transcode. Processing can change the available viewing quality, so wait until the platform finishes before judging the result.
| Destination | Resolution | Codec & Bitrate | Audio | Notes |
|---|---|---|---|---|
| Large TV or projector | 1920 by 1080 or 3840 by 2160 | H.264, 15 to 25 Mbps | 320 kbps AAC | Test text, shadows, and sound on the event display |
| Instagram Reel | 1080 by 1920 | H.264, 8 to 12 Mbps | AAC | Create a dedicated vertical cut, up to 90 seconds |
| TikTok | 1080 by 1920 | H.264, 8 to 12 Mbps | AAC | Keep the social version up to 3 minutes |
| YouTube memorial page | Up to 3840 by 2160 | VBR two-pass, about 35 to 45 Mbps for the master | AAC | Let YouTube transcode the uploaded master |
| Family archive | Match the master project | H.264 or a high-quality archival format | Preserve the original mix | Store project files and delivery copies together |
Use MP4 with H.264 for broad compatibility. H.265 can reduce file size, but choose it only when the playback device and platform are known to support it. Before distribution, archive the full project, a 1080p master, and a smaller 720p share copy on a separate drive or cloud folder. Open each copy after export and check the first minute, a caption-heavy moment, and the final audio fade. This simple check catches failed exports before guests do.
Sharing, Privacy, and Long-Term Ownership
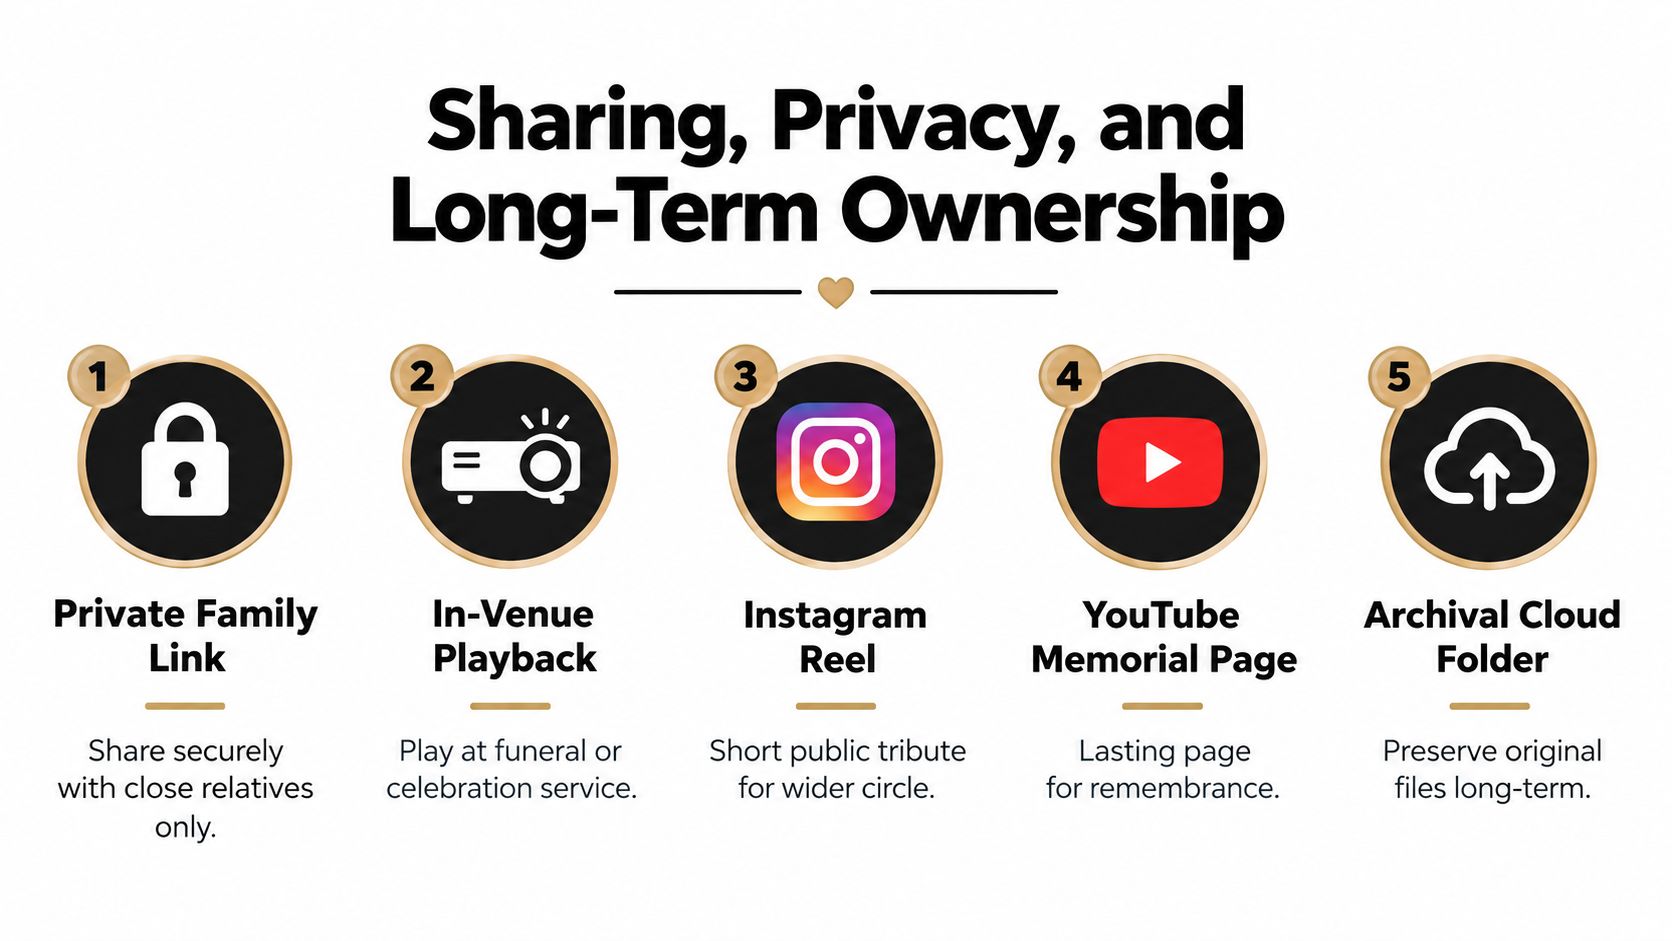
The right delivery method depends on who should see the video and how long it should remain available. A private family link suits close relatives and reduces discoverability. In-venue playback works for a service or celebration, but it depends on a tested local file rather than a fragile internet connection. An Instagram Reel reaches a wider circle, while a YouTube memorial page can provide a more durable public home. An archival cloud folder should hold originals, project files, and permission records, not just the compressed viewing copy.
Check permissions before publishing
Create a short consent record for every contributor and every identifiable third party. Confirm:
- Photographs: The contributor has permission to share the image and agrees to the intended audience.
- Video clips: The people visible or heard in the clip have been considered, especially children.
- Voice messages: The speaker approves editing, captions, and the selected distribution channel.
- Named people: Captions don't identify someone who expected the material to remain private.
- Music: You have the necessary license or understand the platform's handling of the track.
Music licensing deserves practical attention. A song that plays at a private gathering may still trigger a content claim when uploaded to YouTube or Facebook. Use a royalty-free library whose terms cover your intended use, or keep the event version separate from the public social version. If a platform issues a claim, check whether it affects monetization, visibility, or playback, then replace the track or dispute the claim only when your documentation supports that action.
Store the master on at least two drives, and use a labeled folder containing the date, honoree's name, contributor list, permissions, music license, project file, and final exports. Assign one point of contact for future edits so relatives know who controls updates and access. A clear archive prevents the original material from disappearing when a shared link expires or an account changes hands.
If you're working with family photographs or exploring generated motion, review this guidance on AI family photos and responsible use before publishing. The final test is ethical as much as technical. Ask whether the tribute reflects the person's dignity, whether the audience is appropriate, and whether a private memory is being made public because the platform makes publication easy.
For tribute projects that need gentle motion from still images, rapid visual drafts, or social-ready variations, Veo3 AI offers an all-in-one workspace for turning prompts and images into customizable videos. Use it for controlled experimentation, then keep the human decisions about consent, context, message order, and emotional tone in your hands.
Related Articles
Continue with more blog posts in the same locale.

What Is AI Marketing and How It Transforms Growth
Learn what is AI marketing, how it works, key use cases, benefits and how to implement it effectively with real examples and tools.
Read article
Karaoke Video Creator Guide to Pro Sing-Along Videos
Learn how a karaoke video creator turns audio and lyrics into pro karaoke videos with Veo3 AI backgrounds, sync tips and export settings.
Read article
AI Advertising Video Generator Guide to High Converting Ads
Learn how to use an AI advertising video generator to plan, prompt, render and publish high-converting ads for TikTok, YouTube and Instagram.
Read article