
24 Frames Per Second vs 30: Which Frame Rate to Use
24 Frames Per Second vs 30 explained: motion blur, file size, platform delivery and which rate fits cinema, social video and AI-generated clips.
Veo3 AI · 14 min read · Nov 4, 2026
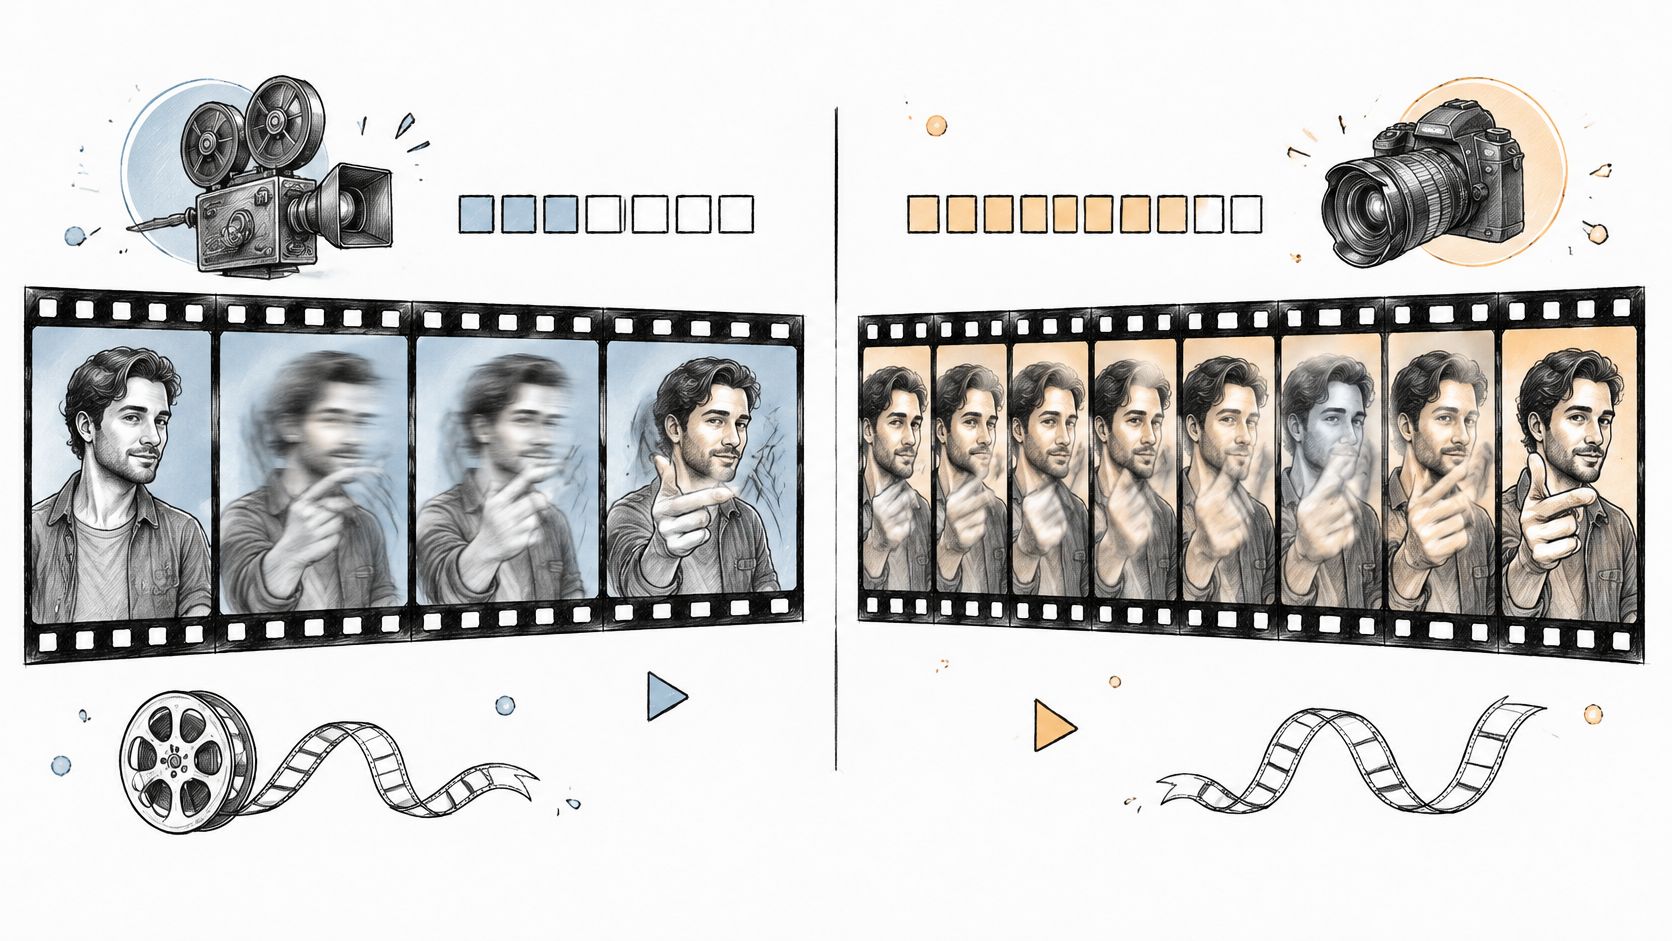
The usual advice, choose cinematic footage at 24 fps and smoother video at 30 fps, leaves out the decisions that often matter most. Shutter settings change the blur inside each frame, export conversion can disrupt otherwise consistent motion, and additional frames increase the amount of material you must generate and process. A frame-rate label isn't a guarantee of a particular look.
For creators comparing 24 frames per second vs 30, the useful question isn't which number is better. It's which combination of motion treatment, production workload, and delivery format suits the actual shot. Choose with a controlled playback test, not a cinematic preset.
Table of Contents
- 24 fps and 30 fps Side by Side
- Exposure, Shutter and Motion Blur Explained
- Frame Count and Render Cost
- Platform Delivery and Frame Rate Conversion
- Testing 24 and 30 fps on AI-Generated Clips
- Which Frame Rate to Choose Before You Generate
<a id="24-fps-and-30-fps-side-by-side"></a>
24 fps and 30 fps Side by Side
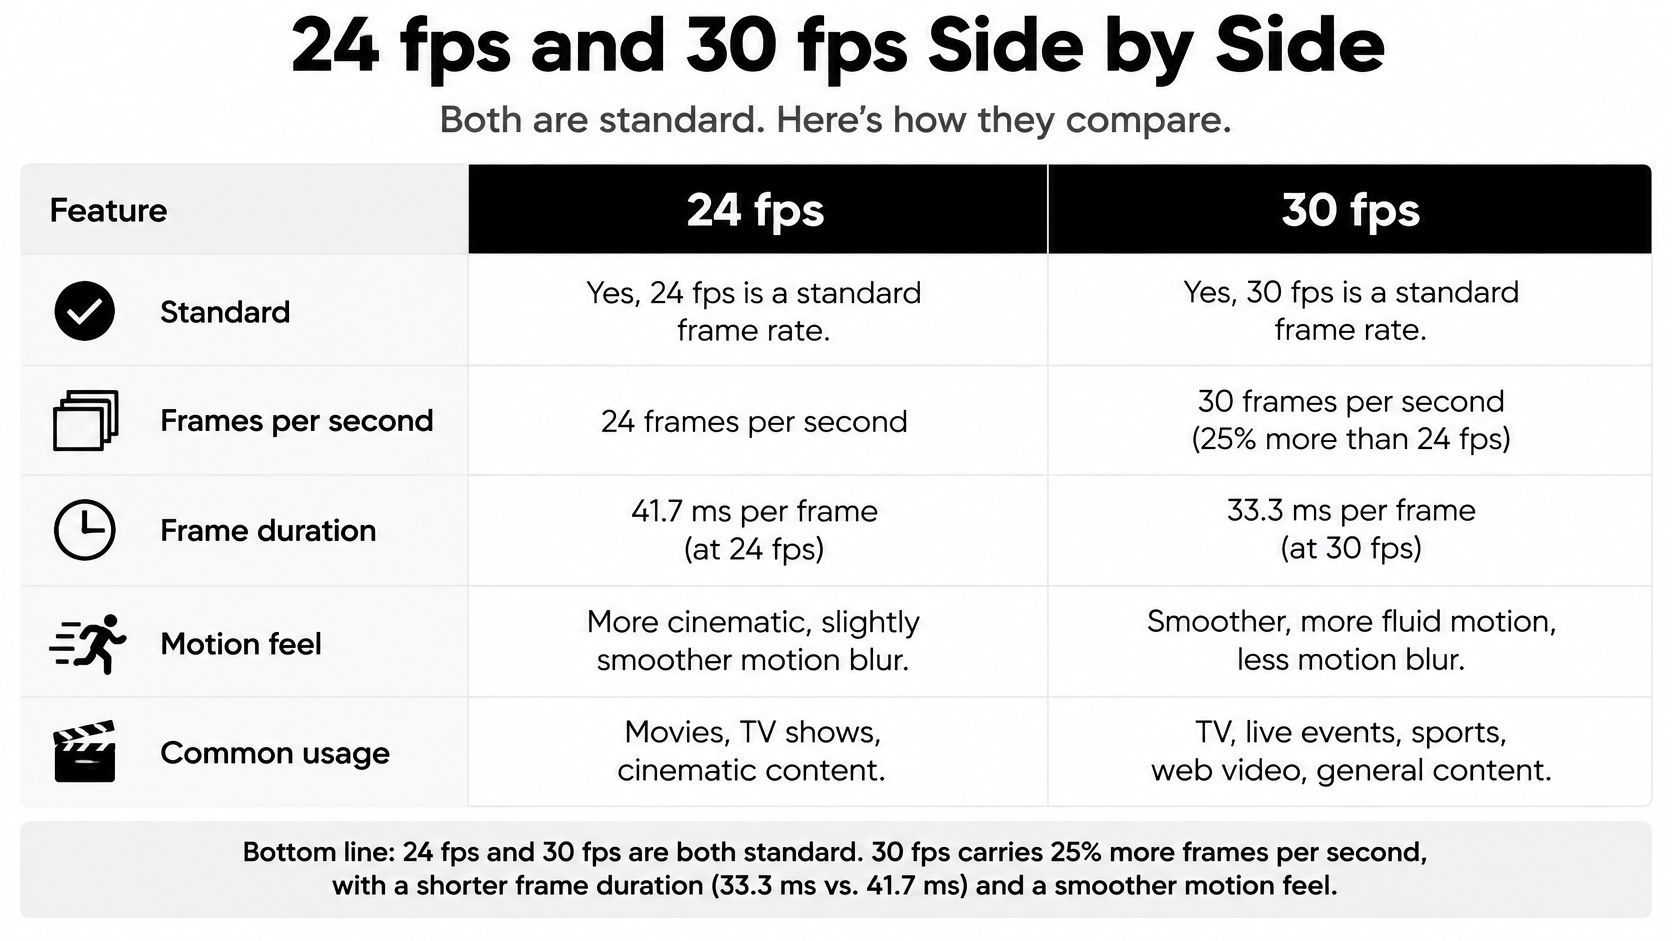
Both rates are standard options, but 30 fps presents 25% more frames per second; the corresponding frame durations are approximately 41.7 milliseconds at 24 fps and 33.3 milliseconds at 30 fps, using the timing relationship described by Sports Video Group.
24 fps and 30 fps core specifications
| Factor | 24 fps | 30 fps |
|---|---|---|
| Frame duration | 41.7 ms | 33.3 ms |
| Frames in one second | 24 | 30 |
| Shutter at 180-degree rule | About 1/48 s, with 1/50 s practical | About 1/60 s |
| Exposure per frame, same aperture and ISO | About 25% longer, roughly a quarter stop more light | Shorter exposure, less light per frame |
| Delivery to a 30 Hz system | May need 3:2 cadence with uneven frame durations | Direct fit, no cadence conversion required |
| Typical fit | Narrative and cinematic pacing | Talking heads, demos, quick gestures and short-form |
The shutter and delivery entries describe conventional production conditions, not properties that every exported file automatically inherits. A generated clip can carry the expected frame-rate metadata while showing blur or movement that doesn't resemble a camera exposure.
Use this visual comparison to distinguish frame timing from the broader production choices.
<a id="what-the-specifications-actually-mean"></a>
What the specifications actually mean
Frame duration describes how far apart successive motion samples arrive. It doesn't tell you how sharp the moving subject will look inside each sample, whether its shape stays consistent, or whether the player will display those samples evenly.
Consider a product rotating against a plain background. More temporal samples can make the rotation easier to follow, but they won't repair a changing logo or an unstable product outline. Conversely, a deliberate camera move can work well with fewer samples when its blur and movement are coherent.
The typical fit row is therefore a starting point rather than a ranking. Narrative work often prioritizes deliberate pacing; demonstrations prioritize readable actions. Neither choice excuses distracting motion.
Reading rule: Separate what changes on paper from what changes on screen. Frame timing, exposure, and delivery compatibility answer different questions.
The practical distinction is between more frequent motion information and better-looking motion. The former follows from the frame rate. The latter depends on how the clip was captured or generated, processed, and played.
<a id="exposure-shutter-and-motion-blur-explained"></a>
Exposure, Shutter and Motion Blur Explained
Frame rate controls sampling frequency; shutter speed controls exposure duration. Confusing them leads to comparisons in which the viewer is really judging different blur treatments rather than different sampling rates.
The conventional 180-degree shutter rule makes exposure time approximately the reciprocal of twice the frame rate, exposing each image for about half its frame interval. Forasoft's explanation of judder and motion blur gives approximately 1/48 second at 24 fps, commonly approximated by 1/50 second, and 1/60 second at 30 fps.
At that conventional shutter relationship, the slower rate allows about 25% more exposure time per frame, with a modest low-light advantage when aperture and ISO remain unchanged; VideoSDK's frame-rate guide also describes the shorter sampling interval at the higher rate as 20% smaller. These are separate effects: exposure influences blur and light capture, while sampling frequency influences the spacing of visible motion.
<a id="why-sharp-frames-can-produce-rough-motion"></a>
Why sharp frames can produce rough motion
A fast shutter can freeze a moving hand into a crisp individual image. During playback, however, the hand jumps between distinct positions without much blur connecting them. A slower shutter integrates more of that movement into each image, potentially replacing crispness with a visible smear.
Neither extreme is automatically desirable. For a product demonstration, the viewer must understand the movement without losing the product's identifying details. For a dramatic shot, a slightly blurred hand might be acceptable while a visibly stepping background pan isn't.
Watch these motion patterns:
- Camera pans: Strong background edges make discontinuous movement easy to notice, especially at the lower rate.
- Lateral subjects: A person or product crossing the frame exposes the distance between successive positions.
- Fast-shutter footage: Reduced blur can make temporal stepping conspicuous at either rate.
<a id="compare-the-relationship-not-just-the-setting"></a>
Compare the relationship, not just the setting
Using an identical shutter duration for both frame rates doesn't preserve the same blur-to-frame-interval relationship. For a conventional comparison, match the shutter angle or exposure ratio, then evaluate whether the resulting blur suits the scene.
A crisp paused frame isn't proof of good motion. Judge the sequence while it's moving.
AI footage needs an additional distinction: a model can depict blur without simulating camera exposure faithfully. Treat a prompt's motion-blur language as a creative direction, not a measured shutter setting. Inspect the rendered movement, particularly where fingers, product edges, and background lines change position.
<a id="frame-count-and-render-cost"></a>
Frame Count and Render Cost
30 fps contains 25% more frames than 24 fps over the same duration, which means more temporal image data to handle; CalculatorLib's video bitrate calculator describes both that relationship and the uncompressed data-rate formula: width × height × bits per pixel × frame rate. The counts below follow directly from that relationship.
Frame count at 24 and 30 fps
| Duration | 24 fps | 30 fps | Difference |
|---|---|---|---|
| 10 seconds | 240 | 300 | +25% |
| 1 minute | 1,440 | 1,800 | +25% |
| 10 minutes | 14,400 | 18,000 | +25% |
For raw, uncompressed images at a fixed resolution and bit depth, the increase is proportional. For a production workflow, that means more frames available for rendering, encoding, decoding, storage, and inspection.
It doesn't mean every bill or processing time increases proportionally. A generator may charge per clip rather than per frame, and encoding performance depends on settings, hardware, and scene complexity. Frame count is a workload measure, not a pricing guarantee.
<a id="why-compressed-files-dont-follow-a-simple-multiplier"></a>
Why compressed files don't follow a simple multiplier
H.264 and H.265 exploit similarities between frames. When a background barely changes, the encoder doesn't need to describe it from scratch in every image. Additional frames can therefore add less compressed data than a raw-frame calculation suggests.
Motion estimation still has to account for those images. Fine texture, changing lighting, camera movement, and unstable generated details can also affect how efficiently the encoder represents the sequence.
Use a matched export test rather than a universal file-size estimate:
- Fix the encoding conditions: Use the same codec, resolution, preset, and quality target.
- Keep the content comparable: Test representative movement, not a static title card.
- Record actual outputs: Compare file size, export duration, and visible artifacts.
- Inspect playback: A smaller file isn't a better result if moving details become difficult to read.
<a id="budget-for-the-workflow-you-actually-use"></a>
Budget for the workflow you actually use
Before assembling a campaign, include alternate crops, review exports, and final delivery versions in your production plan. Blu Dragonfly LLC's resource on planning your media production workflow is a useful planning reference alongside the technical export test.
Choose the lower frame rate when deliberate pacing and lower output volume are the priorities. Choose the higher rate when visibly clearer motion earns its additional processing and delivery workload. Don't spend that workload merely to change the number in the file properties.
<a id="platform-delivery-and-frame-rate-conversion"></a>
Platform Delivery and Frame Rate Conversion
A platform can accept a file without preserving its motion exactly. Upload compatibility and cadence compatibility aren't the same thing, so an accepted export still needs a playback check.
Apple's HLS authoring specification supports 23.976, 24, 25, 29.97, and 30 fps, making both principal options technically viable. The fractional variants matter when the destination specifies NTSC-derived timing, so don't substitute an integer rate for a fractional delivery requirement.
<a id="why-conversion-can-change-the-movement"></a>
Why conversion can change the movement
When film-rate material enters a different timing environment, the player or conversion process must reconcile incompatible intervals. A 3:2 cadence can distribute source images unevenly over display intervals rather than creating new captured movement.
That distinction explains why exporting at a higher frame rate doesn't necessarily make an existing clip smoother. Repeated images preserve the original motion positions; interpolation attempts to create intermediate positions and requires its own artifact review.
Scrolling text, hand gestures, lip movement, and fast product rotations are useful test subjects because small timing inconsistencies are easy to notice. Watch the published asset, not just the local editing preview.
Delivery principle: Acceptance confirms that a file can enter the pipeline. Playback confirms whether its motion survives the pipeline.
<a id="build-destination-specific-masters"></a>
Build destination-specific masters
Maintain a film-oriented master for cinematic delivery and a higher-cadence master where streaming, conferencing, or social specifications call for it. Export from the source project rather than repeatedly converting an already converted delivery file.
For launch assets, use ShipTeaser's video requirements for SaaS launches as a specification-planning resource. Check composition requirements separately with our social media video sizes guide, since aspect ratio and frame rate solve different problems.
Our product ads can be exported in 16:9 or 9:16 at up to 1080p, ready for TikTok, Reels, Shorts, Facebook, and product pages. Those format options don't remove the need to verify the destination's timing requirements.
- Confirm the destination rate. Read the client's or distribution system's actual specification.
- Export the closest matching master. Avoid unnecessary timing conversion.
- Play vertical ads at full speed. Inspect text, gestures, and moving product edges after upload.
- Archive the source-rate master. Preserve a clean starting point for future versions.
The best source rate is usually the one that fits the primary delivery environment, not the one with the more cinematic reputation.
<a id="testing-24-and-30-fps-on-ai-generated-clips"></a>
Testing 24 and 30 fps on AI-Generated Clips
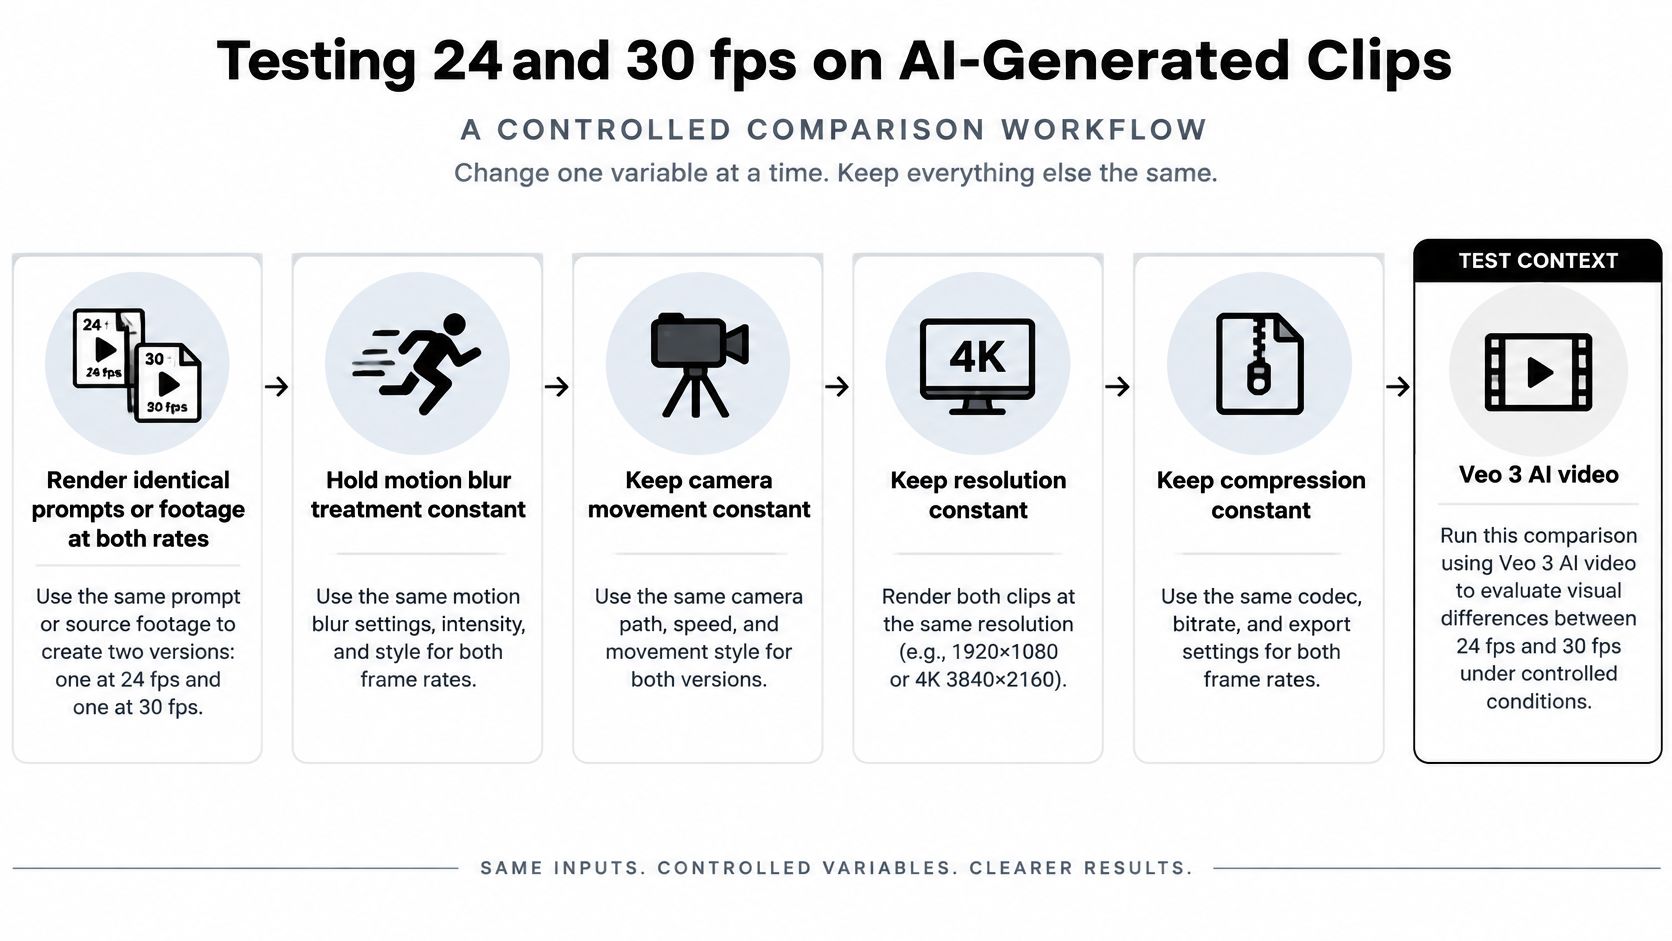
Frame rate alone rarely determines how an AI-generated clip looks. Shutter treatment shapes motion blur, interpolation can add or distort frames, and platform compression can soften movement. To isolate cadence, compare versions while holding motion blur, camera movement, resolution, and compression constant.
With the Veo 3 AI video generator, use the same prompt or source footage for each version. Veo 3.1 generates videos up to 4K with first and last frame control. Videos can run up to 8 seconds on all plans, making a short, representative shot a practical unit for examining motion before assembling a longer sequence.
<a id="run-a-controlled-motion-test"></a>
Run a controlled motion test
- Write a prompt with a single camera move. A restrained lateral move makes judder easier to isolate than a combination of orbiting, zooming, and subject acceleration.
- Produce rate variants at matching resolution. Keep the model and source assets unchanged wherever possible. If the workflow requires conversion rather than native generation, record that distinction.
- Watch at full speed on the audience's device. A phone preview and a large desktop display are different evaluation environments. A paused frame cannot show cadence.
- Inspect pans and hand movements. Look for stepping, repeated positions, changing finger shapes, and unstable product boundaries. Separate timing defects from generation defects.
- Score blur and smoothness separately. A version may look smoother while smearing a label, or preserve detail while making a pan uncomfortable.
- Keep the version that fits the destination. Upload a test export before committing the rest of the campaign to the same settings.
<a id="distinguish-a-frame-rate-test-from-a-generation-test"></a>
Distinguish a frame-rate test from a generation test
Identical prompts do not guarantee identical generated motion. If the subject follows a different path or the camera accelerates differently between outputs, the comparison includes more than frame rate. Use the same source footage for a conversion test. For independently generated variants, assess the complete workflow, including how its motion and blur appear after delivery.
For another moving-image reference, watch the video at normal playback speed before examining individual frames.
<iframe width="100%" style="aspect-ratio: 16 / 9;" src="https://www.youtube.com/embed/_SzGQkI-IwM" frameborder="0" allow="autoplay; encrypted-media" allowfullscreen></iframe>
Judge whether the action remains readable and visually coherent. A carefully motion-designed higher-rate clip can look more filmic than a poorly interpolated lower-rate clip. Keep the better result, not the preferred label.
<a id="which-frame-rate-to-choose-before-you-generate"></a>
Which Frame Rate to Choose Before You Generate
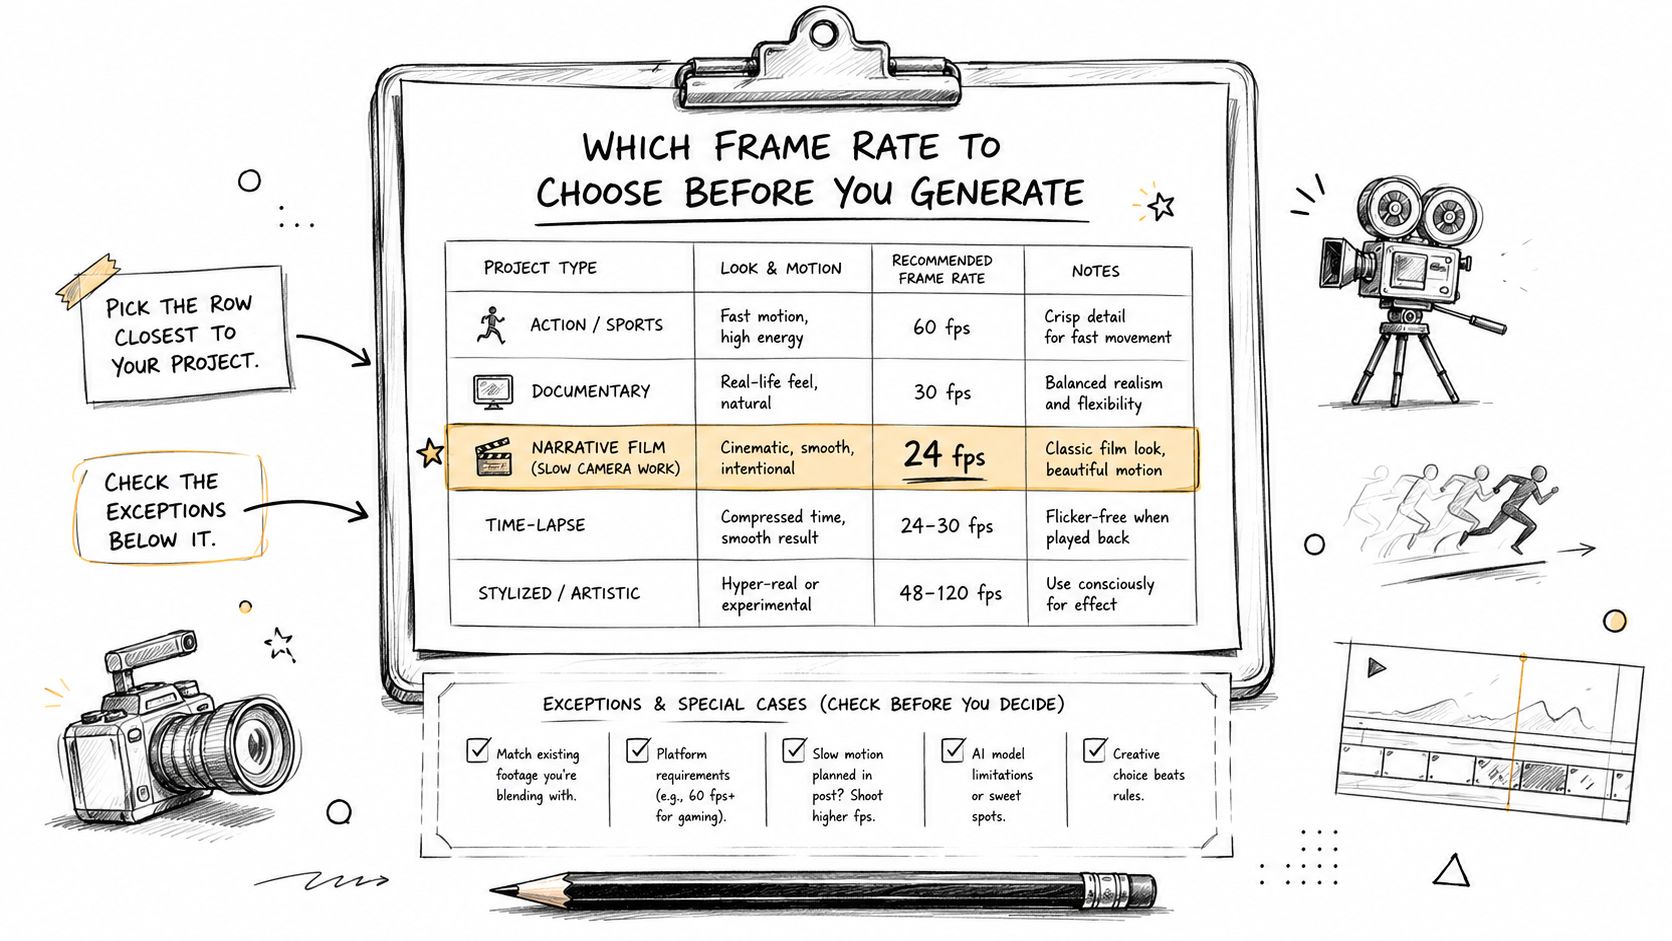
Choose the project row closest to your intended deliverable, then check whether the motion or destination overrides that default. These are production recommendations, not promises that a frame-rate setting will create the desired appearance by itself.
Recommended frame rate by project type
| Project | Better rate | Reason |
|---|---|---|
| Narrative film or slow camera work | 24 fps | Conventional exposure supports familiar cinematic blur |
| Talking-head video or webinar | 30 fps | Closer motion samples help faces and lip movement appear steadier |
| Product demo or UI recording | 30 fps | Smoother cursor, hand and screen movement |
| Short-form social clip with fast gestures | 30 fps, then test both | Smoother motion, though platform compression can mask the difference |
| AI-generated cinematic shot | 24 fps when motion artifacts are controlled | Cinematic cadence with fewer frames to generate and store |
| Client deliverable that must sit at 30 Hz | 30 fps master | Avoids cadence conversion for that delivery requirement |
The visual guide summarizes those starting points without replacing an actual playback test.
<a id="when-to-override-the-default"></a>
When to override the default
Destination requirements take priority over aesthetic shorthand. If a client specifies a particular delivery rate, build for that requirement before generating the campaign. Don't assume a cinematic source is worth the conversion work merely because the subject is premium or dramatic.
Fast gestures and lateral camera movement are reasons to test the smoother option, even for an otherwise cinematic concept. Conversely, a quiet product portrait with restrained movement may not gain enough from additional temporal samples to justify the extra output volume.
Lower generation or storage volume can justify the more economical frame count, but not if the action becomes difficult to follow. Reduce unnecessary camera movement before accepting distracting judder as an unavoidable stylistic feature.
For ads, inspect the horizontal and vertical versions separately. Reframing changes what occupies the screen and which movements attract attention, so approval of a horizontal export shouldn't automatically approve the vertical version.
<a id="lock-the-production-decision"></a>
Lock the production decision
Our Mini plan generates 1080p video, while Standard and Plus generate 4K video. Keep that resolution choice stable during your motion comparison, and compare our plan options before committing to the production workflow.
Use this short approval sequence:
- Name the destination and its required frame rate. Include the final player or advertising placement, not just the editing application.
- Select the project default. Use the table as a starting hypothesis.
- Test a representative shot in both treatments. Choose the shot most likely to reveal a problem, such as a moving hand beside a product label.
- Lock the master rate. Record the export settings so later revisions don't introduce an accidental conversion.
The useful conclusion isn't that cinematic work belongs permanently to one rate and online work to another. It's that motion quality is a production-chain decision: generation, blur, encoding, and playback must work together.
Choose before generating or shooting whenever possible. Conversion later can change motion consistency, and it can't recover movement that was never captured or generated coherently.
Veo3 AI turns text prompts and static images into video, with resolution and format options for different production needs. Visit Veo3 AI to create a representative motion test, compare your delivery versions, and settle the frame-rate decision before building the full campaign.
Related Articles
Continue with more blog posts in the same locale.
AI Video Ads Maker: From Brief to Publish
Plan AI video ads maker clips for TikTok, Reels, and Shorts: brief, prompt, 9:16 export, disclosure, and a one-variable test.
Read article
Filmic Color Grading for Camera and AI Video
Learn filmic color grading with log, Rec.709, LUTs, and secondaries, then apply the same look to AI-generated footage.
Read article
Creating Video Loops That Restart Without a Jump
Creating video loops that restart cleanly, with frame matching, export settings for Shorts and backgrounds, and a replay test.
Read article